29
Mechanical installation
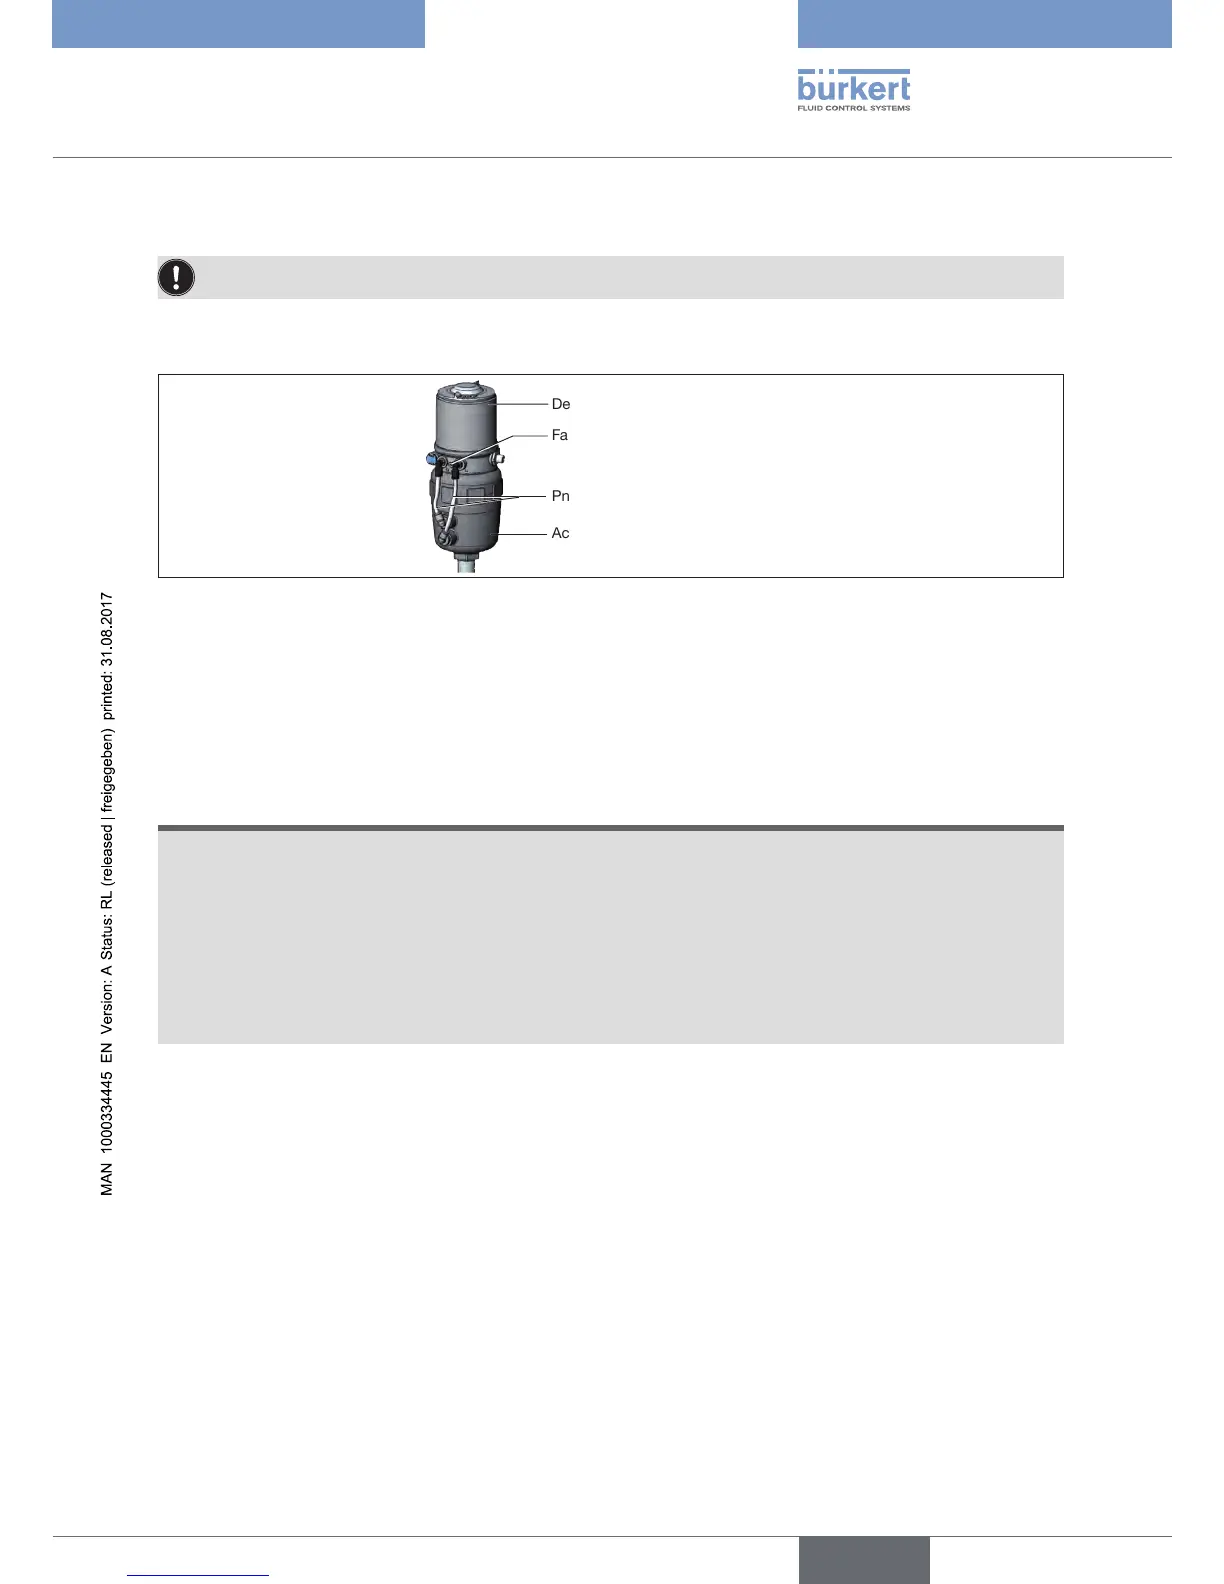
7.4.3 Turning the device
Onlyfordeviceswithexternalpilotairduct(20xx,Classic).
The position of the connections can be aligned by rotating the device continuously through 360°.
Fastening screw (2x)
Pneumatic connection
Device
Actuator
Figure 21: Turning the device
→ Loosen pneumatic connection between device and actuator.
→ Release fastening screws (hex socket bolt SW2.5).
→ Rotate the device into the required position.
NOTE
Damageormalfunctionduetoingressofdirtormoisture.
To observe the degree of protection IP65 or IP67:
▶ Tighten fastening screws only with a tightening torque of max. 1.5 Nm.
▶ Screw in body casing to the stop.
▶ Screw in transparent cap to the stop.
▶ Only for CFA and CFB: Connect the pilot air outlet which is not required to the free pilot air port of the
actuator or seal with a plug.
→ Only tighten the fastening screws until they are hand-tight (max. torque: 1.5 Nm).
→ Re-establish pneumatic connections between device and actuator. If necessary, use longer hoses.