CALREC Putting Sound in the Picture 37
STRIPS MODE
Strips mode arranges the fader panel
controls and touchscreen into vertical
strips with the same controls above
each fader on a panel by panel basis.
This provides quick access to up to
four strip controls and a section of the
TFT touchscreen for each fader.
A fader panel set into Strips mode is
shown right. Currently there are a range
of pre-configured strips available for use.
Accessing Strips mode
To set a fader control panel into strips
mode, touch the STRIPS button on the
Modes and Layers row at the top of the
fader panel.
If the strips bu tton is not visible on the
Modes and Layers row, make sure that the
panel is not locked by checking the status
of the MODE LOCK button also located
on the Modes and Layers row. The MODE
LOCK button is always available even in
strip type select mode, allowing the user
to switch between STRIPS mode and strip
type select mode while locked to STRIPS.
Selecting STRIPS mode will display the
last used strip type on the panel and show
the available strip type buttons.
Apply to All Strips
By default, the user-wide Apply To All
Strips button is ON, and pressing the strip
type applies it to all panels in that console
area. Turn Apply To All Strips off to allow
individual panels to change to different
strip types.
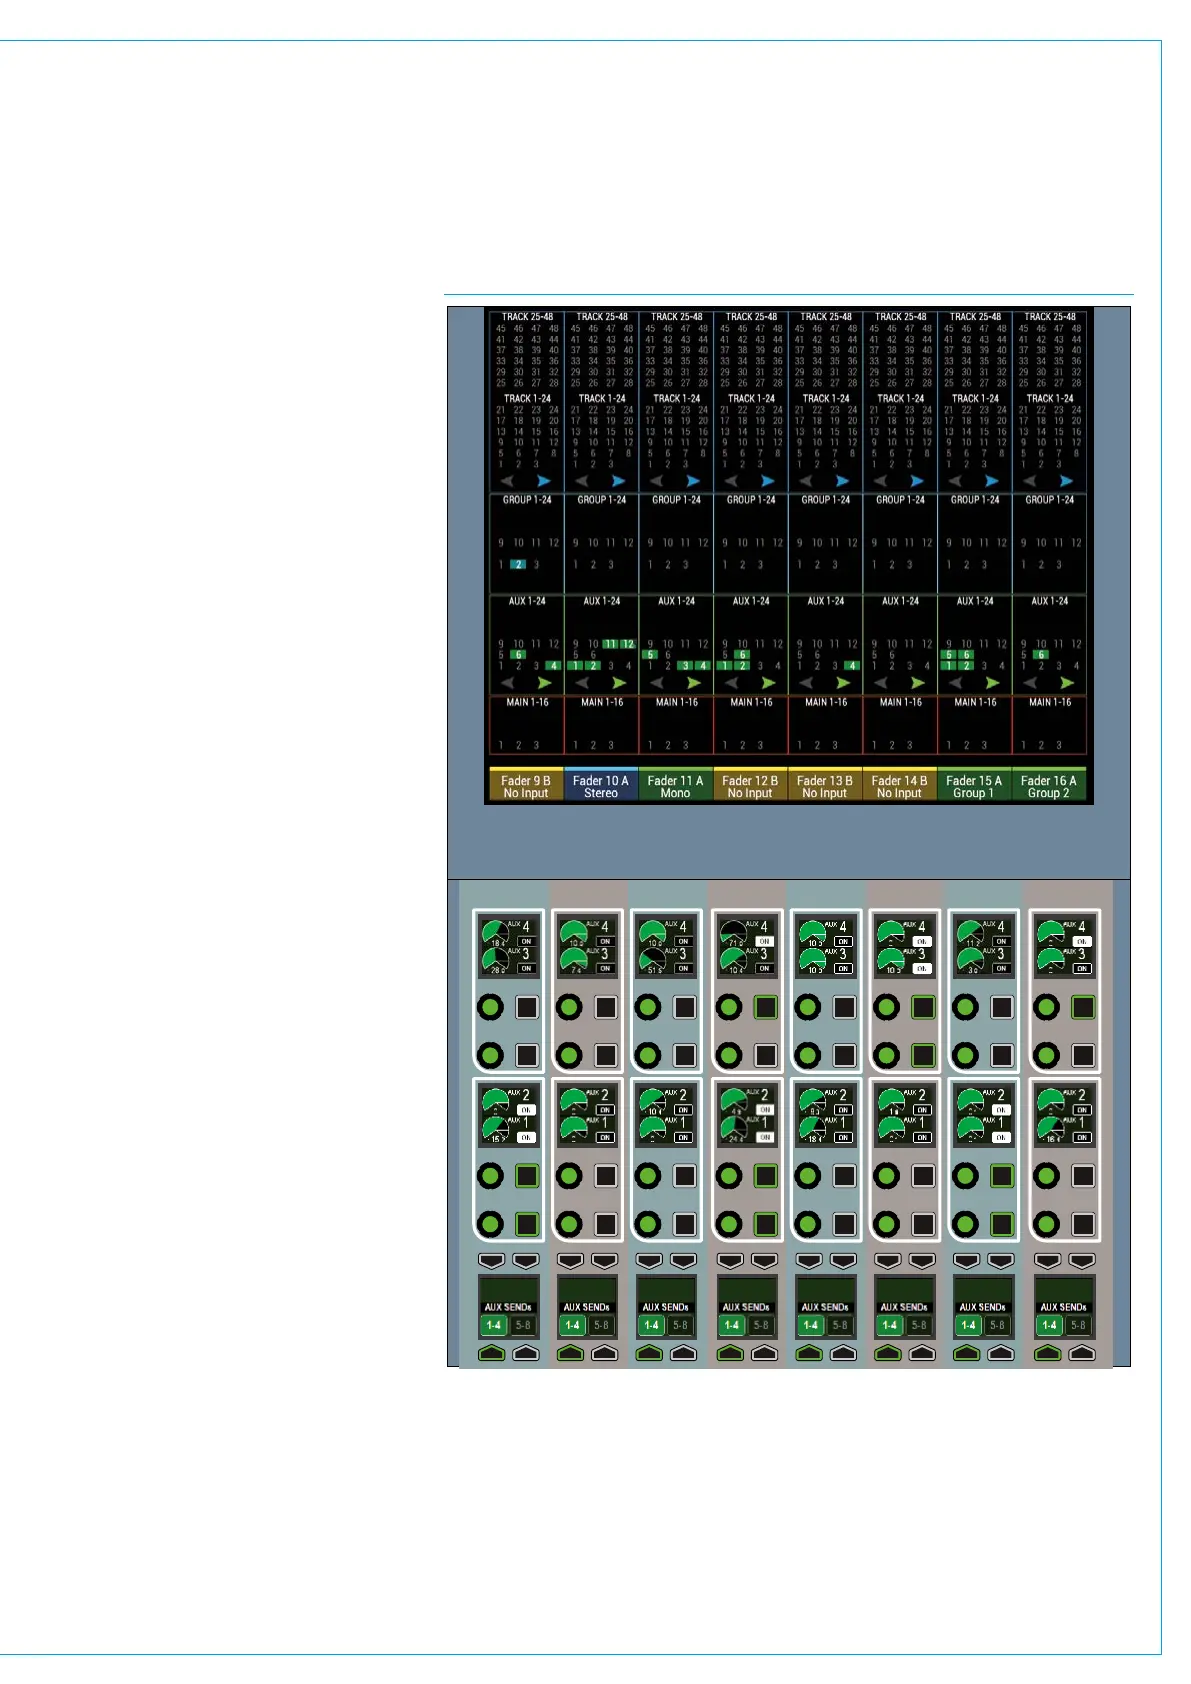
Routing display
Each strip on the TFT contains a routing
overview for the relevant fader. Tapping
on the TFT overview expands that strip
to allow access to all the bus outputs of
that type to add or remove routes to that
output from that channel. See Fig 1.
FIG 1 - STRIPS MODE CONTROL LAYOUT