Chapter 4
4-17
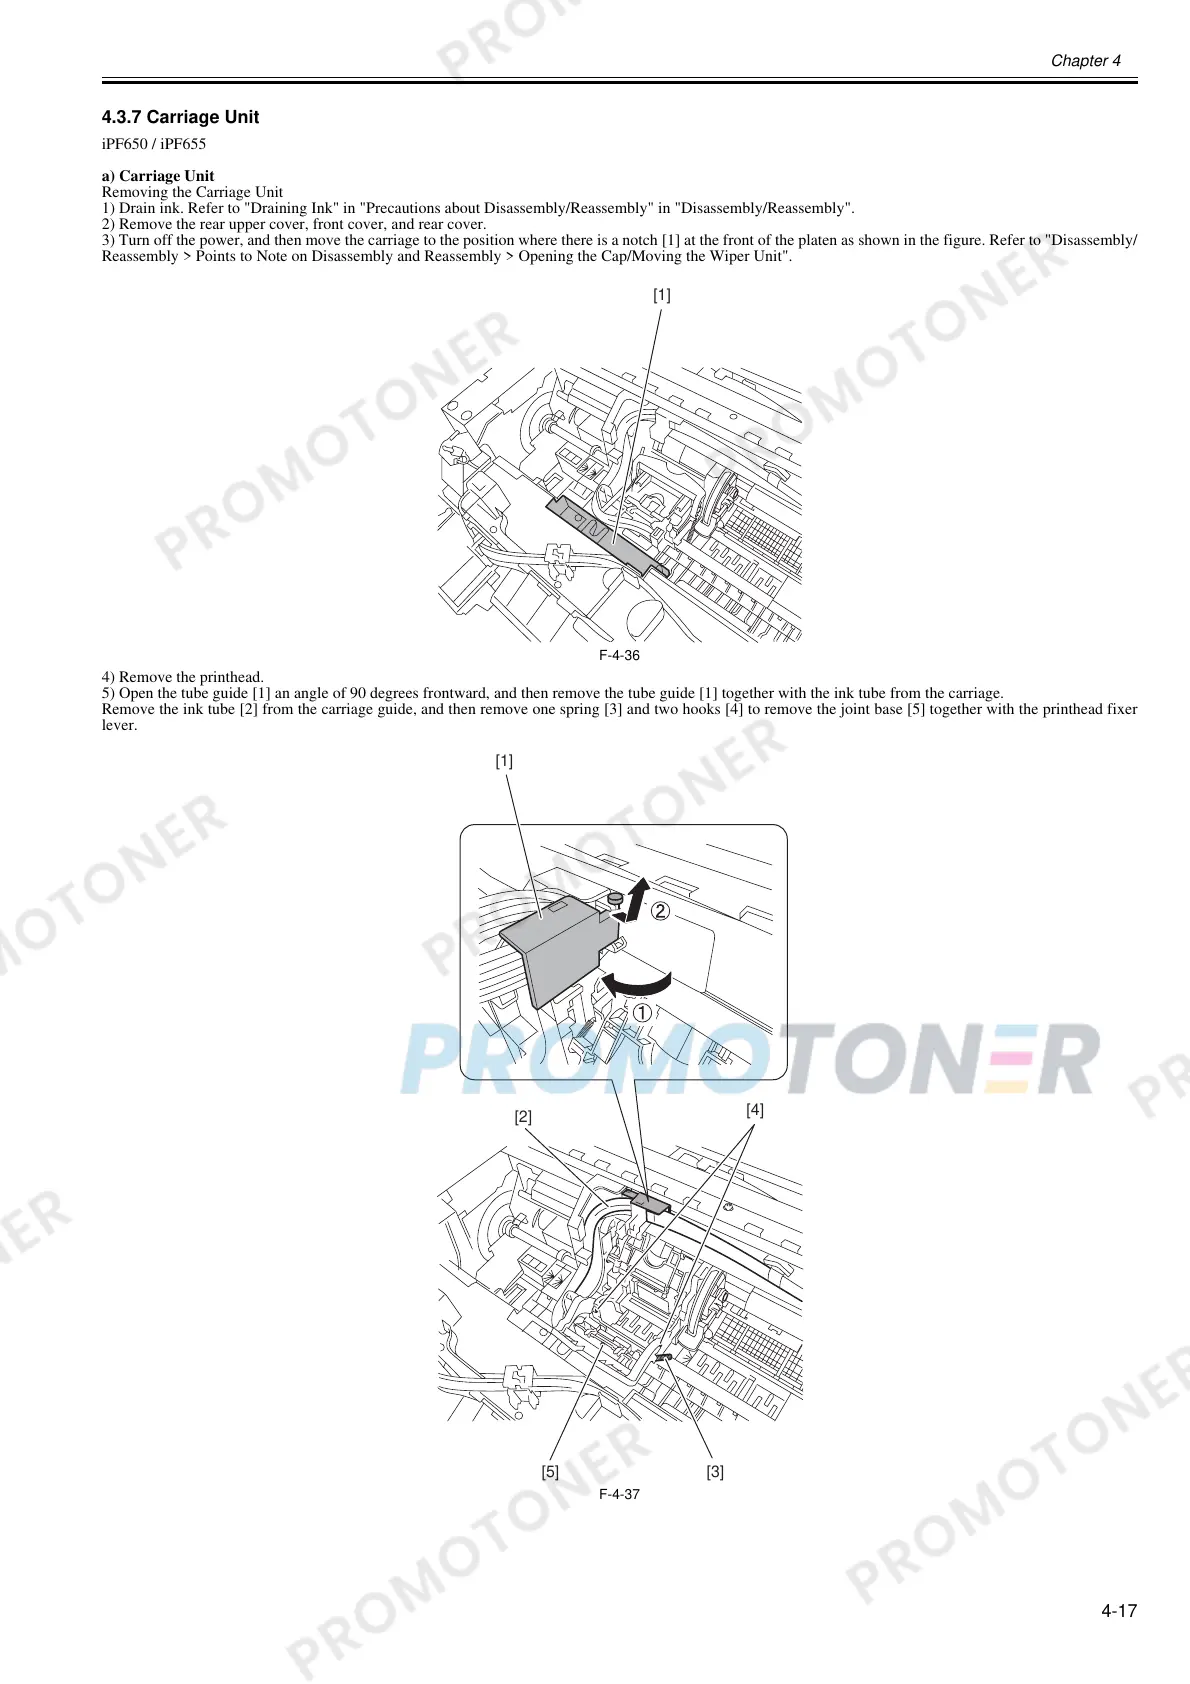
4.3.7 Carriage Unit
0023-3214
iPF650 / iPF655
a) Carriage Unit
Removing the Carriage Unit
1) Drain ink. Refer to "Draining Ink" in "Precautions about Disassembly/Reassembly" in "Disassembly/Reassembly".
2) Remove the rear upper cover, front cover, and rear cover.
3) Turn off the power, and then move the carriage to the position where there is a notch [1] at the front of the platen as shown in the figure. Refer to "Disassembly/
Reassembly > Points to Note on Disassembly and Reassembly > Opening the Cap/Moving the Wiper Unit".
F-4-36
4) Remove the printhead.
5) Open the tube guide [1] an angle of 90 degrees frontward, and then remove the tube guide [1] together with the ink tube from the carriage.
Remove the ink tube [2] from the carriage guide, and then remove one spring [3] and two hooks [4] to remove the joint base [5] together with the printhead fixer
lever.
F-4-37
[1]
[4]
[1]
[3][5]
[2]
 Loading...