Chapter 4
4-24
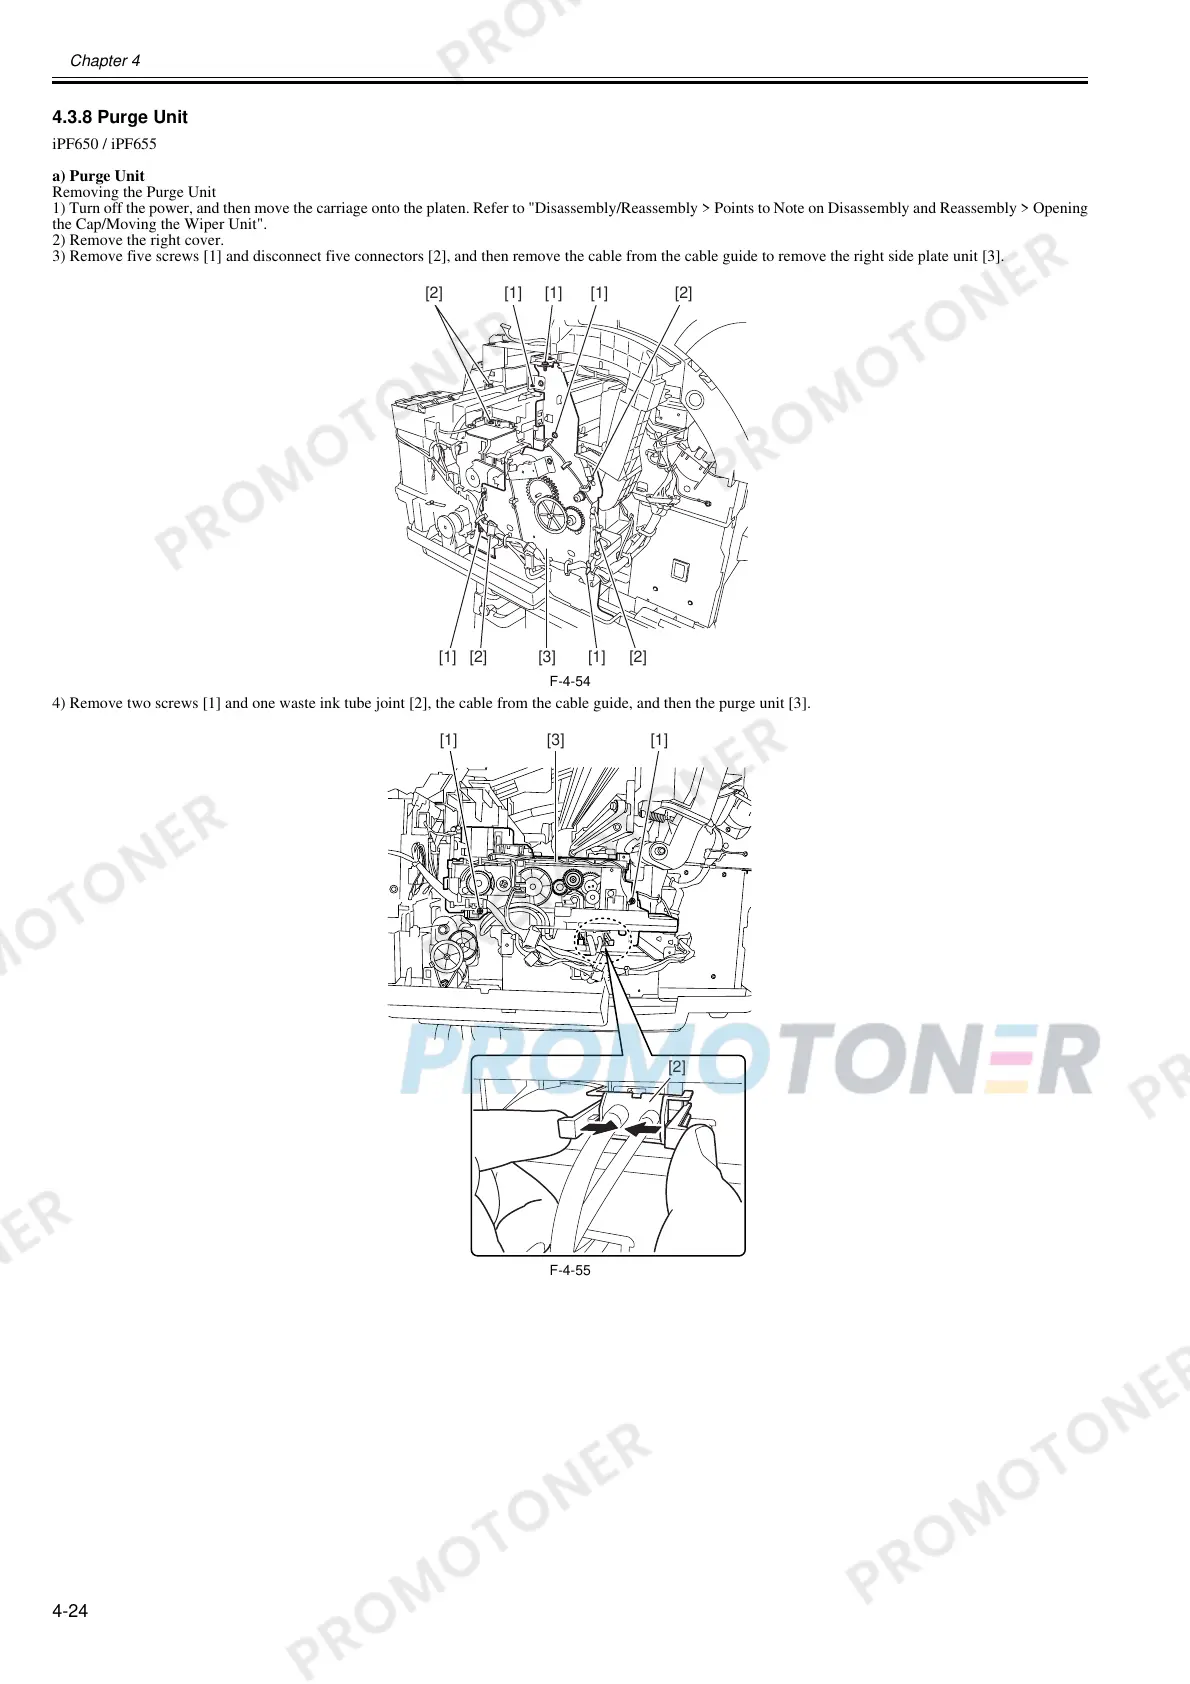
4.3.8 Purge Unit
0023-3215
iPF650 / iPF655
a) Purge Unit
Removing the Purge Unit
1) Turn off the power, and then move the carriage onto the platen. Refer to "Disassembly/Reassembly > Points to Note on Disassembly and Reassembly > Opening
the Cap/Moving the Wiper Unit".
2) Remove the right cover.
3) Remove five screws [1] and disconnect five connectors [2], and then remove the cable from the cable guide to remove the right side plate unit [3].
F-4-54
4) Remove two screws [1] and one waste ink tube joint [2], the cable from the cable guide, and then the purge unit [3].
F-4-55
[2] [1] [1] [1] [2]
[1] [2] [3] [1] [2]
[1] [3] [1]
[2]
 Loading...