10
GB
INSTALLATION
RX DC X-RAY UNIT
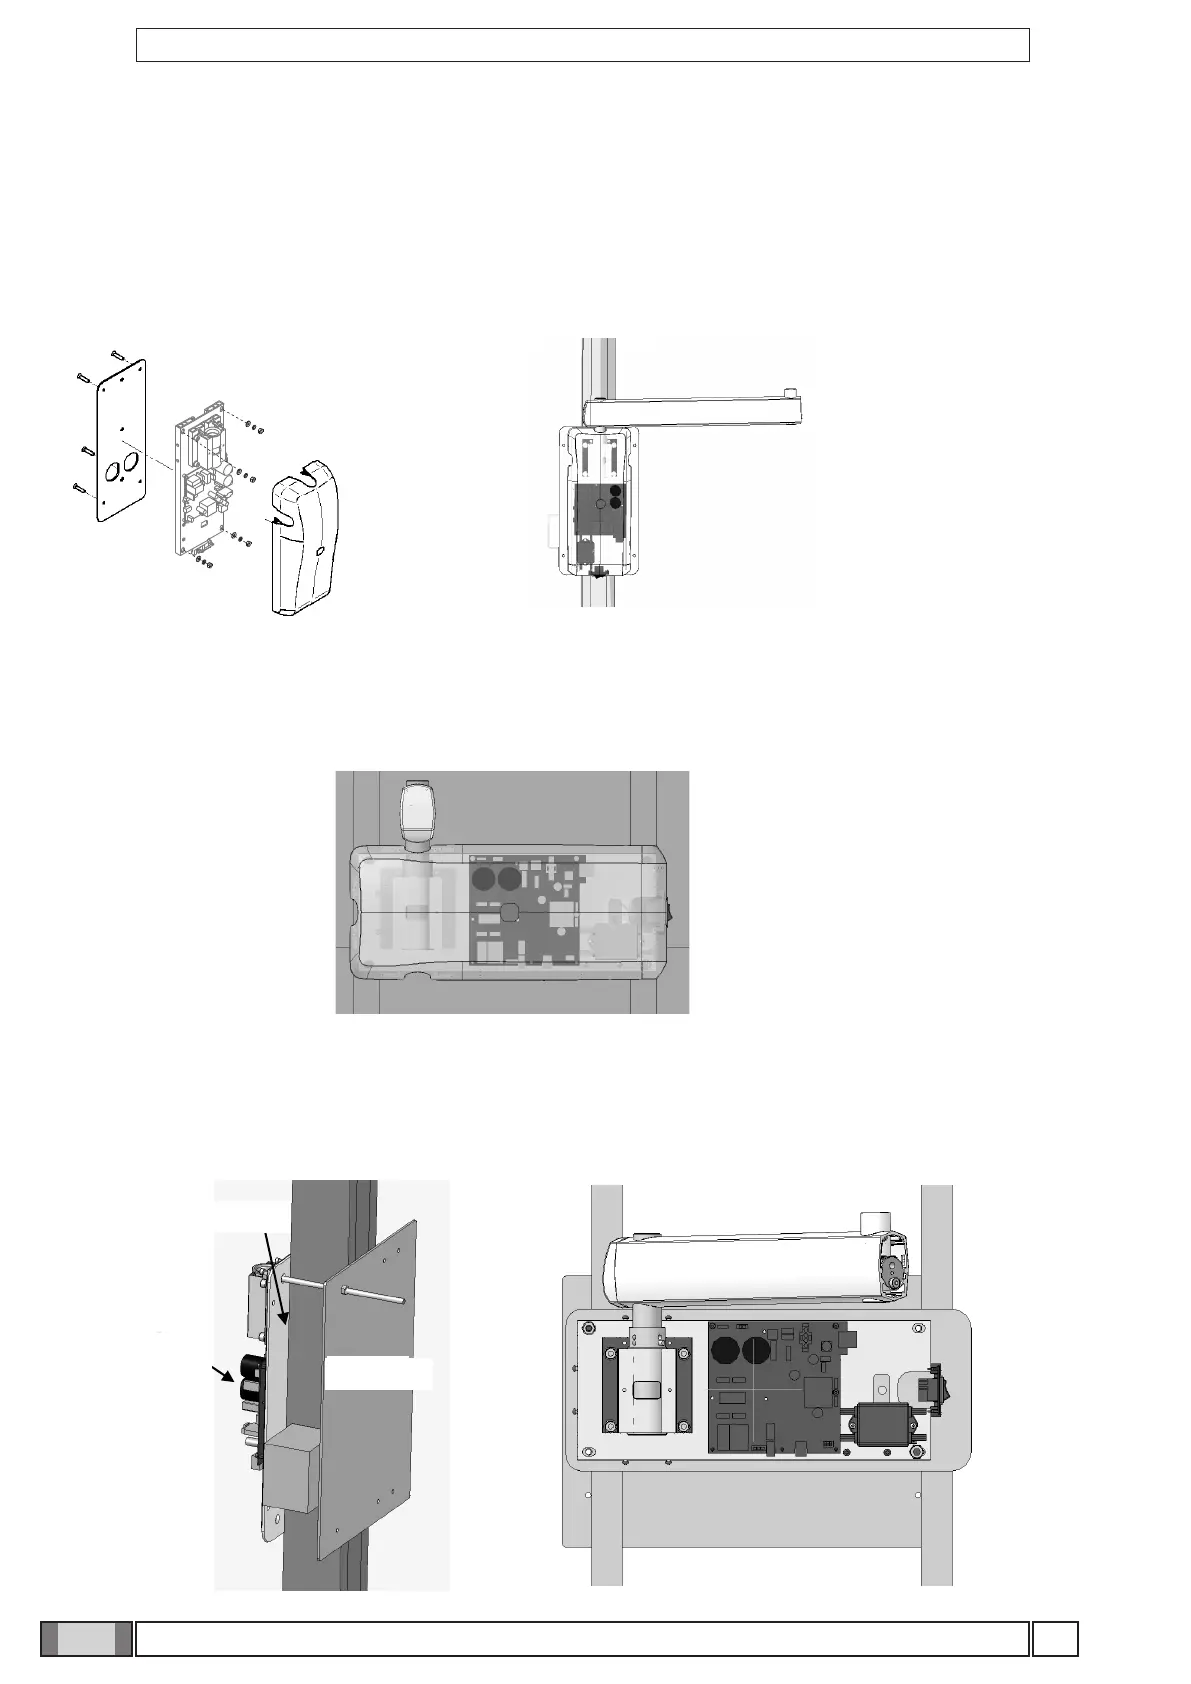
4.2.1 Vertical SINGLE STUD installation with wooden post
• Insert the 4 TPSEI M8x35 screws with heads that allow them to be driven with a screw driver provided in the interface plate
• Run the power cord through one of the holes in the interface plate
• Attach the interface plate to the wooden post with no. 3 dia. 3/8'' x L 3'' wood screws (not supplied)
• Attach the x-ray unit’s wall-mounting plate to the interface plate by tightening the washers and nuts provided on the
TPSEI M8x35 screws with heads that allow them to be driven with a screw driver
Interface
plate
RX
wall-mounting
plate
Counter-plate
4.2.2 Horizontal SINGLE STUD installation with wooden post
The interface plate is not needed for 1.5'' wooden posts with 16'' spacing. Simply attach the RX-DC plate with no. 4 dia.
3/8'' x L 3'' wood screws (not supplied)
4.2.3 Vertical SINGLE STUD installation with iron post
• Attach the wall-mount counter-plate to the iron posts (not completely seen) with the threaded bars and screws provided
• Attach the interface plate to the counter-plate. Secure the x-ray unit’s wall-mounting plate to the latter