49
GB
INSTALLATION
RX DC X-RAY UNIT
10.4.2 Forcing the Wi-Fi channel through DIP switches
Should the wireless channel currently selected on the X-ray device be disturbed, it may be dicult to connect handheld
device and head, therefore it will be impossible to set a free channel.
It is possible to force a Wi-Fi channel by setting the DIP switches [see section "Basic X-ray head control card (Code
97661586)" - DIP switches] as follows (the X-ray device must be o):
6 OFF
7 OFF
no change to the settings
6 ON
7 OFF
channel 2 selection and automatic scanning deactivated
6 OFF
7 ON
channel 5 selection and automatic scanning deactivated
6 ON
7 ON
channel 10 selection and automatic scanning deactivated
Upon turning on the device, check that the correct channel is created and perform the handheld device pairing procedure
(see section "Handheld unit-X-ray head association")
Then, reset both DIP switches to OFF to allow a further change of the channel through the handheld device.
10.5 Replacing the SLIP RING assembly (only RX DC with "ball end socket joint")
1. Pull o the collimator and ring that secures the panels, remove the caps that protect the screws and loosen the
screws that secure the bottom cover.
2. Disconnect all the connectors and work on the two pins to remove card 97661586
3. Detach all the cables connected to the X-ray head that may get in the way. Loosen screw A that secures the X-ray
head, push it back towards the rear and pull it up.
4. Remove the SLIP RING cable loosening the 3 Allen screws that secure it and put away the silicone ring.
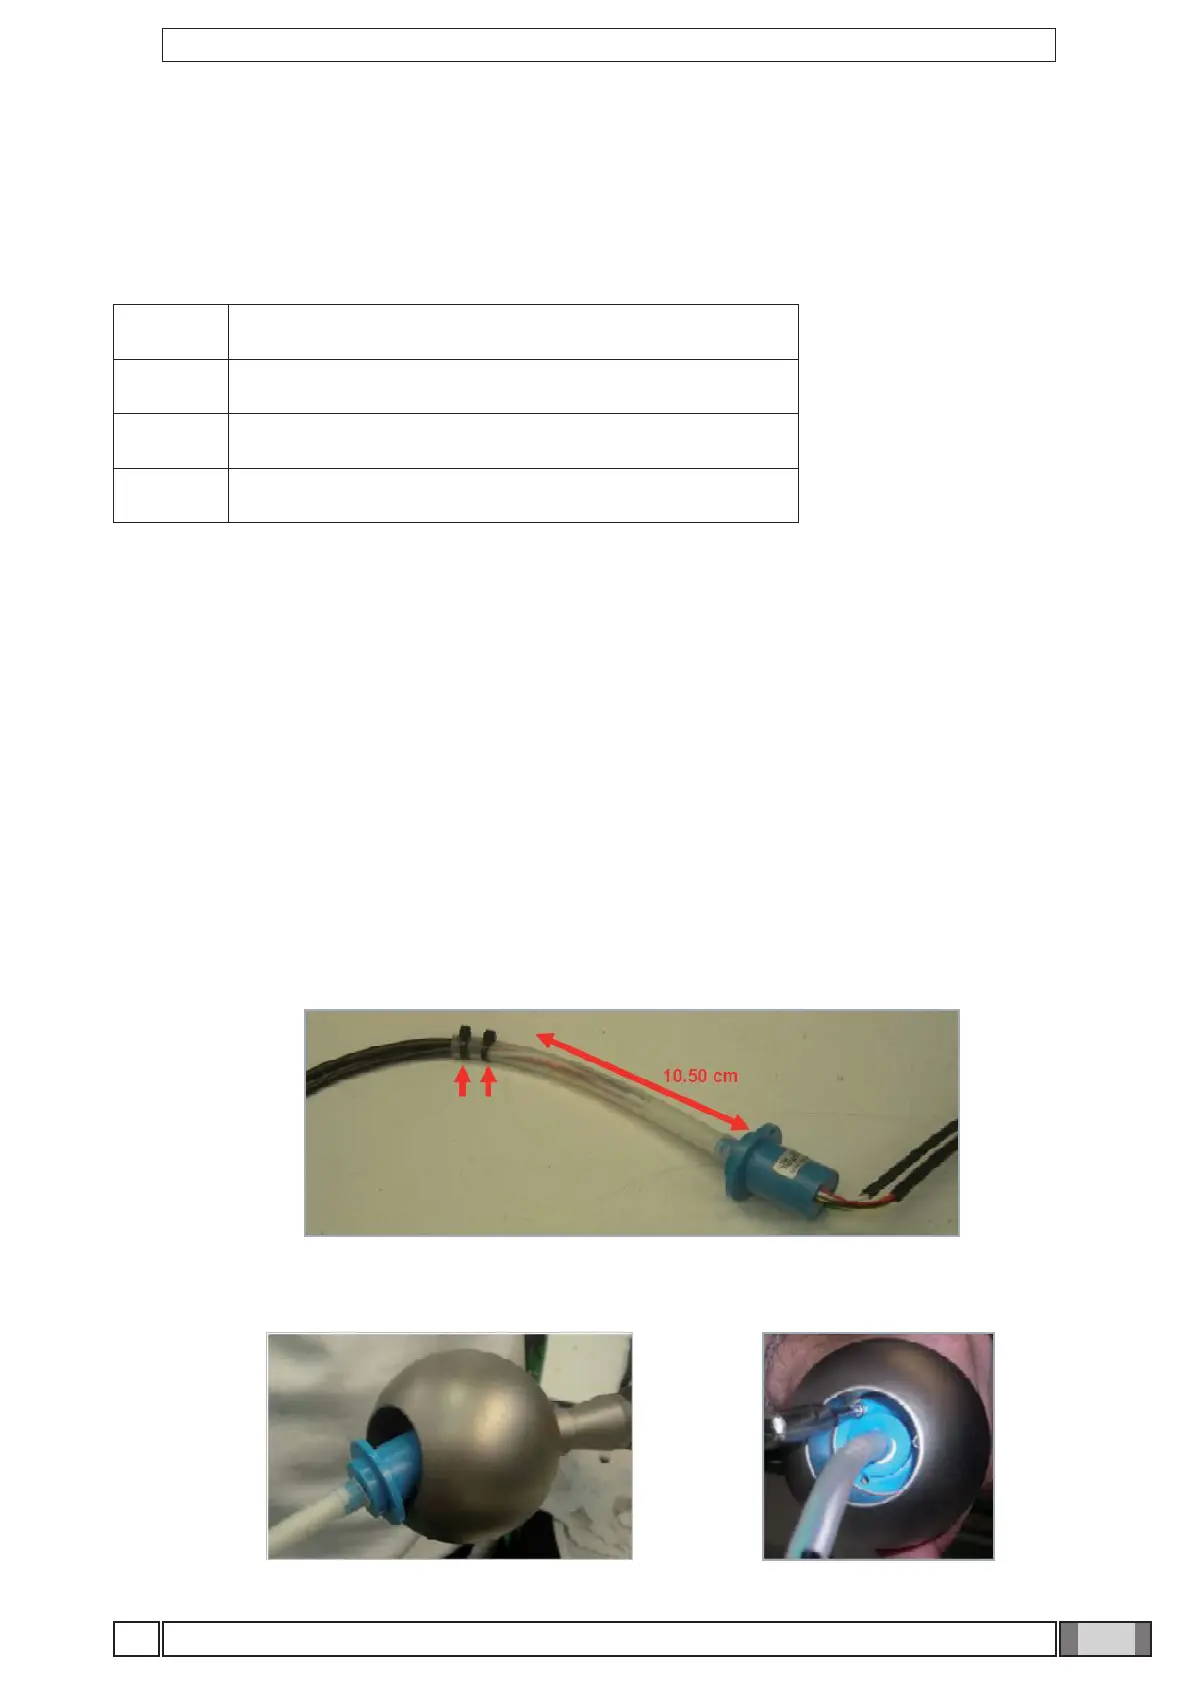
5. Get the new SLIP RING and two clamps: attach one to the end of the clear sheath and the other 10.5 cm away, as
shown in the gure:
6. Insert the SLIP RING in the ball and secure with 3 hexagonal screws and respective washers: