18
GB
INSTALLATION
RX DC X-RAY UNIT
4.6 Installing the RX DC with "ball end socket joint" generator
Figure I
• Take the generator out of the packaging.
• Insert the pin (a) in the sleeve making sure the respective openings match and secure with the screws (b) provided.
• Insert the power cable in the generator’s pin and run it out of the opening (c) provided.
• Lastly, put on the two side covers montare (d).
Figure I
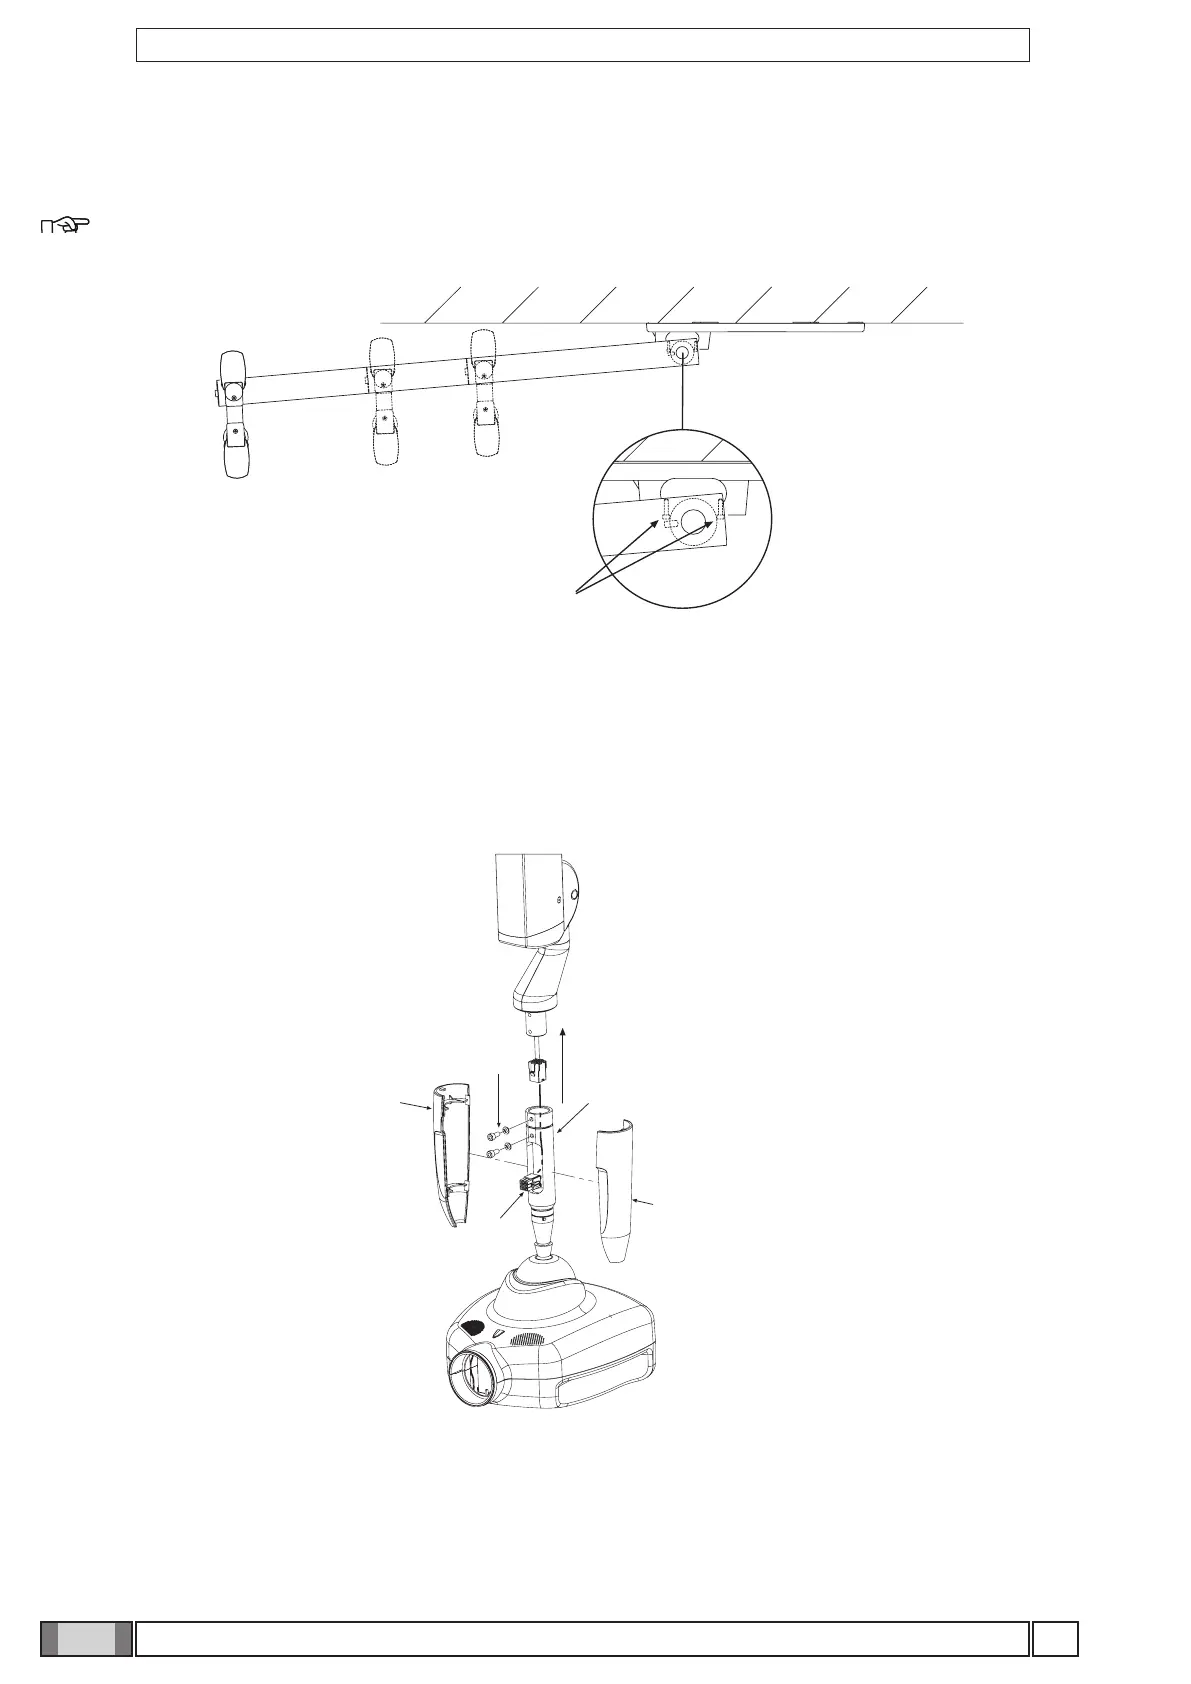
4.7 Installing the RX DC with standard joint generator
• Take the generator out of its packaging.
• Lubricate the bush of the pantograph arm and the generator pivot point with grease designed for bearings. (FIAT
MR3).
Figure H
• There are 2 end-stop screws in the wall-mounted plate to which Loctite has been applied to provide friction. These
have been adjusted according to the length of the extension arm supplied.
NOTE: Work on the screw itself (a) in order to make the extension arm stop before or after.
Figure H