11
GB
INSTALLATION
RX DC X-RAY UNIT
4.3 Extension arm
WARNING!
Do not lubricate the pin of the extension arm: the wall-mounted plate is provided with self-
lubricating bushings.
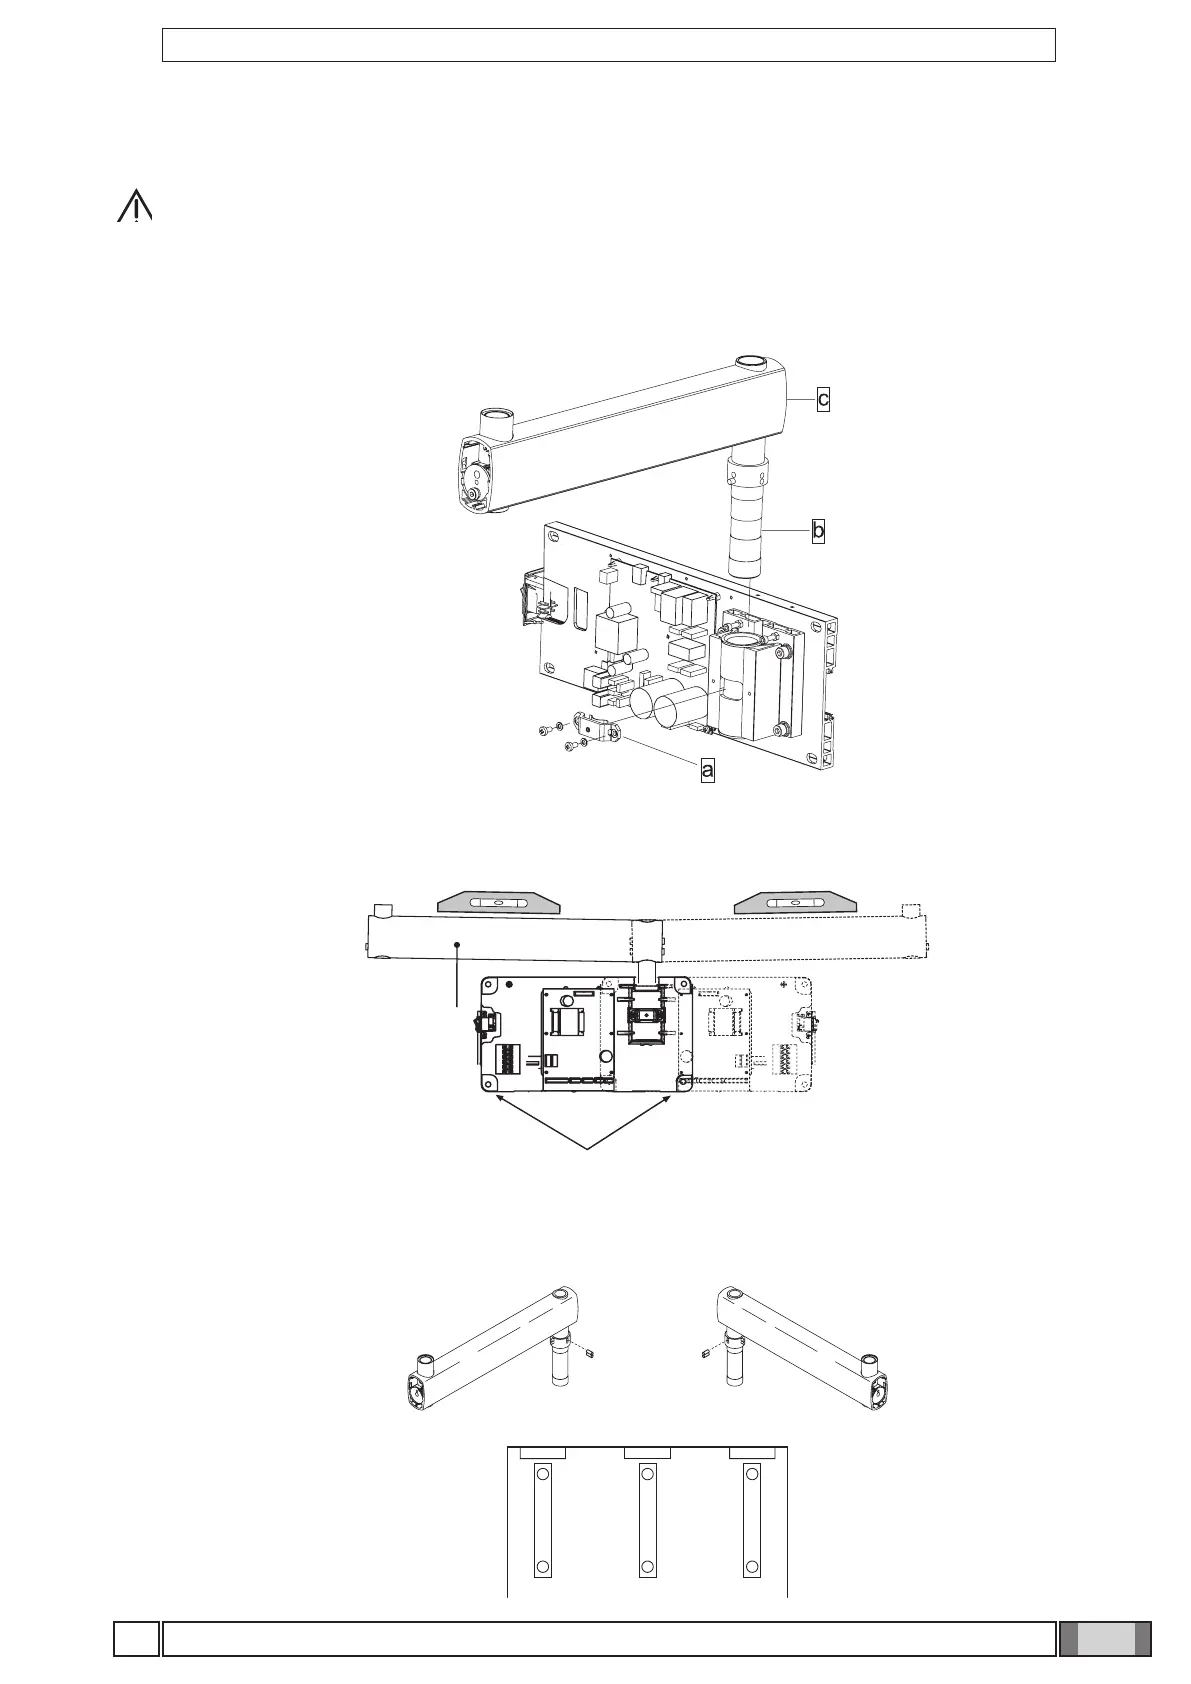
Figure B
• Insert the pin (b) of the extension arm (c) in the hole provided in the wall-mounted plate.
• Take the clutch (a) from the kit, install it on the plate using the corresponding screws and adjust the arm (c) as required.
Figure C
• If the x-ray unit is installed in one of the corners of the dental surgery, make sure the extension arm cannot rotate too
far (90°) by installing the two end-stop pins (included in the kit) on the x-ray unit itself.
• Find the right position for installing the pair of pins (a, b) and insert them in the holes provided using a hammer.
Figure B
Figure C
Figure D
• Use a spirit level to check that the arm (c) is slightly tilted upwards (approx. 1°). If necessary add a shim to the plate
near the bottom wall plugs (d).
• Fully secure the plate.
Figure D