29
GB
INSTALLATION
RX DC X-RAY UNIT
6.4 Use of handheld
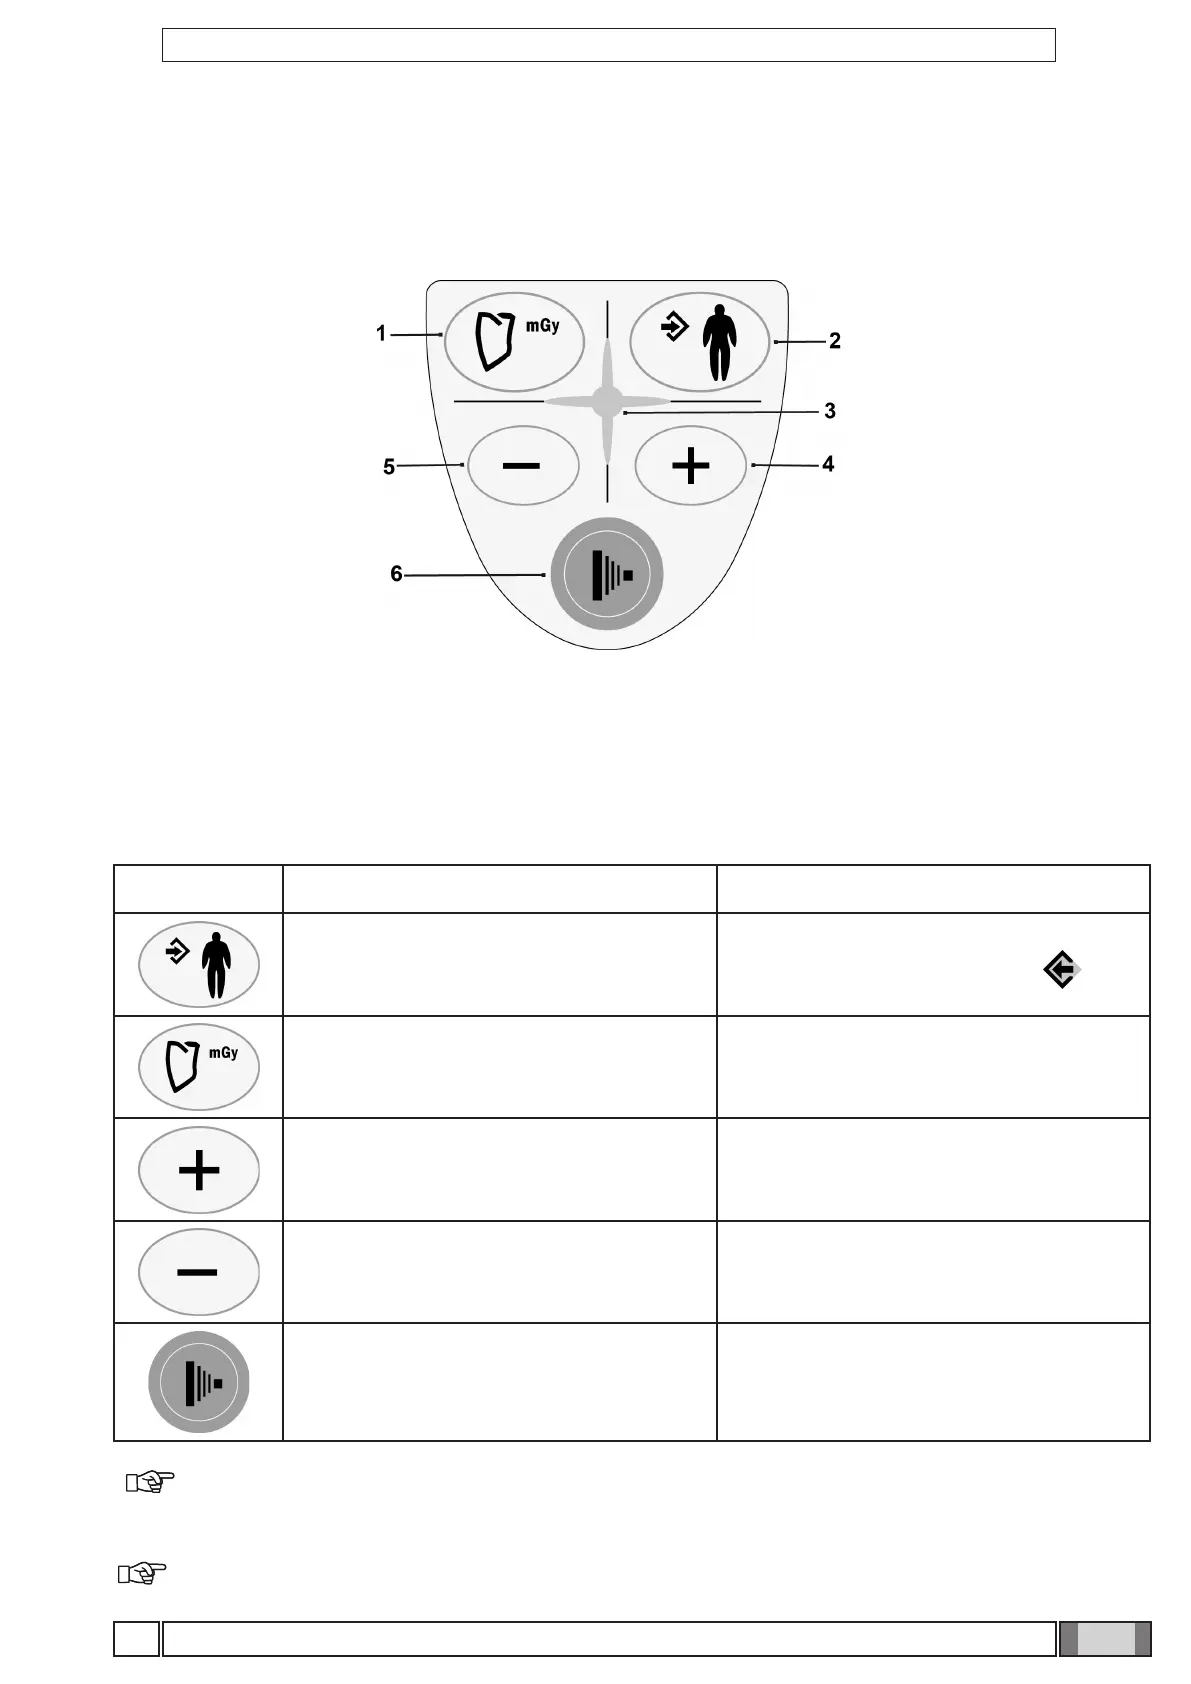
As illustrated in the gure below, the handheld has four function keys and a single x-ray emission key.
1 “Dentition area selection” key
2 “Body size selection” key
3 X-ray emission light
4 “Increase” key
5 “Decrease” key
6 “X-ray emission” key
The main functions of the keys on the handheld, depending on how they are pressed, are:
KEY BRIEFLY PRESSED (less than 3 sec.) PRESSED LONGER (more than 3 sec.)
Changes over from ADULT to CHILD and vice
versa (takes place when key is released).
Saves the selected setting (exposure time,
sensitivity, etc…). The memo icon ( ) lights
up when the data item can be saved.
Selects the various types of teeth to choose the
area to be examined.
Displays the values corresponding to the tooth
exposure times in mGy and in mGy*cm2 if
pressed again.
Increases the exposure times in steps according
to the set scale.
Increases the scroll speed of the values in
increasing order.
Decreases the exposure times in steps
according to the set scale.
Increases the scroll speed of the values in
decreasing order.
NO EFFECTS ARE OBTAINED IF THE KEY IS
PRESSED FOR LESS THAN A SECOND.
Starts x-ray exposure (the key has to be held
down throughout the x-rays emission, “dead
man” function).
NOTE: “Dead man” function: the system that starts x-ray exposure with the dedicated key on the
wireless handheld allows x-rays to be emitted only when the user presses and holds down the exposure
key. X-ray emission will stop if the key is released ahead of time.
NOTE: The function related to pressing the key briey is performed by pressing the key which will