45
GB
INSTALLATION
RX DC X-RAY UNIT
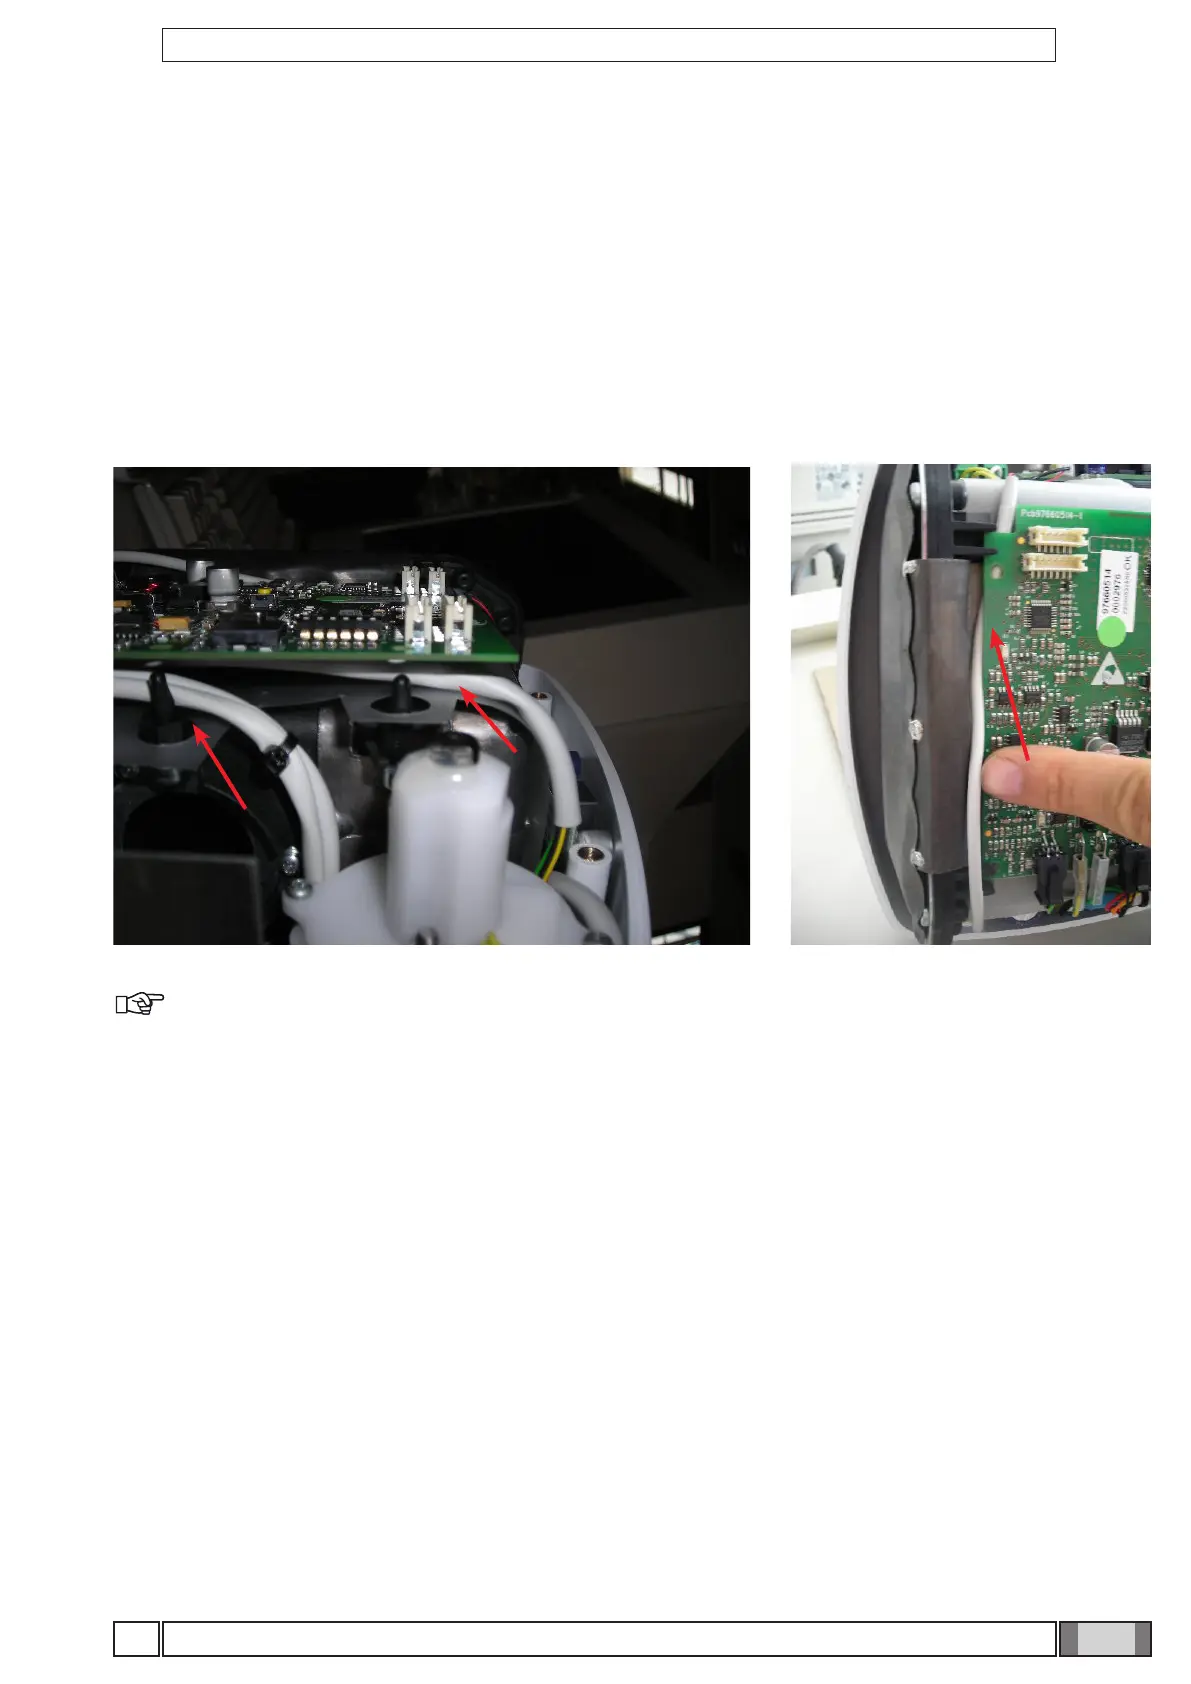
Detach all the connectors and work on the two support pins to pull out the card. Put the new card back in the correct
position, being careful to run the cables behind the card support pins as shown in the gure. Make sure they do not
pass in front of the x-ray collimator.
Before closing the cover, turn on the x-ray unit and make sure the diagnostic led indicator is as shown in the table.
When the X-ray head’s basic control card is replaced, in presence of wireless handheld, the handheld has to be asso-
ciated to the head by following the instructions given in section "Handheld unit-X-ray head association".
DIP switches
Make a note of the positions of the DIP switches of the pcb being replaced
NOTE: The X-ray head has to be calibrated with function T05 on the technical menu when this card
is replaced (see section "Calibrating the X-ray head"). Check on P03 that the rmware versions of the
handheld unit, head and basic board are aligned and correspond to those of the selected update package.
In case of misalignment, carry out the rmware update procedure described in this manual.