47Troubleshooting
16. Allow components to dry.
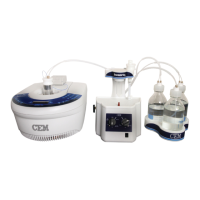
17. Once dry, place the spill cup onto the attenuator as outlined below.
17.1. Locate the notch on the attenuator and lay the attenuator on its side so the notch is facing up.
17.2. Position the spill cup on its side with the lens is facing up.
17.3. Align the long, vertical notch on the spill cup with the cutout on the attenuator.
17.4. Push the spill cup onto the attenuator and rotate the spill cup clockwise. Turn until the lens is cen-
tered beneath the post on the attenuator. This will ensure that the camera lens on the spill cup will
align with the camera within the cavity.
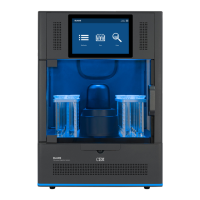
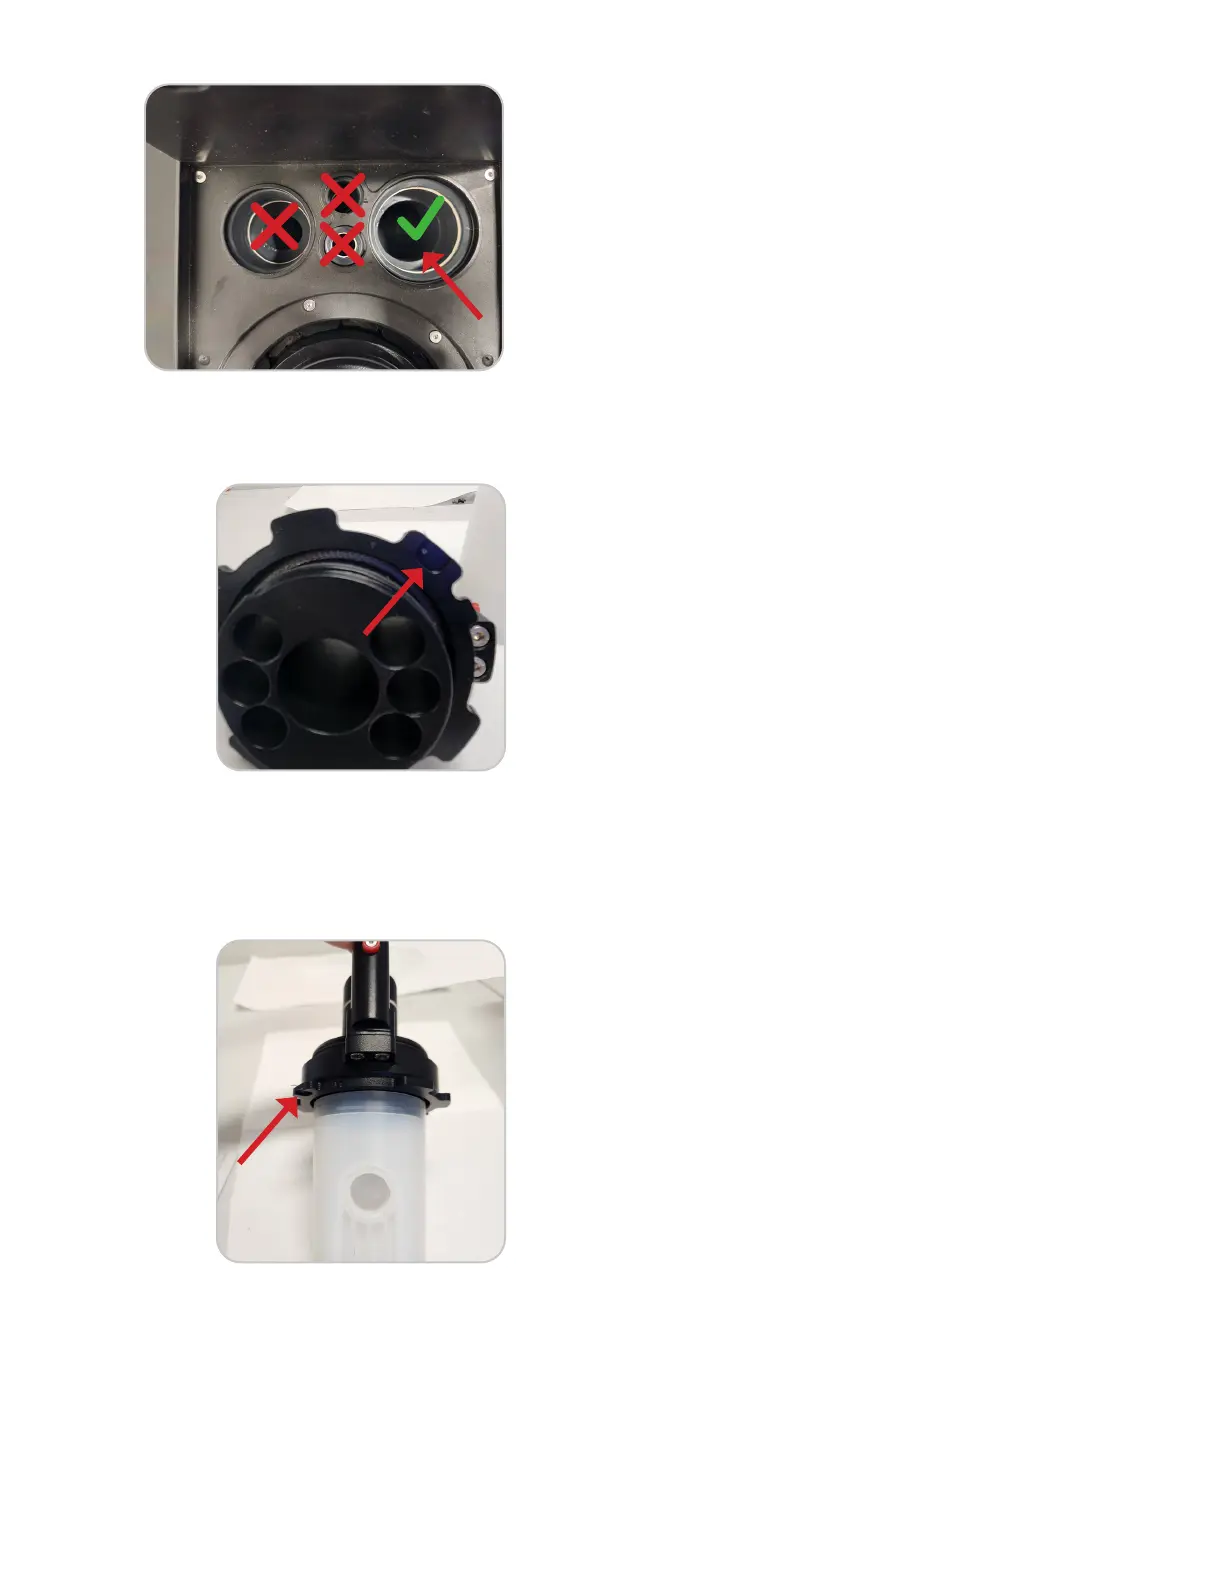
18. Position and lock the attenuator into place as outlined below.
18.1. Insert the attenuator with the spill cup attached into the cavity. Ensure that the camera lens is located
on the right.