Step 7
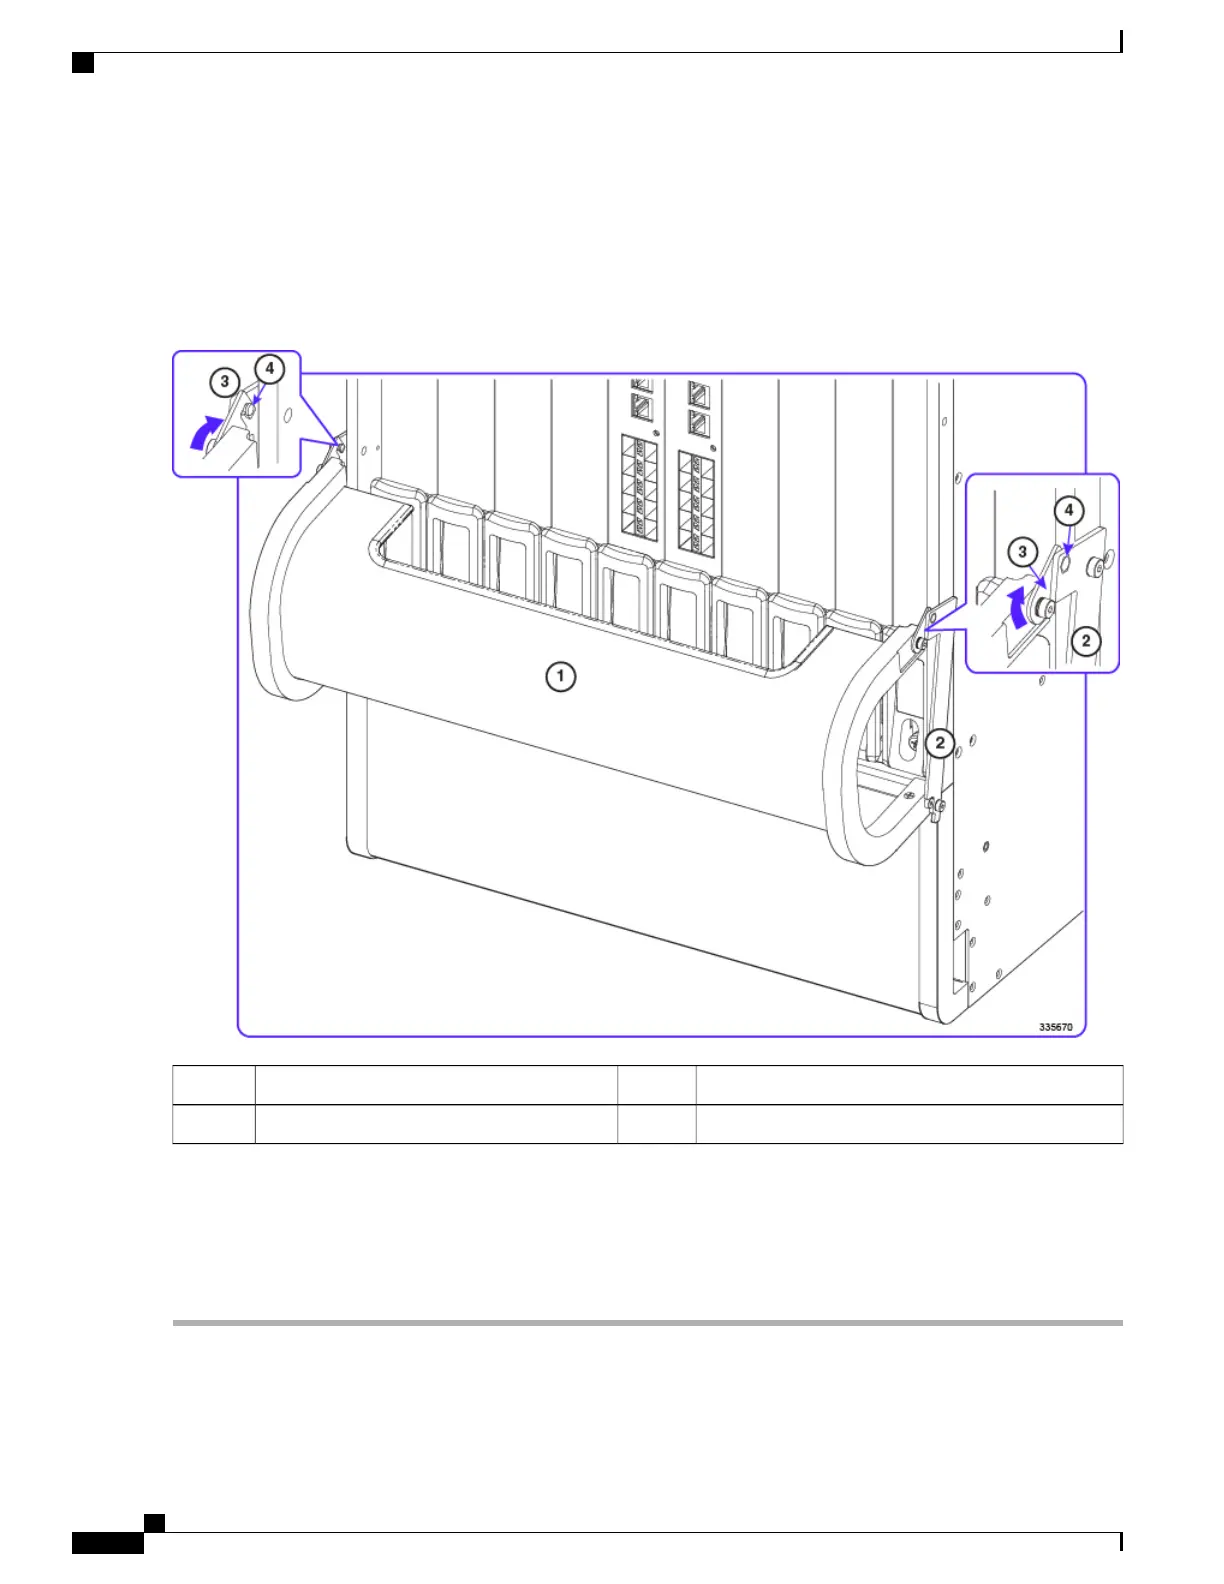
Verify that the tray can be swung upward into its closed position. Test the latches by clipping them to the posts on the
swing arms. You may need to apply slight inward pressure on the latches so they will clear the swing arms and rest on
the posts. See the figure below.
Figure 33: Testing Latches on the Cable Management Tray
Swing arm2Cable management tray1
Post4Latch3
To lower the cable management tray, unlatch the swing arms and lift the base of the tray slightly upward before allowing
it to swing downwards. This completes the installation of the cable management tray. To gain improved access to the
hook-and-loop straps on the cable guides, refer to Removing Cable Guides, on page 159. You must install the cable
management bracket on each MIO/UMIO card before you can route and secure network cables. For additional information,
refer to Installing Cable Management Brackets, on page 160.
ASR 5500 Installation Guide
158
Cable Management System Installation
Installing the Cable Management Tray
 Loading...