Page 38 WS2H and WS3 Manual
6. INLET/OUTLET PLUMBING: Connect to a supply line downstream of outdoor spigots. Install inlet and outlet
shutoff valves for the control valve; see top view drawings for control valve inlet and outlet locations. Installation of a
three valve bypass is recommended. If using plastic ttings ground the water conditioner per local electric codes. If an
external water meter is used, install the water meter on the outlet side of the control valve. It is recommended that the
meter assembly be installed horizontally or in a down ow vertical position to reduce turbine bearing wear. The turbine
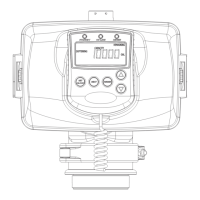
assembly may be orientated in any direction. Remove the cover and drive bracket and thread the water meter cord
through the hole in the back plate. Reinstall the drive bracket. Weave the cord through the strain relief on the backplate
and connect the end to the three prong connector labeled FLOW on the printed circuit board. Re-install the cover.
7. Drain: Verify that the drain can handle the backwash rate of the water conditioner. Correctly size the drain line
and install an appropriately sized drain line ow control. For WS2H and WS3 valves a drain line ow control are
NOT supplied with a valve. For WS2H valves the drain outlet is 2” Female NPT or BSPT threads or 2.5” groove lock
connection. For WS3 valves the drain port is 3” Female NPT or BSPT, no groove lock connection. If using copper,
solder joints near the drain must be done prior to connecting the drain line ow control tting. Leave at least 6” (152.4
mm) between the drain line ow control tting and solder joints to prevent heat from damaging the ow control.
Avoid elevating the drain line above the control valve where possible. Discharge the drain line through an air gap to a
receptacle in accordance with local plumbing codes.
IMPORTANT: Never insert a drain line directly into a drain, sewer line, or trap. Always allow an air gap between
the drain line and the receptacle to prevent back siphonage.
8. Regeneration: If the control valve is to be used to regenerate the water conditioner with brine (saturated salt
solution) or other regenerants. The WS2H and WS3 control valves regenerant port has a 1” 90° Male NPT threaded
outlet connection that swivels 360°. To ensure acceptable operation of the injectors use 1” pipe to connect to the brine
tank. Smaller drain line ow controls may result in the injector performance not matching the injector graphs. Use an
adequately size drain line ow control to ensure proper brine draw.
See Table 3 for injector order number and size for tank diameter. An over ow drain line from the regenerant tank that
discharges into an acceptable drain is recommended, as a regenerant over ow could damage furnishings or the
building structure. Connect a line to the over ow tting on the regenerant tank. If an over ow tting is not already
installed on the regenerant tank, install one. Do not elevate the over ow drain line. Discharge the over ow drain line
through an air gap to a receptacle in accordance with local plumbing codes.
9. Power Adapter: If a Power Adapter is already connected to the control valve, plug the Power Adapter into an
uninterrupted outlet. If the Power Adapter cord has not yet been connected to the control valve, remove the control
valve cover and the drive bracket and thread Power Adapter cord through the hole in the back plate. Reinstall the drive
bracket. Weave the cord through the strain relief on the backplate and connect the end to the four pin connector on
the printed circuit board labeled POWER. Reinstall the cover. Plug the Power Adapter into an uninterrupted outlet.
10. Program the control valve: It is very important to program the control valve for the type of system (e.g. water
softener of lter) and the end use application. Check the program used prior to testing the system.
INSTALLATION (CONTINUED)