66 www.clearcom.com
Congure Relays for Individual BeltStaons
From the BeltStaon:
• Press MENU; select “Set Controls;” select “Select Relay.” Note that there are more opons under “Set Controls”
than t on the screen. Scroll to the boom of the screen and scroll one more detent too see the “Select Relay”
opon. Select one of the relays: Relay 1 thru Relay 5. When a relay is selected a check mark will be visible beside
the selecon.
• To acvate the relay, a “Relay Buon” must be triggered. To select a “Relay Buon,” one of the relays must
already have been selected. To select a “Relay Buon,” Press MENU; select “Set Controls;” select “Relay Buon;”
select one of the trigger opons.
• If Talk A or Talk B is selected to acvate the relay, the relay will remain closed whenever the buon is selected for
acve talk.
• If Ch A or Ch B is selected to acvate the relay, the relay will remain closed whenever channel A or B is selected.
• If STAGE or ENTER is selected to acvate the relay, the relay will remain closed whenever the buon is pressed,
for as long as the buon is held.
» If STAGE is selected to acvate the relay, and if Stage Announce Audio is enabled, and if the Stage Announce
Relay is enabled, all three funcons will operate simultaneously.
» If ENTER is selected to acvate the relay, and if Wireless ISO is enabled, both funcons will operate
simultaneously while in Operaonal mode. When in Menu mode, ENTER only funcons as an Enter buon.
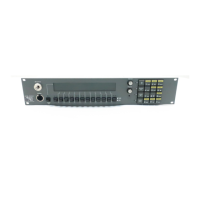
From the BaseStaon:
• Select the numbered key 1 through 5 that corresponds to the BeltStaon desired. Scroll to and choose “Select
Relay.” Select one of the relays Relay 1 thru Relay 5.
• Press MENU to go up one level back to the menu.
• Scroll to and select “Relay Buon;” select an opon to trigger the relay.
Since every user will require a custom applicaon, cables for your RELAY connecons will require some bench work
with a soldering iron.
Use the Transceiver
Choose an opmum locaon for the Tempest Remote Transceiver and antenna.
Using standard CAT-5 cable, connect the Transceiver to the BaseStaon RJ-45 connector labeled TRANSCEIVER.
The “Power” LED on the Transceiver will light if the BaseStaon is powering the unit. If the “Power” LED does not
illuminate when connecons are made and the BaseStaon is on, the CAT-5 cable may be too long to deliver adequate
power to the Transceiver.
Local BaseStaon whip antenna is disabled when the remote transceiver is connected.