30
CONVAID USER’S GUIDE
Positioning Belts
Pelvic Positioning Belts
WARNING: Positioning belts should never be used as a safety restraint device
in a motor vehicle when transporting chair with occupant. An additional
WC-4-19 compliant automotive type seat belt is required when the chair is used
in transport vehicles.
WARNING: Positioning belts and harnesses should only be installed by a
Convaid provider or healthcare practitioner.
Make sure the occupant does not slide down in the wheelchair seat.
1. Feet must be planted on footplate and securely anchored to prevent sliding forward off seat, in
conjunction with using appropriate pelvic positioning belt. Position client as directed by healthcare
practitioner. The belts must be snug, but not too tight. You should be able to slide your open hand,
at between the belt and the occupant.
2. NEVER use positioning belts as a user restraint, or on an occupant who is comatose or agitated.
Note: Failure to heed above warnings may cause serious injury.
All R82 vests and belts come individually packaged and include the R82 clip, which is used to secure
strapping. Follow the instructions to determine proper mounting location. When R82 vests and belts
are ordered, they are accompanied by a hardware kit, containing the following:
• 4 medium (1.5”) screws with 4 small coved washers, 4 metal washers, 4 capped nylon nuts
• 4 long (1.75”) screws with 4 large coved washers, 4 metal washers, 4 capped nylon nuts
• 2 short (.5”) screws, 2 nylon washers and 2 locknuts
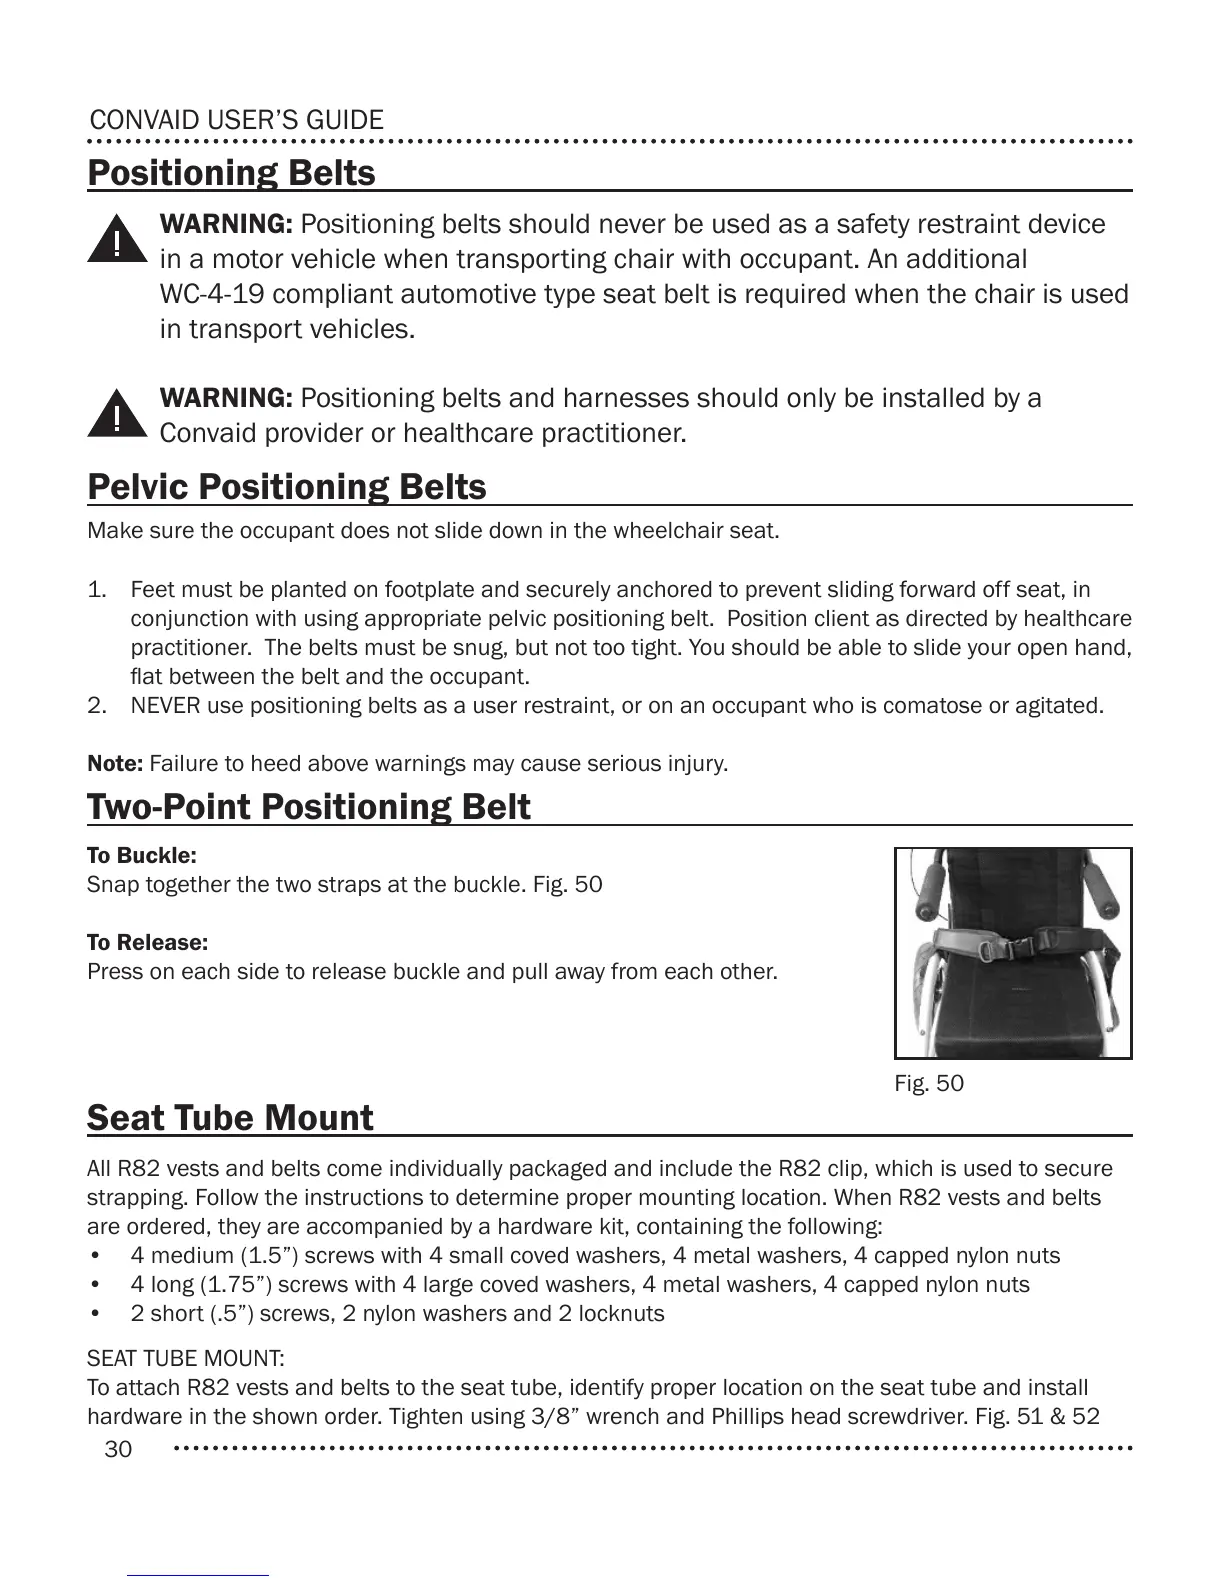
Two-Point Positioning Belt
Seat Tube Mount
To Buckle:
Snap together the two straps at the buckle. Fig. 50
To Release:
Press on each side to release buckle and pull away from each other.
SEAT TUBE MOUNT:
To attach R82 vests and belts to the seat tube, identify proper location on the seat tube and install
hardware in the shown order. Tighten using 3/8” wrench and Phillips head screwdriver. Fig. 51 & 52
Fig. 50