I/O CONTROLLOGIX MESSAGING EXAMPLE
PRODUCT REFERENCE GUIDE
341
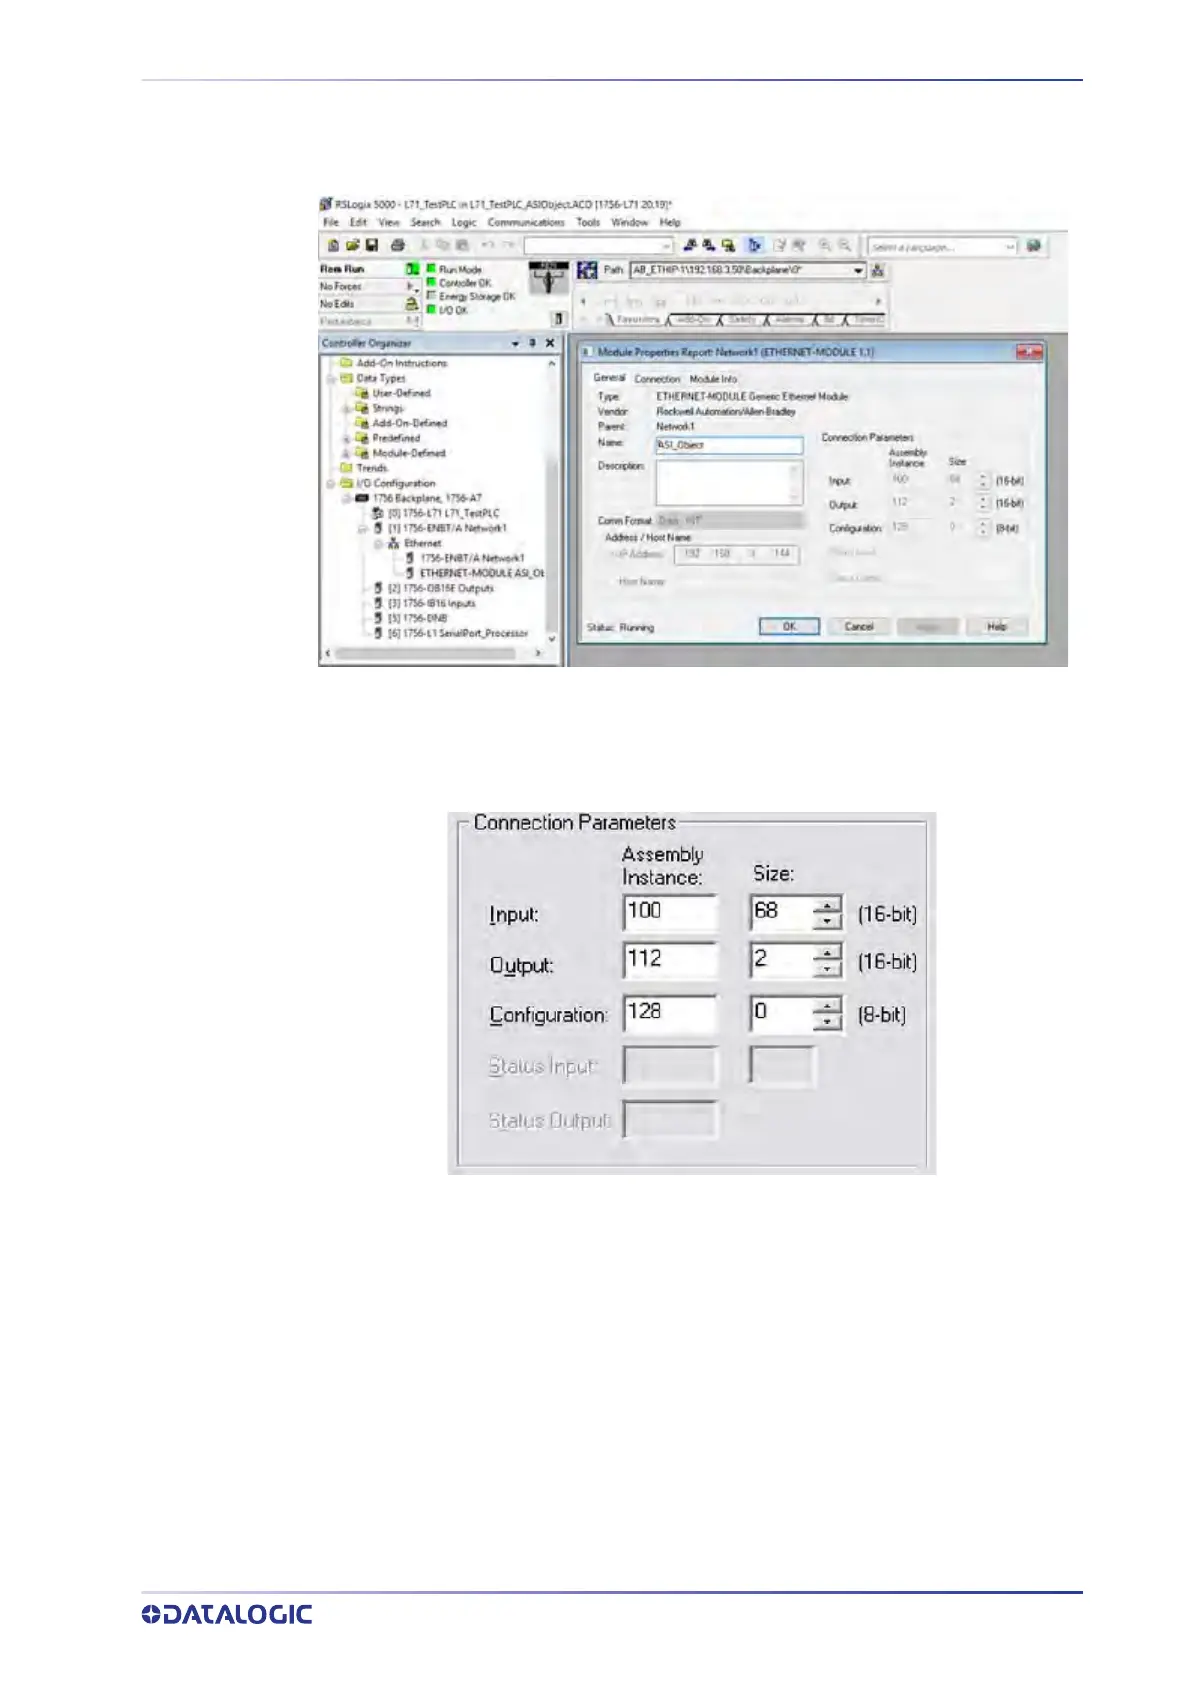
3. Specify the Properties for your camera. First set the Comm Format to Data-INT.
This must be done first as it cannot be changed later.
4. Specify the Name, Description and IP address of the camera.
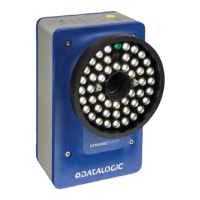
5. Next enter the Connection P
arameters.
6. You can only “schedule” I/O message transfers to the camera at a fixed interval.
Click the Connection Tab and specify this interval. The camera will handle inter-
vals down to 20 milliseconds.