NOTE: 16 x E3.S backplane is a combination of two 8 x E3.S backplanes. Follow the same steps to install the second 8 x
E3.S backplane.
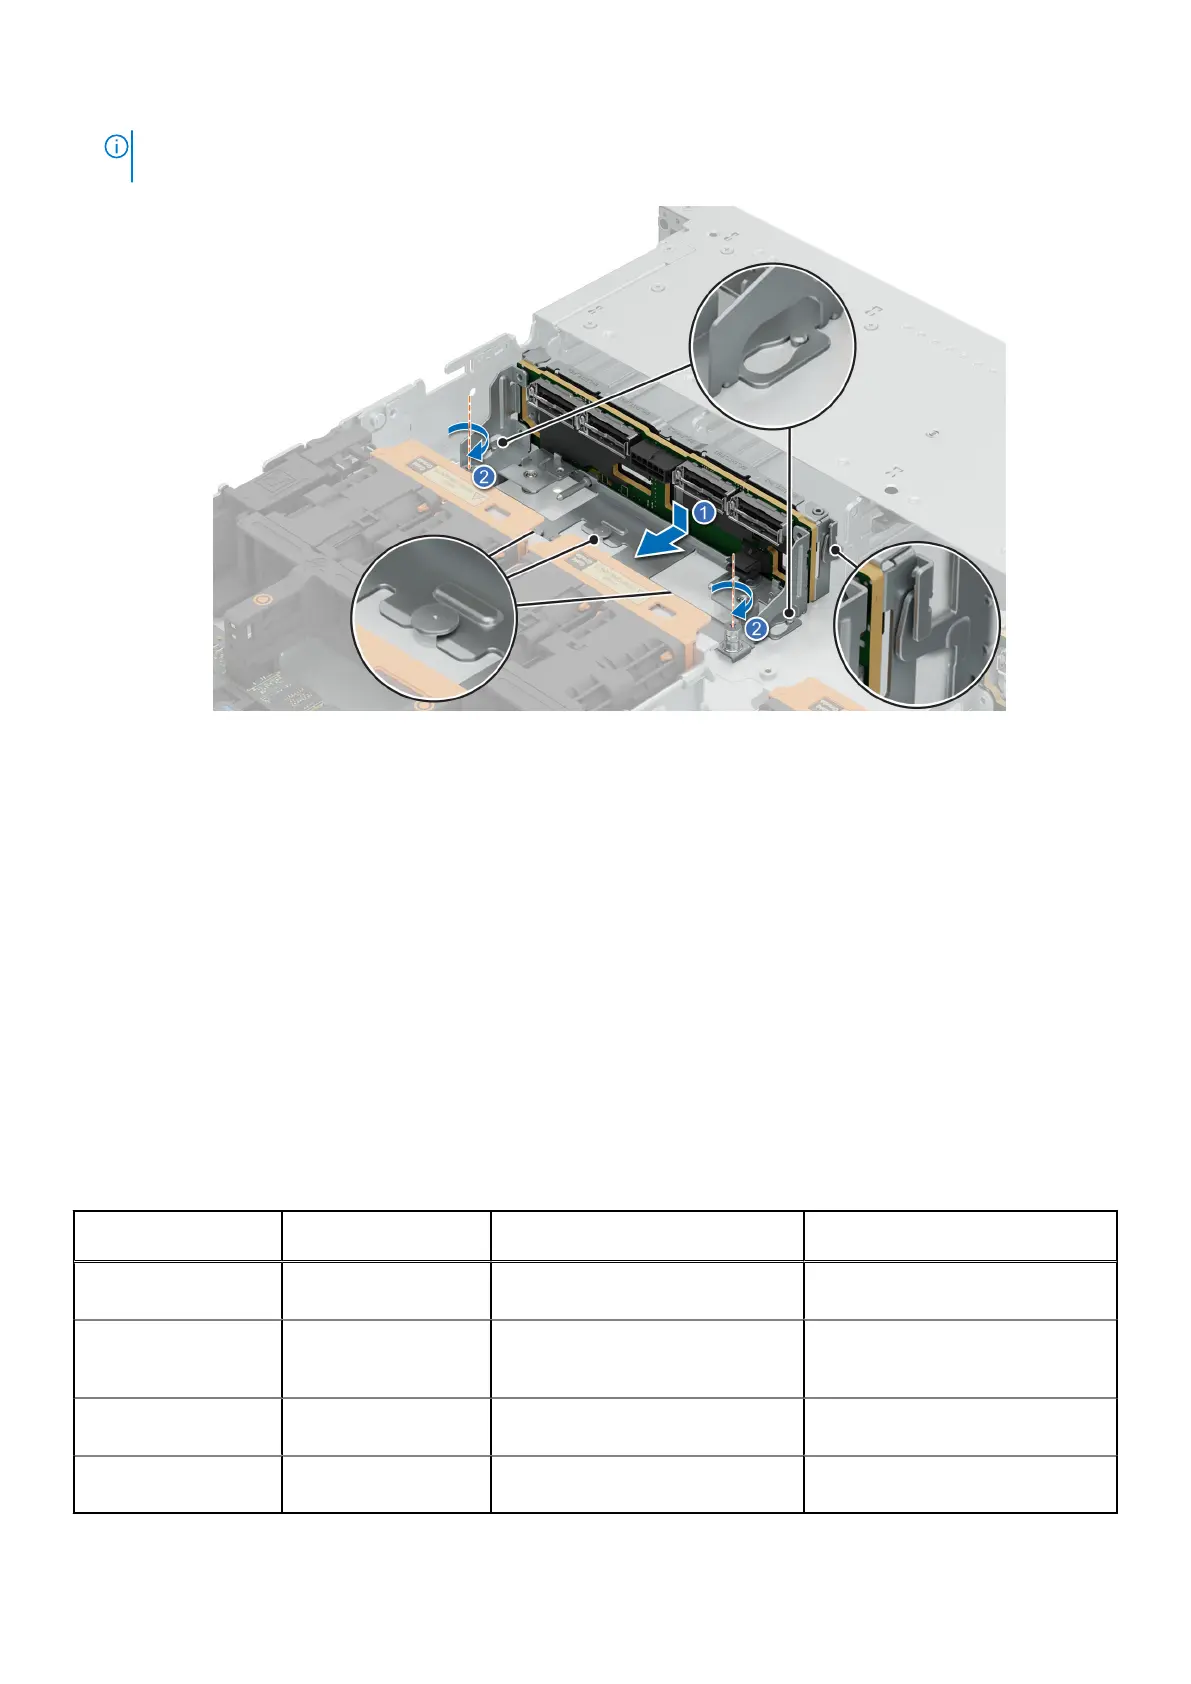
Figure 63. Installing the 16 x E3.S drive backplane
Next steps
1. Connect the drive backplane cables to the connectors on the system board and backplane.
2. Install the drives.
3. If removed, install the air shroud.
4. Install the drive backplane cover.
5. Follow the procedure listed in After working inside your system.
Side wall brackets
Side and center bracket perfect sealing
The topic lists details on side (right and left) and center bracket perfect sealing available on different configurations.
Table 68. Side and center bracket perfect sealing
Configuration Foam installed on the
right side bracket
Foam installed on the left side
bracket
Foam installed on the center
bracket
No BP (0 drive
configuration) chassis
Installed Installed Installed
10 x 2.5 inch
chassis (SAS/SATA/
NVMe) chassis
Installed Installed Installed
8 x 2.5 inch universal
with fPERC 11
Installed Not installed Not installed
10 x 2.5 inch (NVMe)
(1CPU)
Installed Not installed Not installed
Installing and removing system components 93
 Loading...