Chapter 5: Working with Pro Tools LE 47
Recording an Audio Track
To record an audio track:
1 Assign the input for a track and set its input
levels appropriately.
2 Click the Record Enable button for a track.
(See Figure 6 on page 41).
3 Choose Windows > Show Transport to display
the Transport window.
4 Click Return To Zero to start recording from
the beginning of the session. You can also record
according to a selection or from the cursor loca-
tion in the Edit window.
5 Click Record in the Transport window to en-
able recording.
6 Click Play or press the Spacebar to record on
all record-enabled tracks.
7 Record your performance.
8 Click Stop in the Transport window or press
the Spacebar when you are finished recording.
To play back a recorded track:
1 Click the track’s Record Enable button a sec-
ond time to take it out of Record mode.
2 Click Play in the Transport window or press
the Spacebar to start playback.
3 Click Stop in the Transport window or press
the Spacebar to stop playback.
Recording MIDI
To configure a MIDI track for recording:
1 For Macintosh systems, choose MIDI > Input
Devices and make sure your input device is se-
lected in the MIDI Input Enable window. Click
OK to apply your changes.
2 Choose File > New Track and specify 1 MIDI
Track, then click Create.
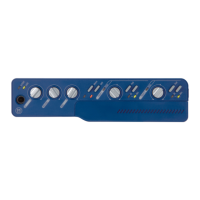
3 In the Mix window, click the track’s MIDI De-
vice/Channel Selector and choose the destina-
tion (assignment) for that MIDI track by
choosing a MIDI interface port, a channel, or a
device from the pop-up menu. Choices vary de-
pending on the operating system, Pro Tools ver-
sion, and the hardware and instruments you
have connected.
4 You can assign a default program change to
the track by clicking on the Program button in
the Mix window and making the necessary se-
lections for program and bank select, and then
clicking Done. Default program changes are
sent when playing a track.
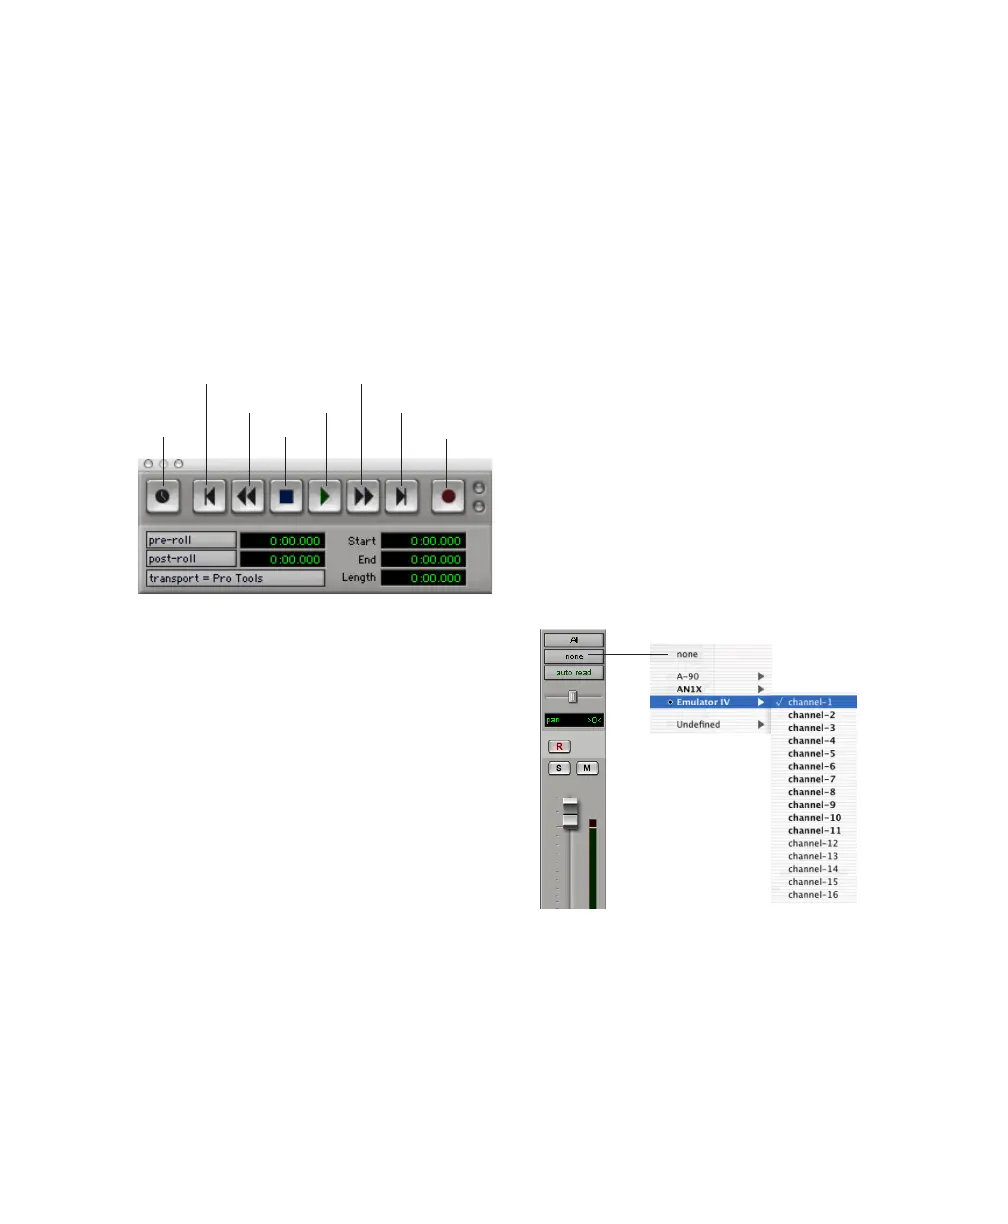
Transport window (Expanded view shown)
Online
Rewind
Stop
Play
Record
Return To Zero
Go to End
Fast Forward
MIDI Device/Channel Selector