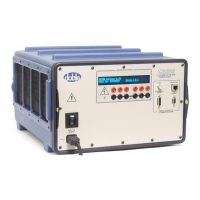
F6300 Power System Simulator User Guide
72A-2337-01 Rev. B 11/05 5-7
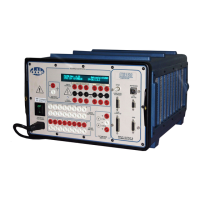
Replace the front instrument panel:
.
1. Lay the new front panel face down in front of the instrument, with the communications
board on the right.
2. Reconnect the ground wire in front of the circuit breaker.
3. Reconnect the blue and brown AC leads to the circuit breaker.
• Connect the blue lead opposite the blue wire at the front of the circuit breaker.
• Connect the brown lead opposite the brown wire at the front of the circuit breaker.
4. Reconnect wire W8 to the Output Terminal board.
5. Tilt the front panel up and rest the bottom of the front panel inside the bottom of the black
instrument frame.
6. Line up the connector at the bottom of the High Current Interface board with its mate on the
motherboard.
7. Tilt the front panel into a vertical position and press the bottom of the panel until the High
Current Interface connector mates.
8. Secure the front panel with 12 hex-head screws.
9. Reconnect W6, W7, and W20.
NOTE All the wires in the F6300 (Table 5.1) connect to the communications board or the output
terminal board on the instrument front panel.
Table 5.1 F6300 Connections to the Front Panel
Wire Connects From Connects To
W6 Communications board CPU board
W7 Communications board Analog I/O board
W20 Analog Multiplexer board Output Terminal board
10. Replace the instrument cover.