(11) Remove the liquid line from the engine com-
partment.
INSTALLATION
(1) Position the liquid line into the engine com-
partment.
(2) Remove the tape or plugs from the opened liq-
uid line fitting and the evaporator tube.
(3) Lubricate a new rubber O-ring seal with clean
refrigerant oil and install it on the liquid line fitting.
Use only the specified O-ring as it is made of a spe-
cial material for the R-134a system. Use only refrig-
erant oil of the type recommended for the A/C
compressor in the vehicle.
(4) Connect the liquid line to the A/C evaporator.
(5) Tighten the nut that secures the liquid line to
the A/C evaporator. Tighten the nut to 13.5 N·m (10
ft. lbs.).
(6) Remove the tape or plugs from the liquid line
fitting and condenser port.
(7) Lubricate a new rubber O-ring seal with clean
refrigerant oil and install it on the liquid line fitting.
Use only the specified O-ring as it is made of a spe-
cial material for the R-134a system. Use only refrig-
erant oil of the type recommended for the A/C
compressor in the vehicle.
(8) Connect the liquid line to the A/C condenser.
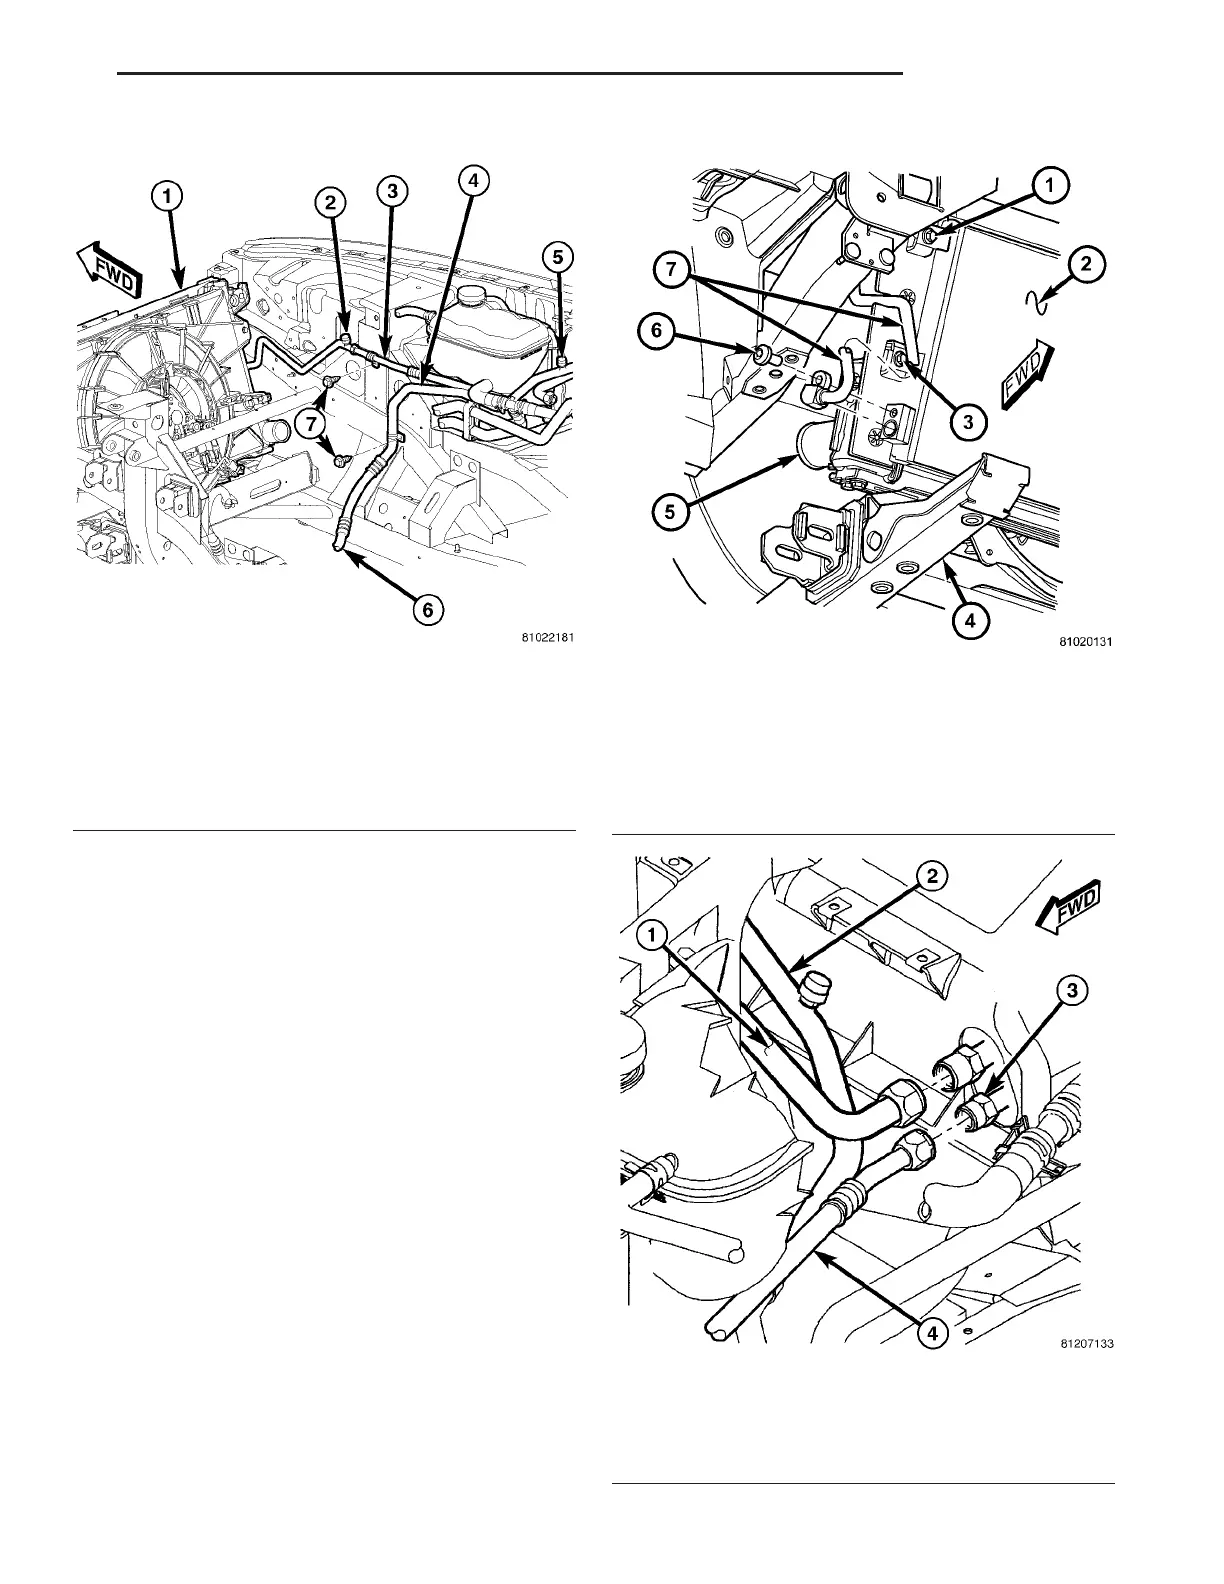
Fig. 18 Liquid Line
1 - A/C CONDENSER
2 - HIGH SIDE SERVICE PORT
3 - LIQUID LINE
4 - SUCTION LINE
5 - LOW SIDE SERVICE PORT
6 - TO A/C COMPRESSOR
7 - BOLT
Fig. 19 Liquid Line - A/C Condenser
1 - UPPER MOUNTING BOLT
2 - A/C CONDENSER
3 - LOWER MOUNTING BOLT
4 - RIGHT FRAME RAIL
5 - RADIATOR
6 - BOLT
7 - SUCTION LINE
Fig. 20 Liquid Line - Evaporator
1 - SUCTION LINE (REAR)
2 - SUCTION LINE (FRONT)
3 - A/C EVAPORATOR TUBES
4 - LIQUID LINE
ZB PLUMBING 24 - 53
LIQUID LINE (Continued)










 To Next Page