(4) Remove brake lamp switch and discard. Do
not reuse switch. (Refer to 8 - ELECTRICAL/
LAMPS/LIGHTING - EXTERIOR/BRAKE LAMP
SWITCH - REMOVAL)
(5) Disconnect brake booster input rod from brake
pedal as follows:
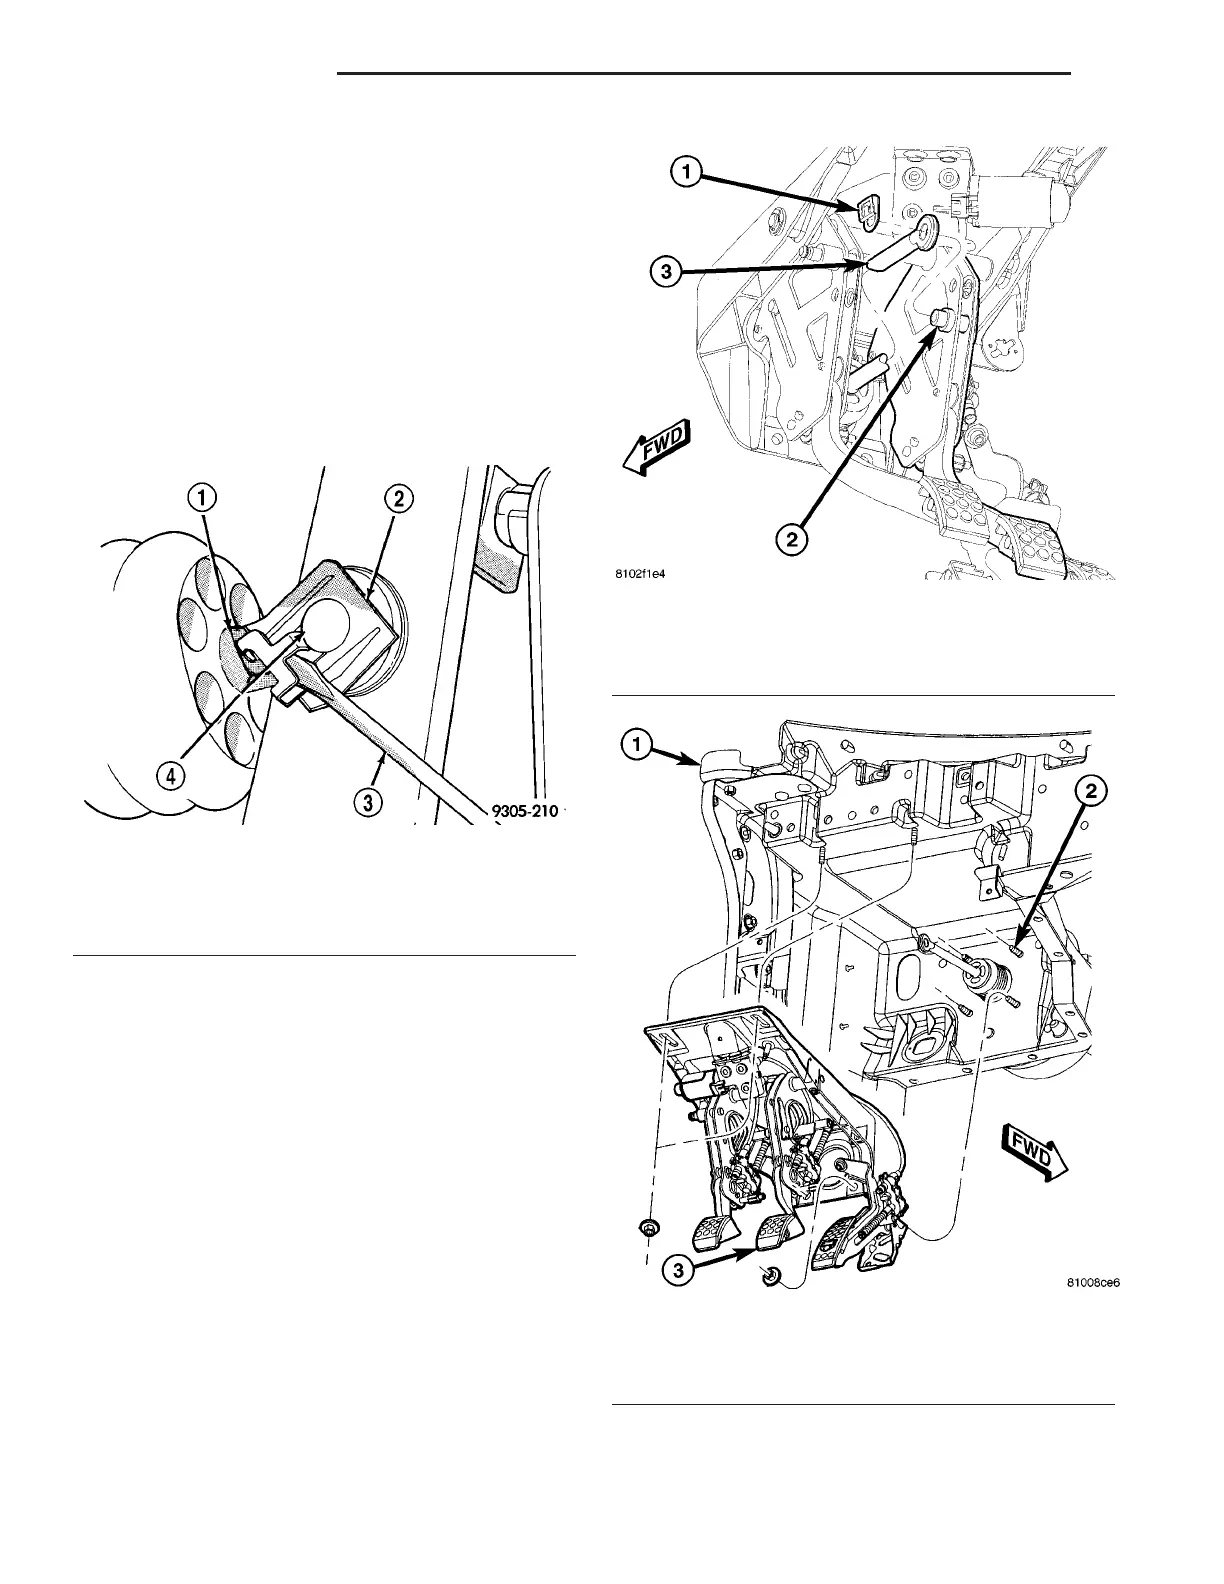
(a) Position a small screwdriver under center
tang on booster input rod retaining clip (Fig. 45)
(b) Lift center tang high enough to clear end of
pedal pin, then slide clip off pedal pin and discard.
Do not reuse clip.
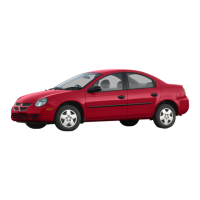
(c) Slide booster input rod off brake pedal pin
(Fig. 46).
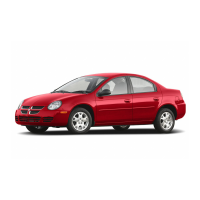
(6) Remove four nuts that attach booster to vehicle
(Fig. 47).
(7) Under hood, slide booster up and forward until
mounting studs on rear of booster are past dash
panel, then remove booster from vehicle.
CAUTION: Do not attempt to disassemble power
brake unit as this booster is serviced ONLY as a
complete assembly.
INSTALLATION
NOTE: When installing power brake booster, be
sure gasket is between booster and dash panel
(Fig. 44).
(1) Align mounting studs on back of power brake
booster with holes in dash panel and install booster
firmly against dash panel.
(2) Install and tighten four nuts mounting power
brake booster to dash panel (Fig. 47). Tighten nuts to
28 N·m (21 ft. lbs.) torque.
Fig. 45 Brake Pedal Retaining Clip
1 - INPUT ROD
2 - RETAINING CLIP
3 - SCREWDRIVER
4 - PEDAL PIN
Fig. 46 Booster Input Rod Attachment To Pedal
1 - RETAINING CLIP
2 - BRAKE PEDAL PIN
3 - BOOSTER INPUT ROD
Fig. 47 Adjustable Pedals Mounting
1 - DASH PANEL
2 - BOOSTER STUDS
3 - ADJUSTABLE PEDALS ASSEMBLY
5 - 30 BRAKES - BASE ZB
POWER BRAKE BOOSTER (Continued)





 To Next Page