(6) Disconnect upper and lower radiator hoses.
(7) Remove the radiator mounting bolts (Fig. 23).
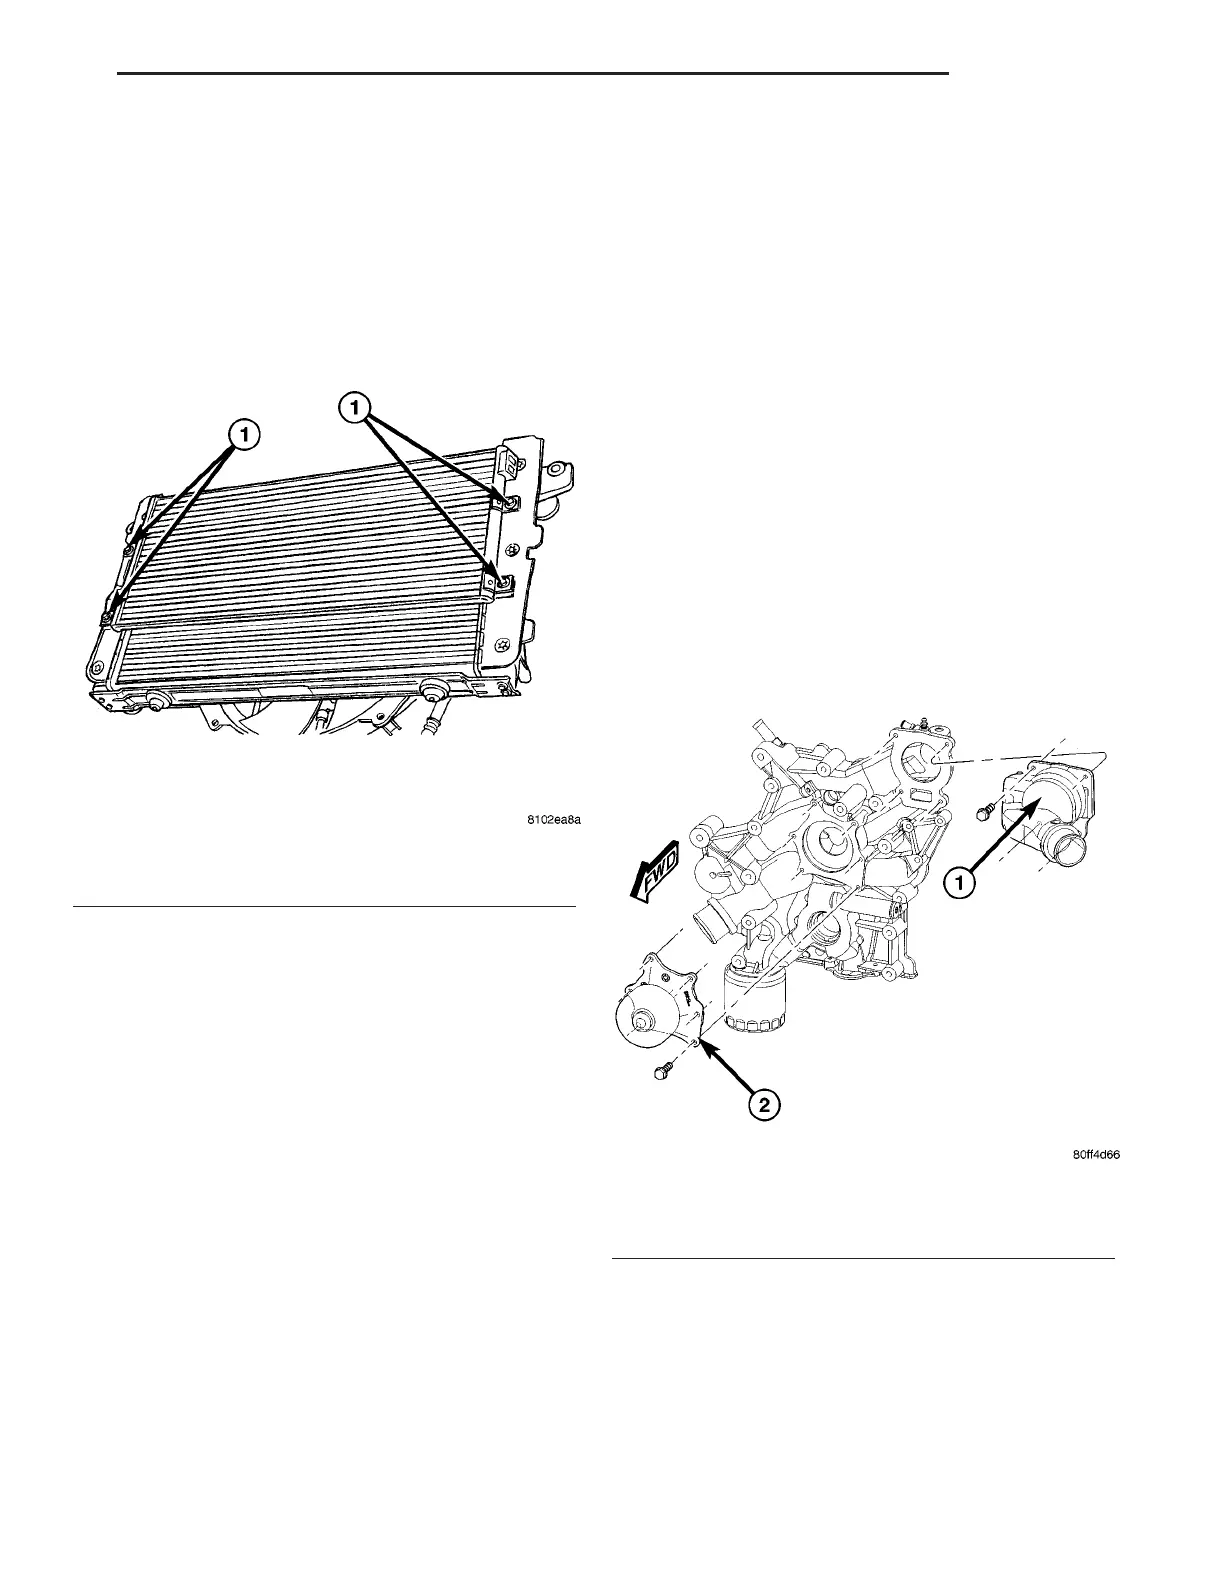
(8) Remove A/C condenser mounting fasteners
(Fig. 24).
(9) Remove radiator from engine compartment.
Care should be taken not to damage radiator
cooling fins during removal.
INSTALLATION
(1) Care should be taken not to damage radi-
ator cooling fins during installation. Install radi-
ator into position. The lower rubber isolators must
rest in the holes in the bottom of the radiator sup-
port (Fig. 23).
(2) Install A/C condenser mounting fasteners (Fig.
24). Tighten A/C condenser mounting fasteners to 5
N·m (45 in. lbs.).
(3) Install radiator radiator mounting bolts (Fig.
23). Tighten radiator mounting bolts to 11 N·m (95
in. lbs.).
(4) Connect upper and lower radiator hoses.
(5) Install radiator fan fasteners (Fig. 23). Tighten
radiator fan mounting fasteners to 5 N·m (45 in.
lbs.).
(6) Install oil cooler mounting fasteners. Tighten
oil cooler mounting fasteners to 5 N·m (45 in. lbs.).
(7) Install air cleaner housing assembly, connect
throttle body air inlet hose (Refer to 9 - ENGINE/
AIR INTAKE SYSTEM - INSTALLATION).
(8) Fill the cooling system with coolant (Refer to 7
- COOLING/ENGINE - STANDARD PROCEDURE -
FILLING COOLING SYSTEM).
(9) Operate the engine until it reaches normal
operating temperature. Check the cooling system for
correct fluid level.
WATER PUMP
REMOVAL
(1) Drain cooling system (Refer to 7 - COOLING/
ENGINE - STANDARD PROCEDURE - DRAINING
COOLING SYSTEM).
(2) Disconnect throttle body air inlet hose, remove
air cleaner housing assembly (Refer to 9 - ENGINE/
AIR INTAKE SYSTEM - REMOVAL).
(3) Remove accessory drive belt (Refer to 7 -
COOLING/ACCESSORY DRIVE/DRIVE BELTS -
REMOVAL).
(4) Remove water pump attaching bolts in the
reverse order of the torque sequence (Fig. 27).
(5) Remove water pump (Fig. 25).
(6) Remove and discard the water pump gasket.
INSPECTION
Replace the water pump if it has any of the follow-
ing defects.
(1) Damage or cracks on the pump body.
(2) Coolant leaks; if the seal is leaking, evident by
traces of coolant leaks from vent hole.
(3) Loose or rough turning bearing.
(4) Impeller rubs either the pump body or chain
case cover.
Fig. 24 A/C Condenser Mounting
1- A/C CONDENSER FASTENERS
Fig. 25 Water Pump and Thermostat Housing
1 - THERMOSTAT HOUSING
2 - WATER PUMP
ZB ENGINE 7 - 25
RADIATOR (Continued)









 To Next Page