(9) Release toe link from knuckle using Puller,
Special Tool C-4150A (Fig. 5). Remove tool.
(10) Remove cotter pin and castle nut from lower
ball joint stud (Fig. 3).
CAUTION: Do not strike or apply heat to steering
knuckle in an effort to separate ball joint studs from
knuckle.
NOTE: Use of Spacer, Special Tool 6983, is neces-
sary to allow proper use of Puller, Special Tool
C-4150A, to release lower ball joint from lower con-
trol arm.
(11) Insert Spacer, Special Tool 6983, between
lower ball joint grease seal boot and lower control
arm. Push Spacer in until it surrounds ball joint
stud. Use care not to damage grease seal boot.
CAUTION: When releasing ball joint using Puller,
Special Tool C-4150A, use care not to pinch and
damage ball joint grease seal boot.
(12) Install Puller, Special Tool C-4150A, over
Spacer and lower control arm as shown (Fig. 6). Ball
bearing in bolt of Special Tool C-4150A must be
centered in end of lower ball joint stud.
(13) Release lower ball joint from lower control
arm using Puller. Remove tools. Lift ball joint stud
from lower control arm.
(14) Install Puller, Special Tool CT-1003, on hub
and bearing flange (Fig. 7).
(15) Tighten Puller screw against halfshaft yoke,
pressing yoke out of hub and bearing assembly.
Remove tool.
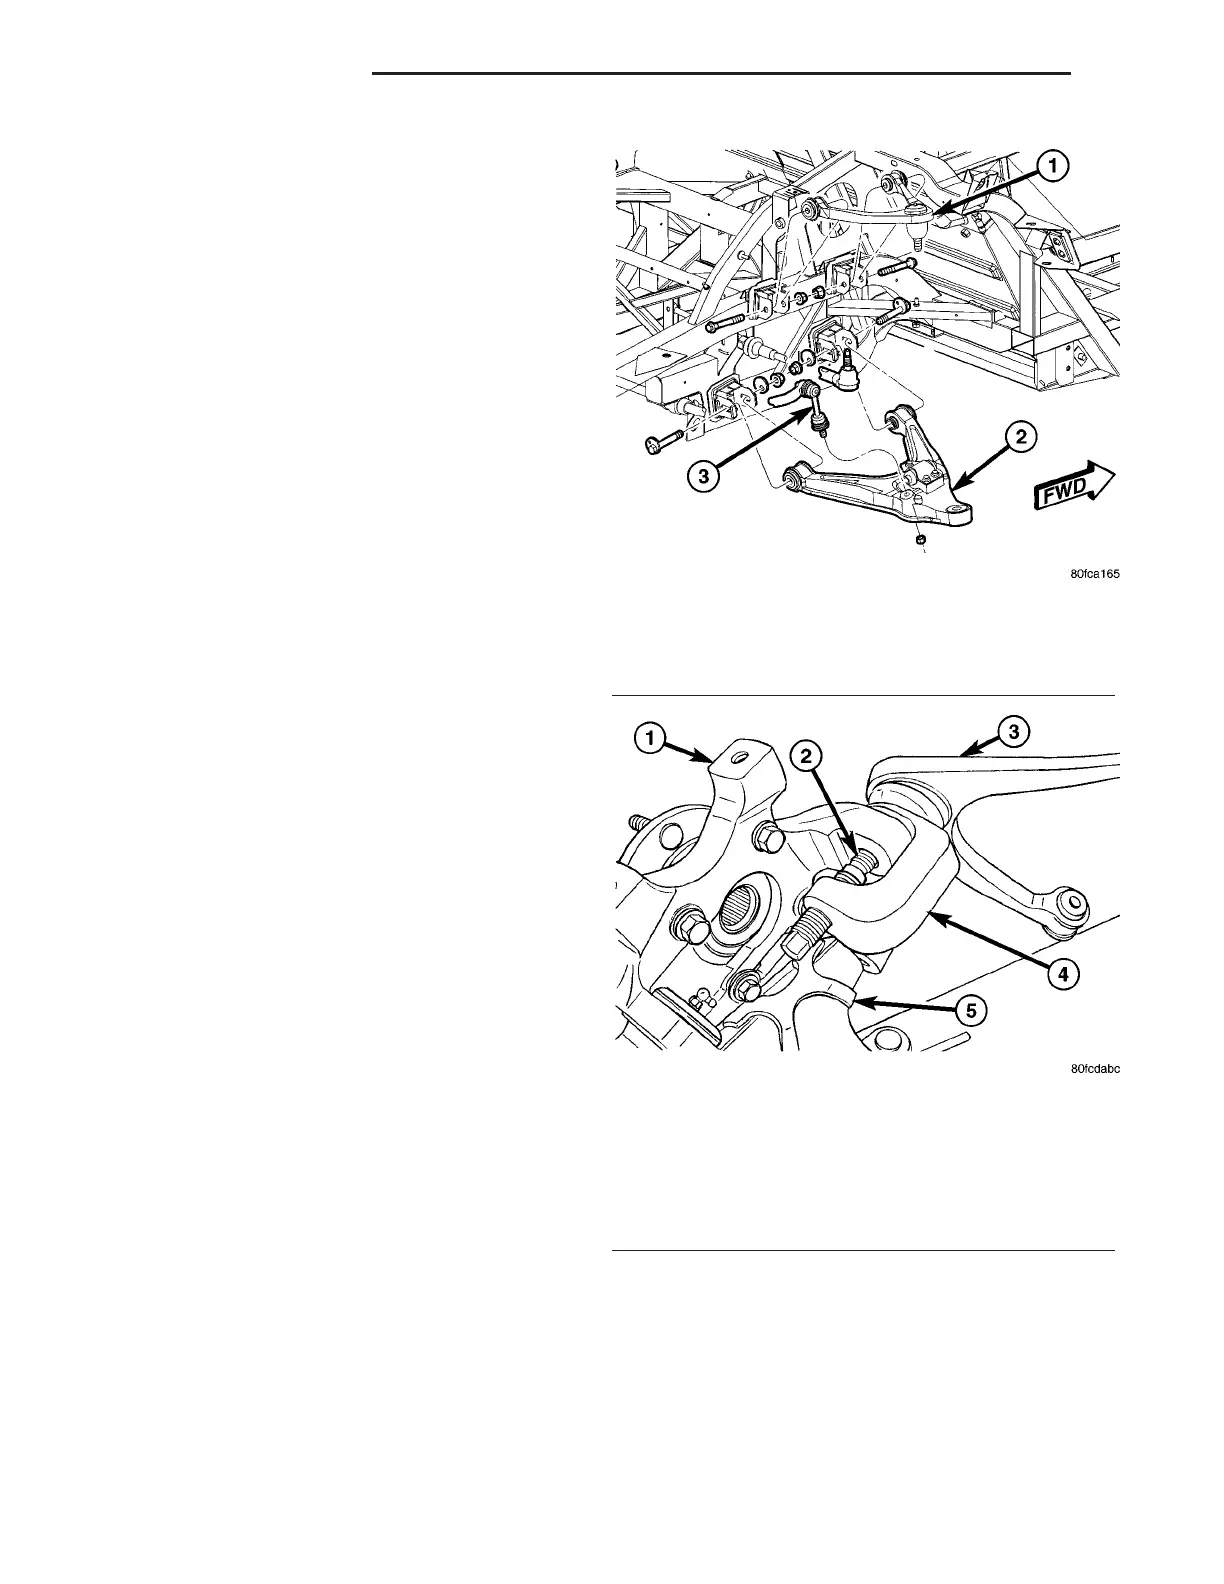
(16) Remove bolts fastening upper control arm to
frame (Fig. 9).
(17) Pull outward on knuckle and upper control
arm sliding hub and bearing off halfshaft yoke and
control arm off frame brackets.
CAUTION: Use a vise equipped with soft jaw caps
to protect the surface of the surface of the knuckle
from damage.
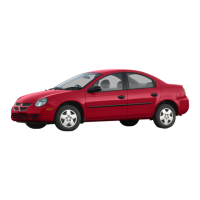
(18) Mount knuckle in vise (Fig. 10).
(19) Remove cotter pin and castle nut from upper
ball joint stud.
CAUTION: When releasing upper ball joint using
Puller, Special Tool C-4150A, use care not to pinch
and damage ball joint grease seal boot.
(20) Install Puller, Special Tool C-4150A, over
knuckle and upper ball joint as shown (Fig. 10). Ball
bearing in bolt of Special Tool C-4150A must be
centered in end of lower ball joint stud.
(21) Release upper ball joint from knuckle using
Puller. Remove upper control arm and tools.
(22) Remove four bolts fastening hub and bearing
to knuckle.
(23) Remove hub and bearing from knuckle.
Fig. 9 Upper And Lower Control Arms
1 - UPPER CONTROL ARM
2 - LOWER CONTROL ARM
3 - STABILIZER LINK
Fig. 10 Puller Positioned To Release Upper Ball
Joint
1 - KNUCKLE
2 - UPPER BALL JOINT STUD
3 - UPPER CONTROL ARM
4 - PULLER C-4150A
5 - VISE WITH SOFT JAW CAPS
2 - 34 REAR SUSPENSION ZB
KNUCKLE (Continued)






 To Next Page