INSTALLATION
(1) Position the fascia and connect the fog lamp
electrical connectors.
(2) Install the upper screws.
(3) Install the fascia to wheel splash shield screws.
(4) Install the nuts attaching the fascia to the
fender and tighten too 6 N·m (50 in. lbs.).
(5) Install the nine lower screws.
FRONT FASCIA - EXPORT
REMOVAL - EXPORT
(1) Raise and support the vehicle (Refer to LUBRI-
CATION & MAINTENANCE/HOISTING - STAN-
DARD PROCEDURE).
(2) Remove the headlamp washer nozzle covers
(Refer to 8 - ELECTRICAL/WIPERS/WASHERS/
WASHER NOZZLE - REMOVAL).
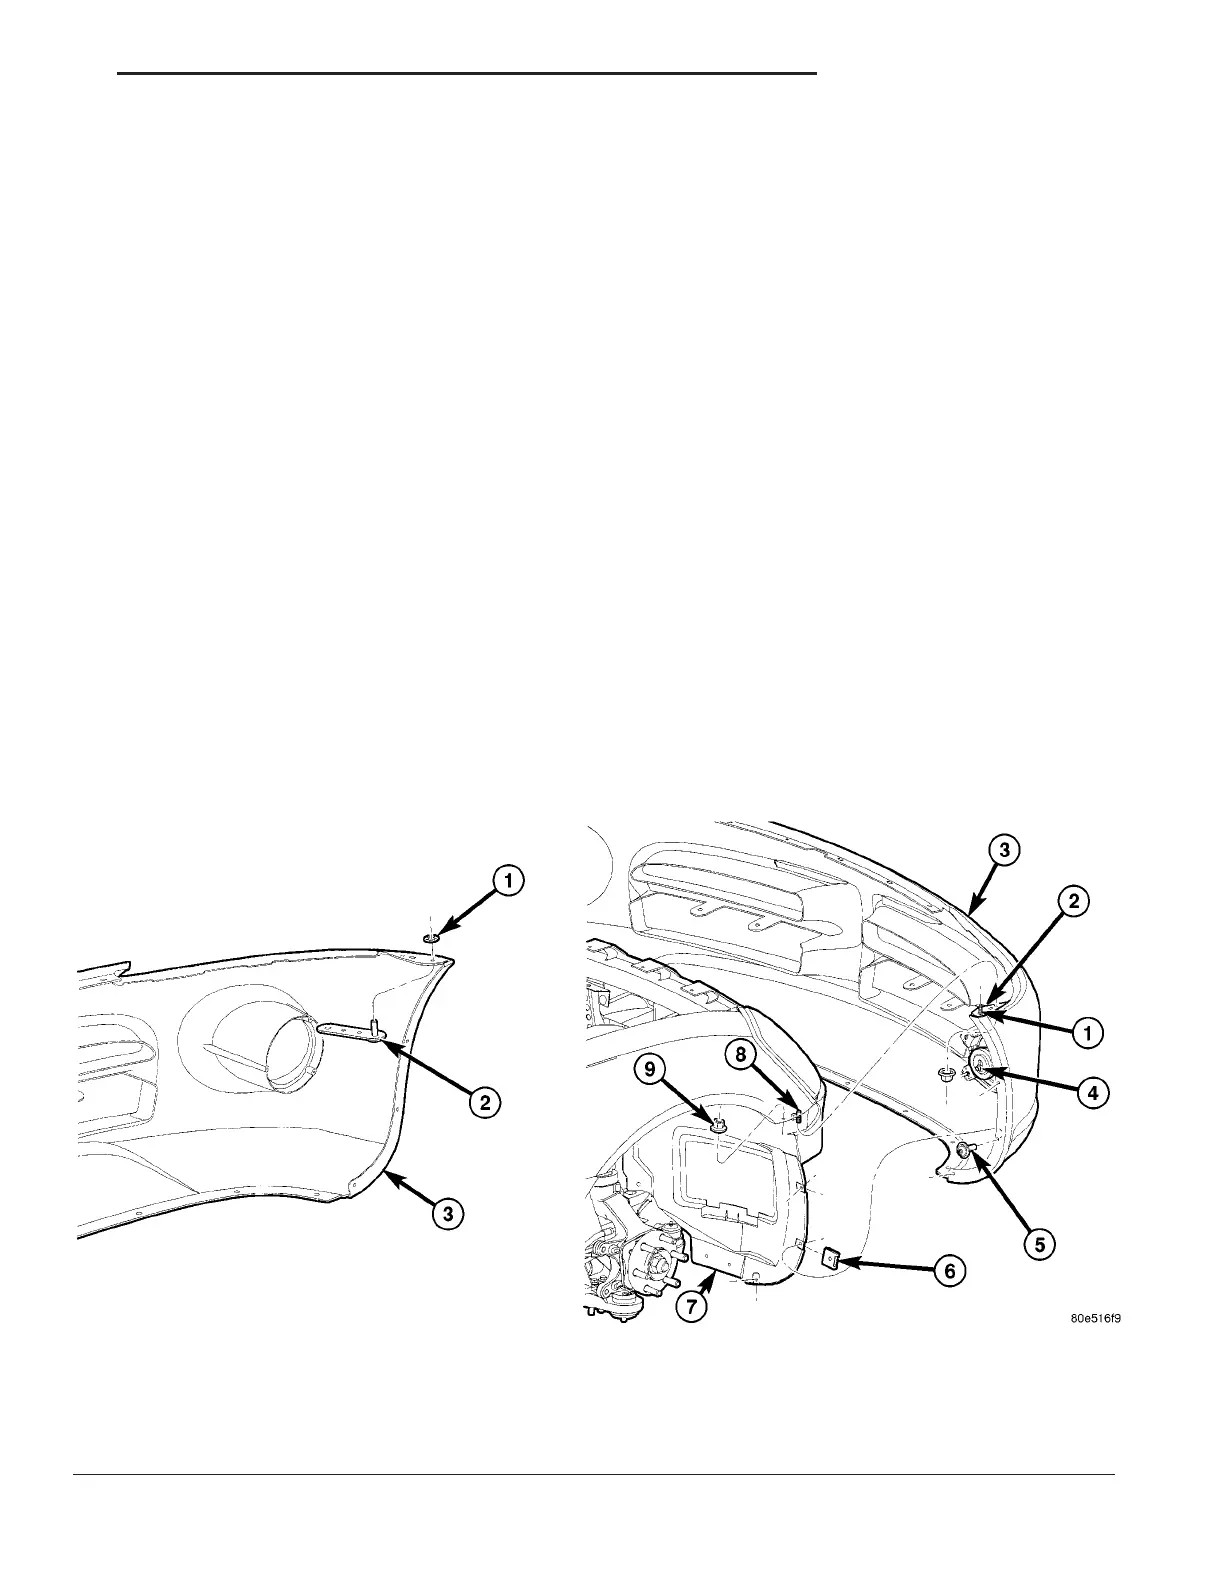
(3) Remove the nine lower screws (Fig. 4).
(4) Remove the splash shield access panels and
remove the nuts attaching the fascia to the fender
(Fig. 3).
(5) Remove the remaining wheel opening fasten-
ers.
(6) Remove the upper screws and remove the fas-
cia.
(7) Disconnect the fog lamps.
INSTALLATION - EXPORT
NOTE: When installing a new fascia, use the sup-
plied template to cut holes for the headlamp wash-
ers/covers.
(1) Position the fascia and connect the fog lamp
electrical connectors.
(2) Install the upper screws.
(3) Install the fascia to wheel splash shield screws.
(4) Install the nuts attaching the fascia to the
fender and tighten too 6 N·m (50 in. lbs.).
(5) Install the nine lower screws.
Fig. 3 FASCIA TO FENDER ATTACHMENT
1 - PUSH ON SPRING NUT
2 - STUD PLATE
3 - FASCIA, FRONT
4 - FOG LAMP
5 - SCREW
6 - SPRING NUT
7 - HEADLAMP MOUNT SUPPORT
8 - STUD WITH FENDER ASSEMBLY
9 - FASCIA TO FENDER NUT
ZB FRAME & BUMPERS 13 - 3
FRONT FASCIA (Continued)






 To Next Page