Add Text Element
To add a text element into a label design:
1. In the label creator's side menu select the Element tab.
2. Select the Add menu.
3.
Select Text.
4.
Enter the required text using the on screen keyboard.
Note The keyboard type and language can be changed by selecting the
appropriate icon at the bottom of the text entry screen.
5. Select the green Tick icon to add the text element to the label design.
6.
In the label design area, select the text element.
7.
In the label creator's side menu select the Element tab.
8. Select the Edit menu.
9.
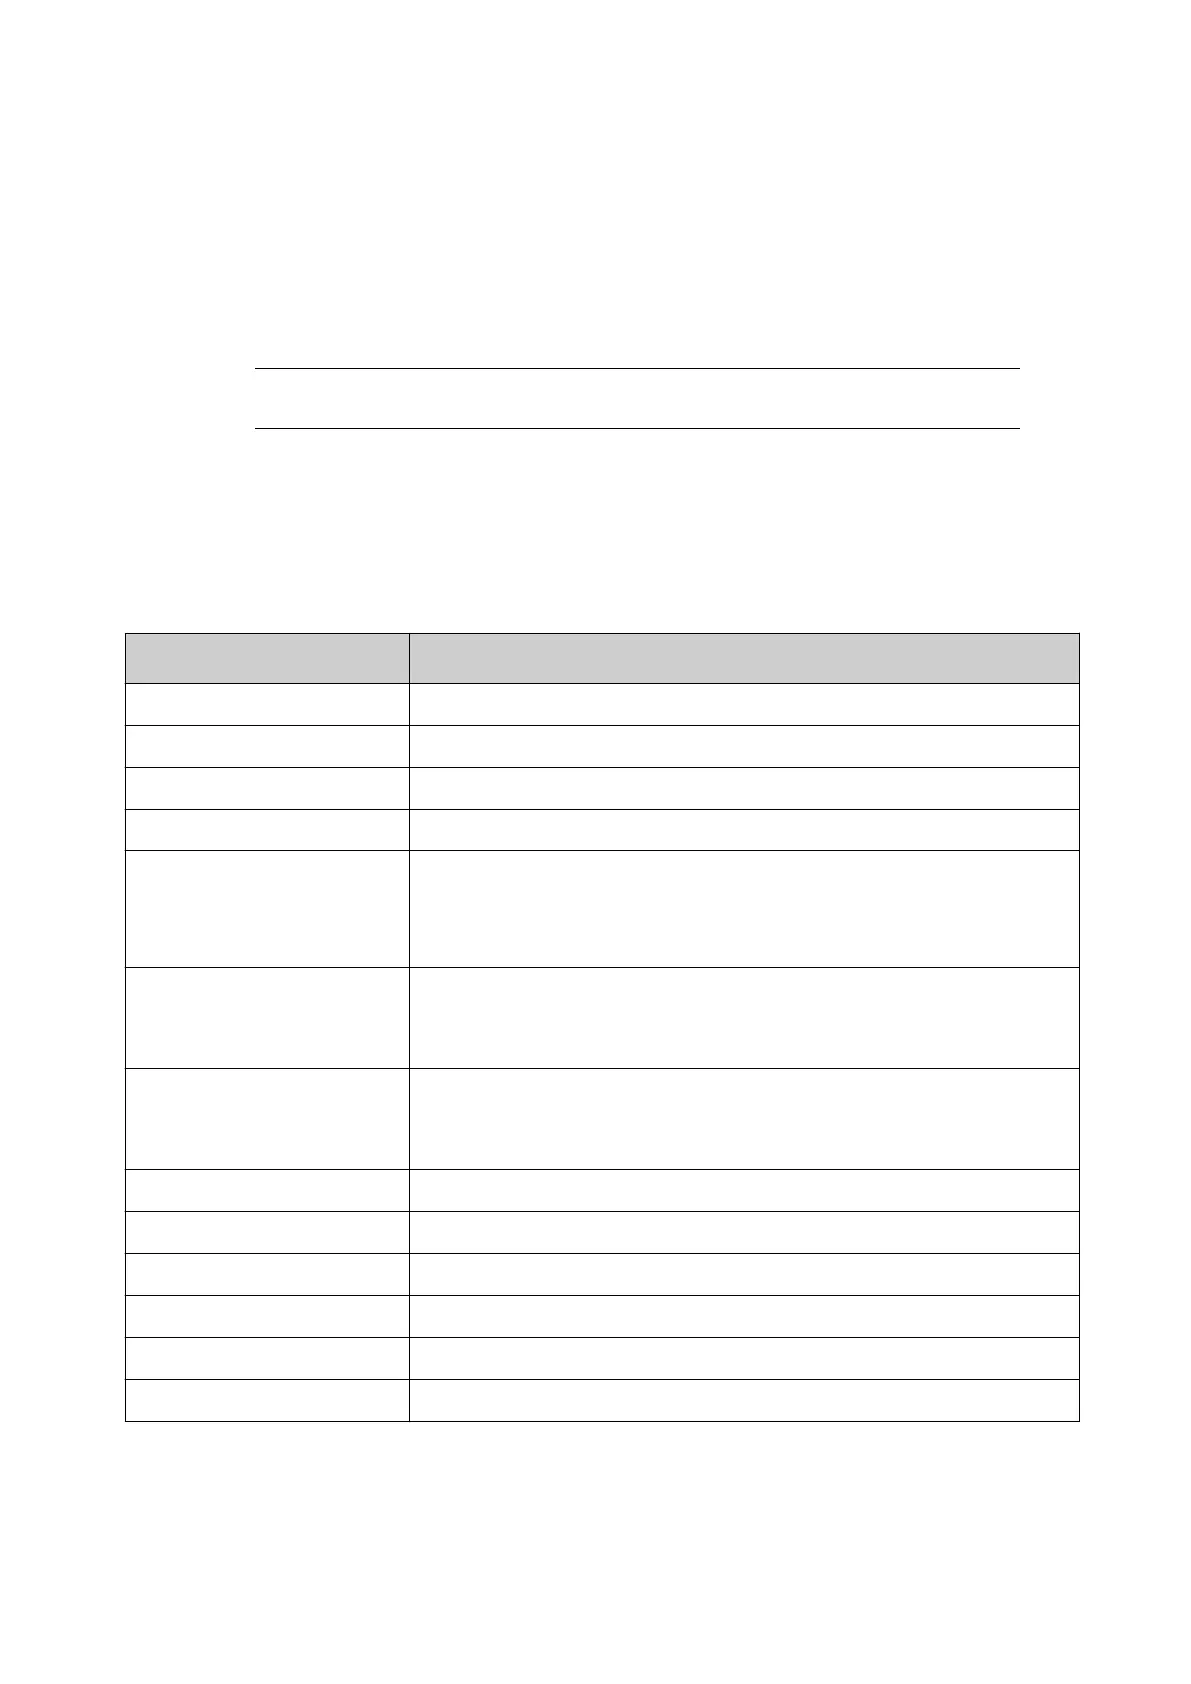
The settings described in the table below can now be defined:
Setting Name Explanation
Name Edit the name of the element.
Horizontal position (mm) Set the element's horizontal location in the label.
Vertical position (mm) Set the element's vertical location in the label.
Font Select the font type.
Maximised font rendering Choose how the font size/height will be set:
• Enabled = Set the font size by "Height (mm)".
•
Not enabled = Set the font size by "Font size (pt)".
Height (mm)
Note This setting is only visible if "Maximised font
rendering" is enabled.
Set the font height in mm.
Font size (pt)
Note This setting is only visible if "Maximised font
rendering" is not enabled.
Select the font size in pt.
Inter-character gap (mm) Adjust the space between each character.
Text width reduce (%) Adjust the width of the text element.
Bold Enable/disable bold characters.
Alignment Align the element to the left, centre or right of the label.
Rotation Rotate the element by 0°, 90°, 180° or 270°.
Chimney-Tower print Arrange the characters so they are stacked one below the other.
OPERATION
EPT053091 - Issue 5 - 07 May 2021 138
 Loading...