15 | Examples of settings
166
D-ISC 100 x xx2
Fig.15.16: Add/remove sensor menu 3.2.1.3 I
Select a free (not assigned) sensor channel (
here S3 ≙ menu
3.2.1.3
) and confirm with .
Fig.15.17: Add sensor menu 3.2.1.3 II
Edit
Use the arrow keys on the keypad (
) to navigate to the
"Edit" button and activate the manual address input by pressing
the
key. Now if you know the device address, input it into the
address field. Otherwise: see "Scan" below.
The input is made using the arrow keys (
) and the key
(keypad on the housing). For ease of input, you can also use the
key to open a "virtual keyboard".
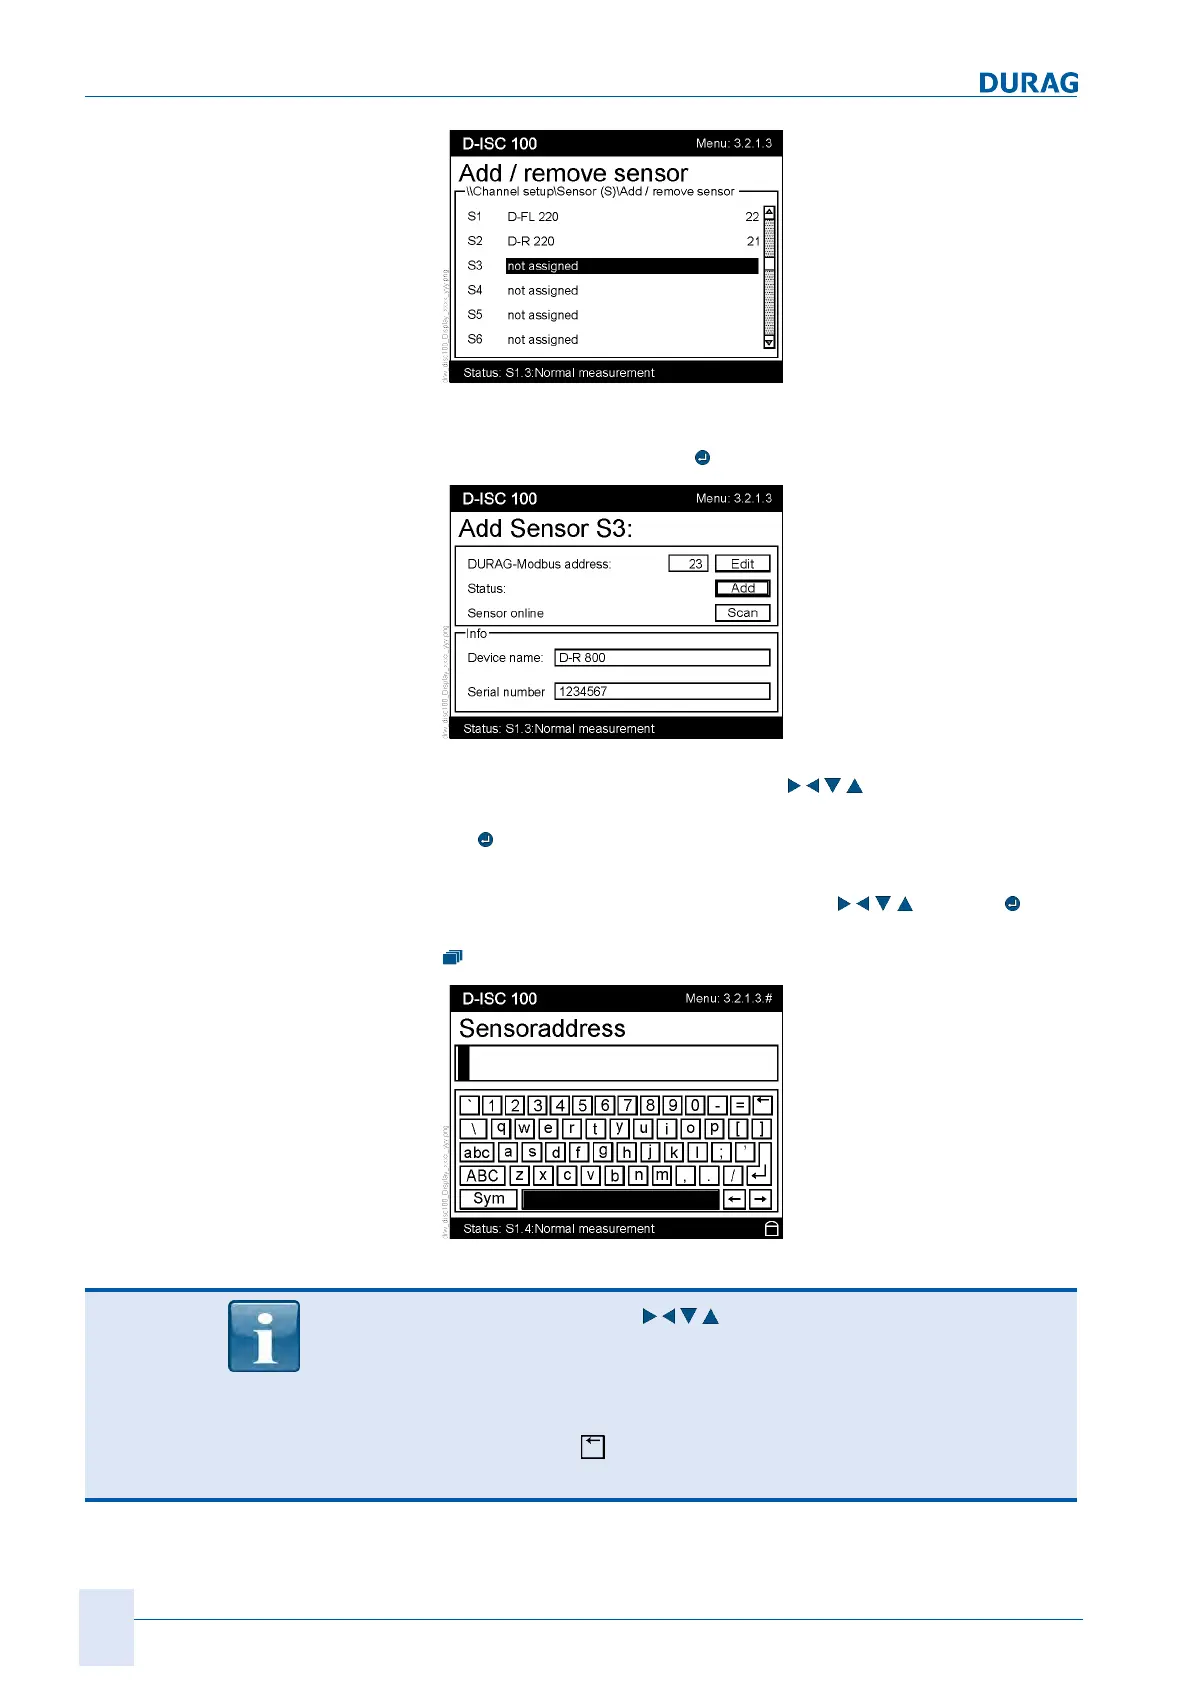
Fig.15.18: Sensor address menu 3.2.1.3.# with virtual on-screen keyboard
Use the arrow keys ( ) (keypad on the housing) to
navigate between the keys of the virtual keyboard. The current
character is shown against a black background (
in this example
the space bar
).
You can go back a step (delete the last character) by pressing
the Back key (
) at the top right-hand side of the virtual
keyboard.
 Loading...