Operation
Operating manual 171/173 Version 01.0 - 01/201620
5.2 Inserting and replacing the needle
Sequence
After changing to needles with strength 100 or greater,
have a technician adjust the needle
evasive movement
of the looper (ellipse width). The correct settings are described
in the Service manual.
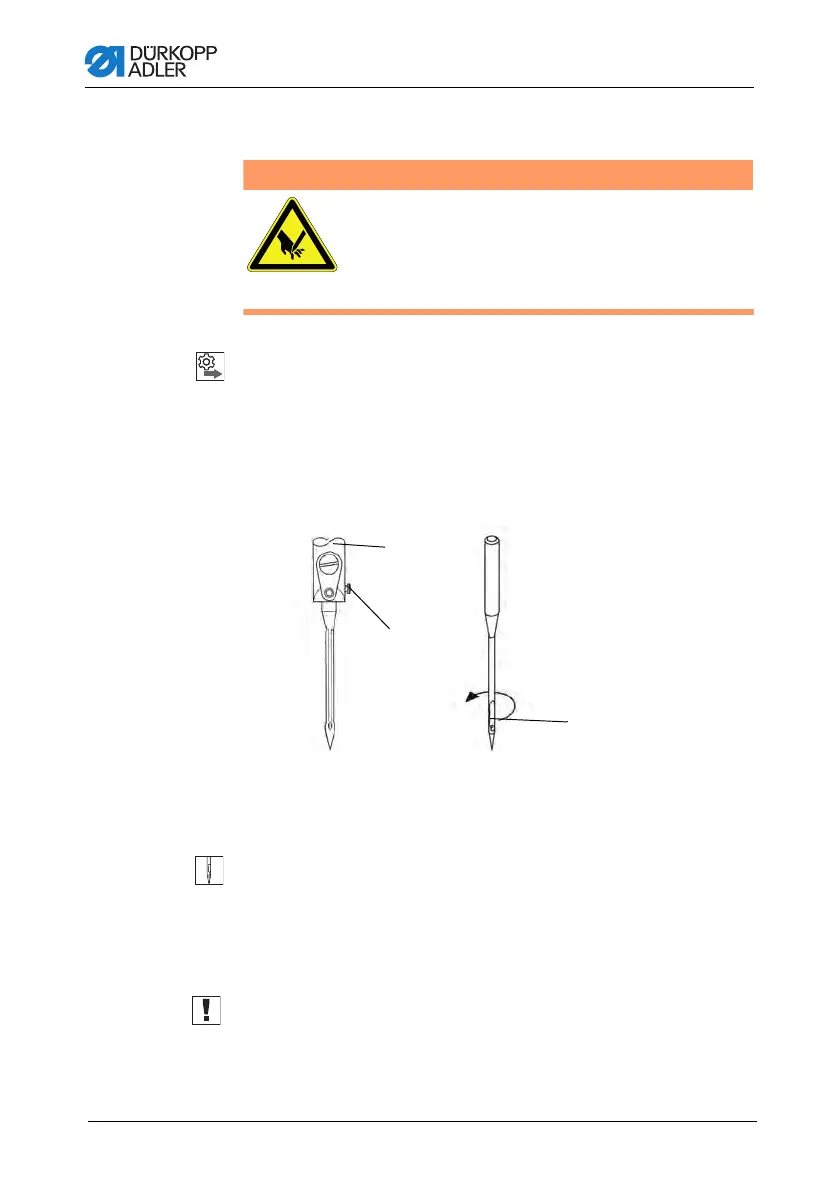
Fig. 3: Inserting and replacing the needle
1. Turn the handwheel until the needle bar (1) reaches
the upper end position.
2. Loosen the fastening screw (2).
3. Pull the needle out downwards.
4. Insert the new needle.
5. Important: Alig
n the needle so that the groove (3) faces
to the rear.
6. Tighten the fastening screw (2).
Risk of injury from the needle point
and moving parts.
Switch off the sewing machine before
replacing the needle.
Do not touch the needle point.
WARNING
(1) - Needle bar
(2) - Fastening screw
(3) - Groove
①
②
③
 Loading...


