04/10 MN04020001Z-EN
Control unit
69
Setting parameters
The following table shows a good example of the general
execution for selecting and setting parameters.
h
When the MMX is switched on for the first time, it
activates the Quickstart Wizard to guide you through
specific parameters
(A as per “Step” 2).
Sequen
ce
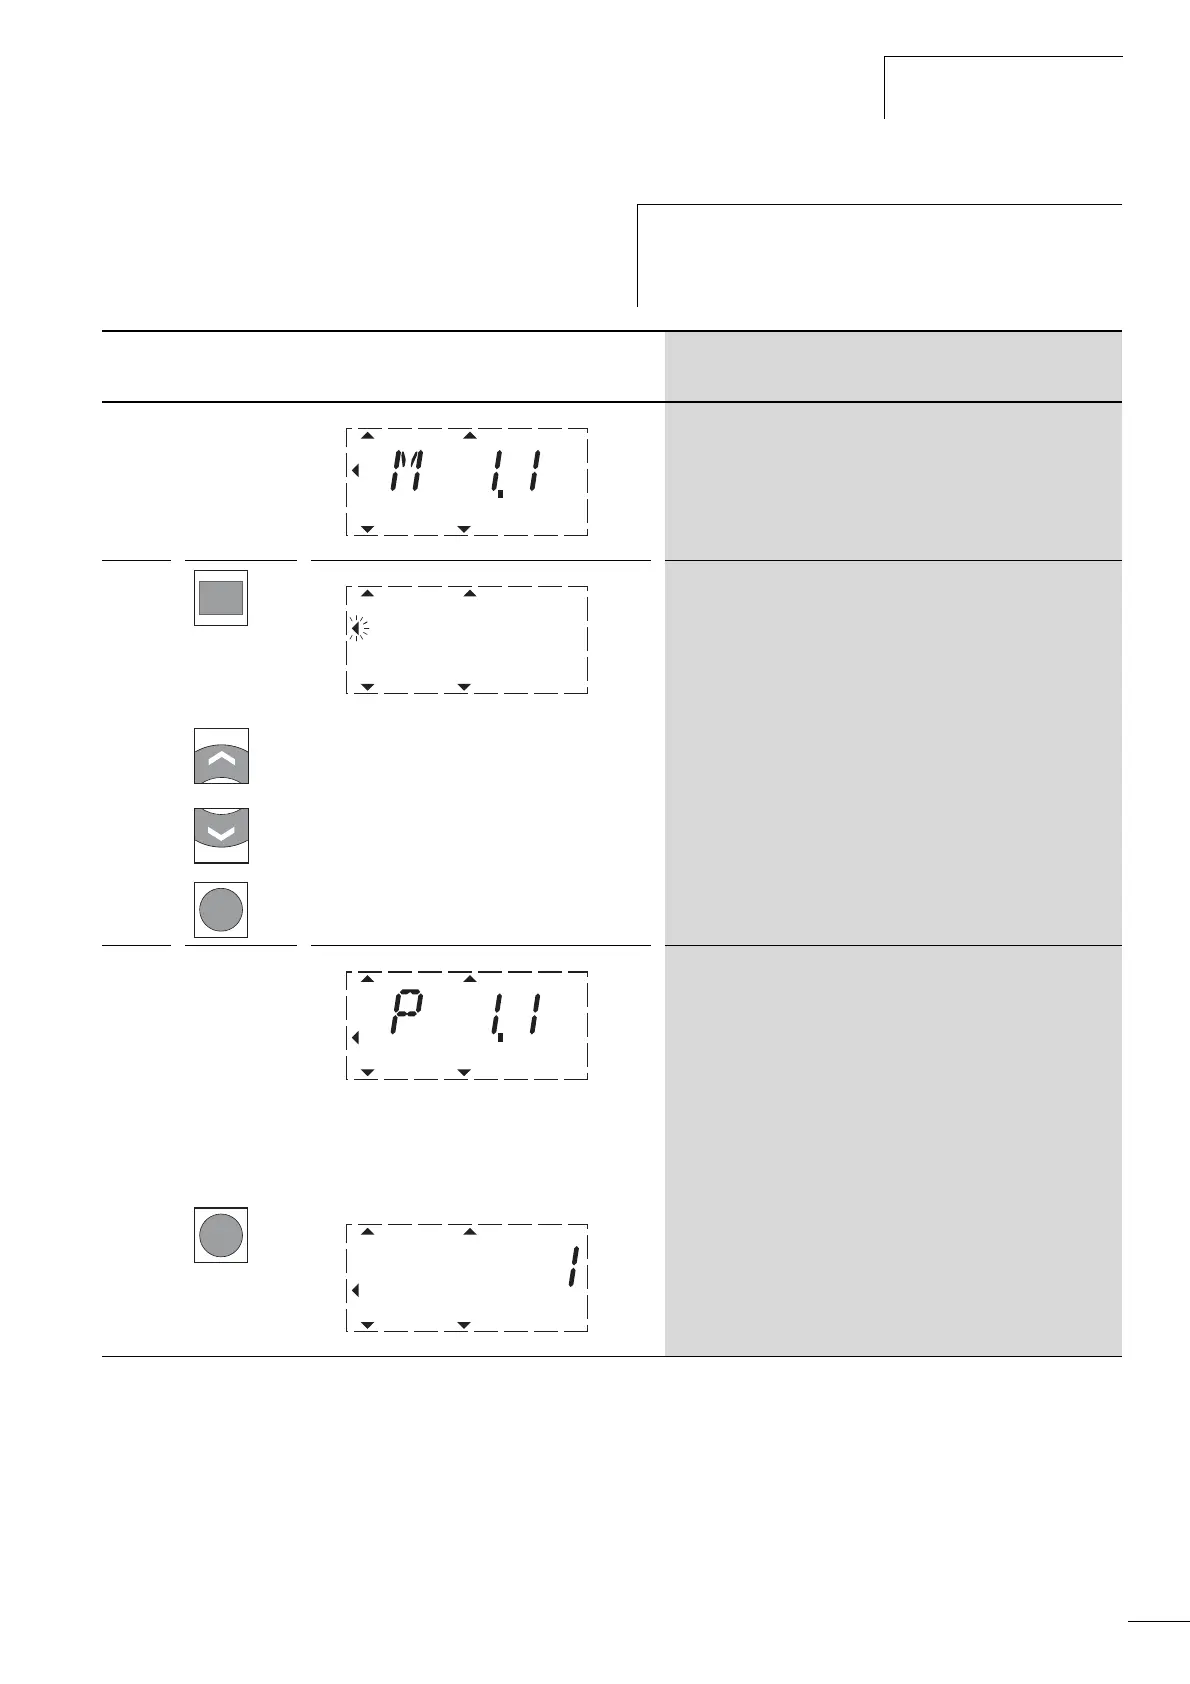
Commands Display Description
0 Measured value 1.1
The display changes automatically with the value of the output
frequency 0.00 Hz (at STOP).
1
By actuating the BACK/RESET button, you activate the menu level
(arrow flashes).
The two arrow buttons enable you to select the individual main
menus:
• REF = Setpoint input (Reference)
• MON = Operational data indicator (Monitor)
• PAR =Parameter levels
• FLT = Fault log (Fault).
Use the OK button to open the selected main menu.
2
The numerical first value is always shown from the selected main
menu.
Example: Main menu PAR, Parameter P1.1
The display automatically switches between the parameter number
and the defined value.
P1.1 =1 is displayed at the first switch on and after the factory
settings have been activated.
L
Display in automatic alternation
M
Use the OK button to activate the selected parameter.
The value (1) flashes.
P1.1 =1:
• The Quickstart Wizard is activated and guides you step-by-step
through the specific drive parameters (a page 72).
RUN STOP ALARM FAULTREADY
REF
FWD REV I/O KEYPAD BUS
MON
PAR
FLT
BACK
RESET
RUN STOP ALARM FAULTREADY
REF
FWD REV I/O KEYPAD BUS
MON
PAR
FLT
OK
RUN STOP ALARM FAULTREADY
REF
FWD REV I/O KEYPAD BUS
MON
PAR
FLT
OK
RUN STOP ALARM FAULTREADY
REF
FWD REV I/O KEYPAD BUS
MON
PAR
FLT
 Loading...