Procedure
1. Install the 2U DAE rails into the cabinet.
The DAE rails should be installed above the topmost component in the cabinet. The
rails must be aligned carefully so that they are level front to back and with the
companion rail left to right.
Refer to Figure 49 on page 67 while performing the procedure that follows.
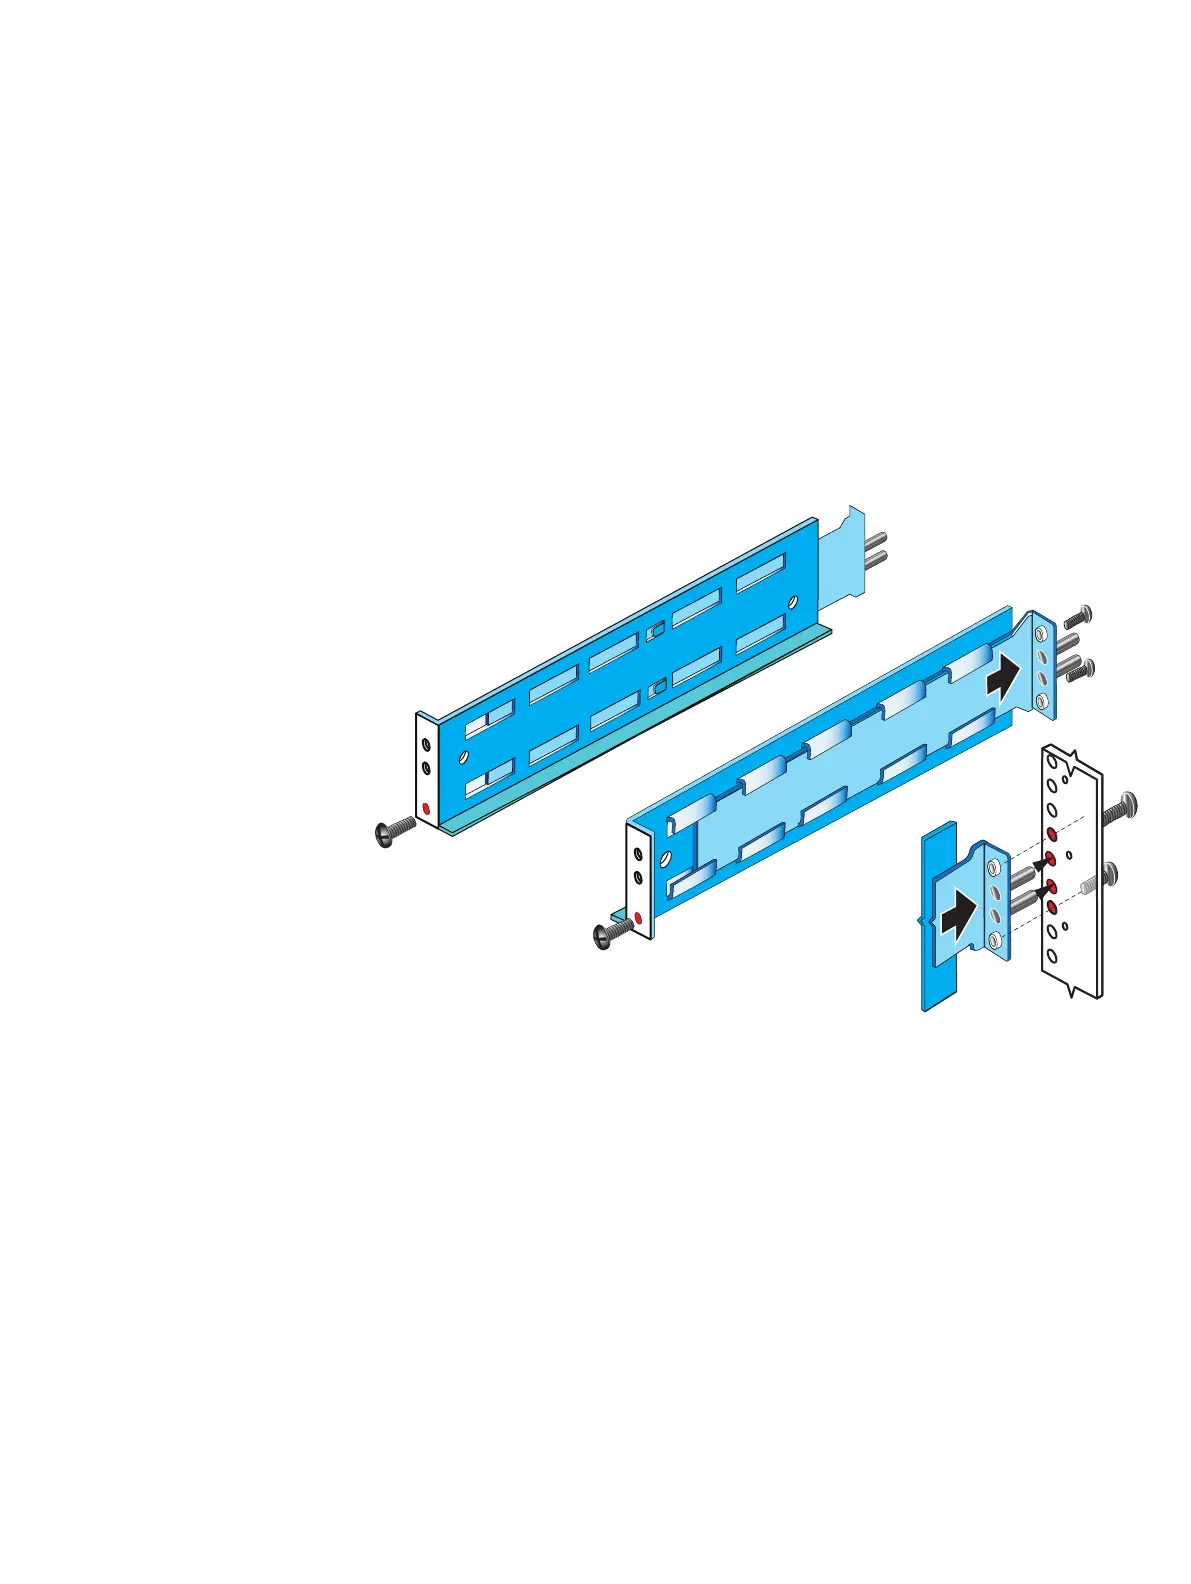
a. Insert the adjustable rail slide and seat both alignment pins into the rear channel
of your cabinet.
b. Extend the rail and align the front of the rails.
2. Insert one screw in the lowest hole of the front and two in the back of each rail.
Figure 49 Installing 2U DAE rails
Install 3U DAE rails
The following procedure shows you how to install 3U DAE rails.
Procedure
1. Install the 3U DAE rails into the cabinet.
The DAE rails should be installed above the topmost component in the cabinet. The
rails must be aligned carefully so that they are level front to back and with the
companion rail left to right.
Refer to Figure 50 on page 68 while performing the procedure that follows.
a. Insert the adjustable rail slide and seat both alignment pins into the rear channel
of your cabinet.
b. Extend the rail and align the front of the rails.
2. Insert two screws in the middle two holes of the front and two retention screws in the
back of each rail.
Add additional storage
Installing DAE rails 67

 Loading...


