Installation and Operation Manual - COMTEC
®
6000 Service and Maintenance
Doc.-ID: COM6000_11022020_EN 37
5.6 Replacing the Filter
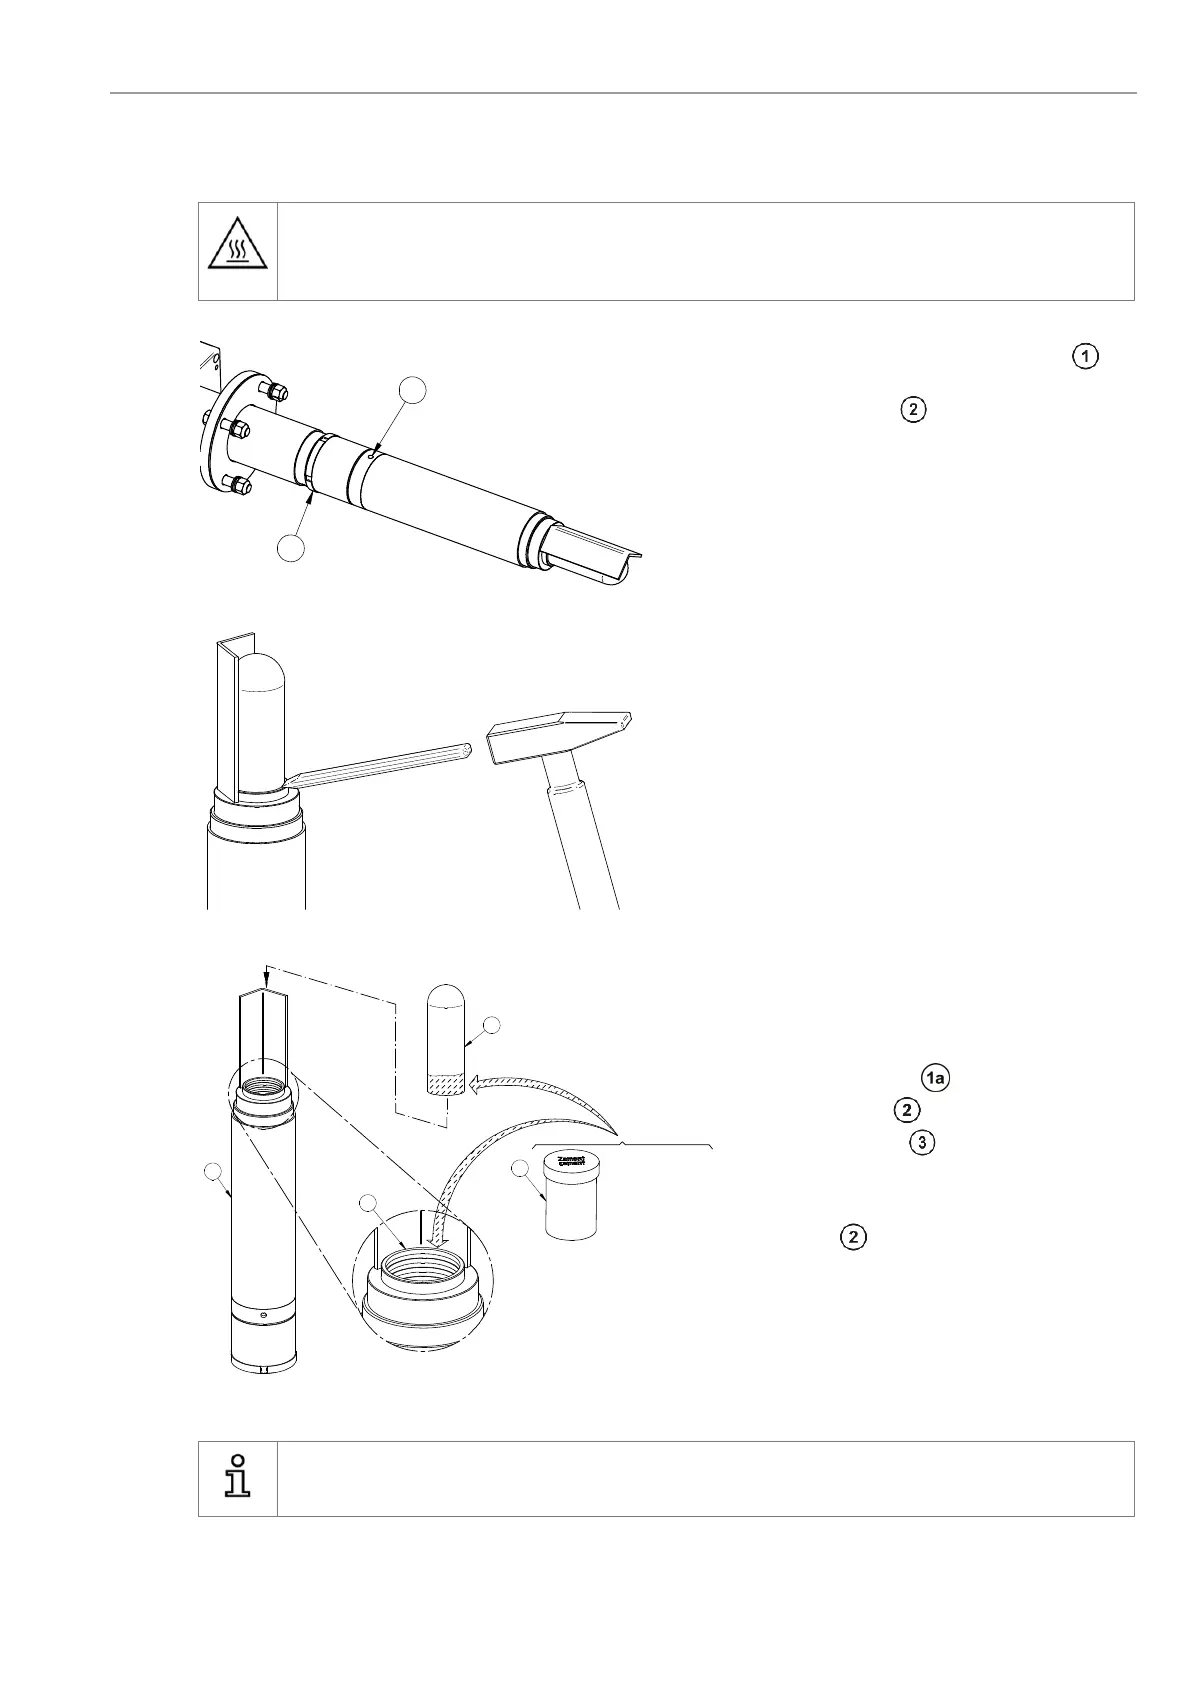
Warning hot surface
The probe may only be removed with heat-insulated gloves. Before removing the probe, always switch off
the supply voltage to the electronic system. After removal, store the probe in a safe, protected place and
wait until it has cooled down below 35°C/95°F.
Loosen the retaining ring at the filter head
with a hook wrench and screw off the filter
head from the probe
with a pin wrench
If needed, a set of spanners for loosening the
filter head can be ordered at ENOTEC. Part-
No.: PST-0002 (for filter heads with retaining
ring). Both sets of spanners additionally have
an Allen key for the loosening of the O
2
sensor
screws.
Figure 31 - Removing the filter head
Clamp the filter head in a vice
Remove filter completely by prying it loose with
a chisel or a similar tool.
Figure 32 - Removing the old filter
Remove all residue and pieces of the old filter.
Also clean the grooves of the filter seat.
Install the new filter as follows:
Mix the supplied glue with water according
to the instructions. Spread the glue into the
grooves of the seat and onto the filter part
which comes into contact with the seat. Push -
turn the filter into the seat. Evenly smooth
the glue between the filter and seat and re-
move all excess glue.
Figure 33 - Glue the filter in place
Info
The cement dries at room temperature within 24 hours. Using the cement supplied by ENOTEC, all types
of ceramic, basalt and sintered metal filters supplied by can be inserted and fixated.
1
2
+ H2O
1
1a
2
3