3-12
Using the Printer Software for Windows
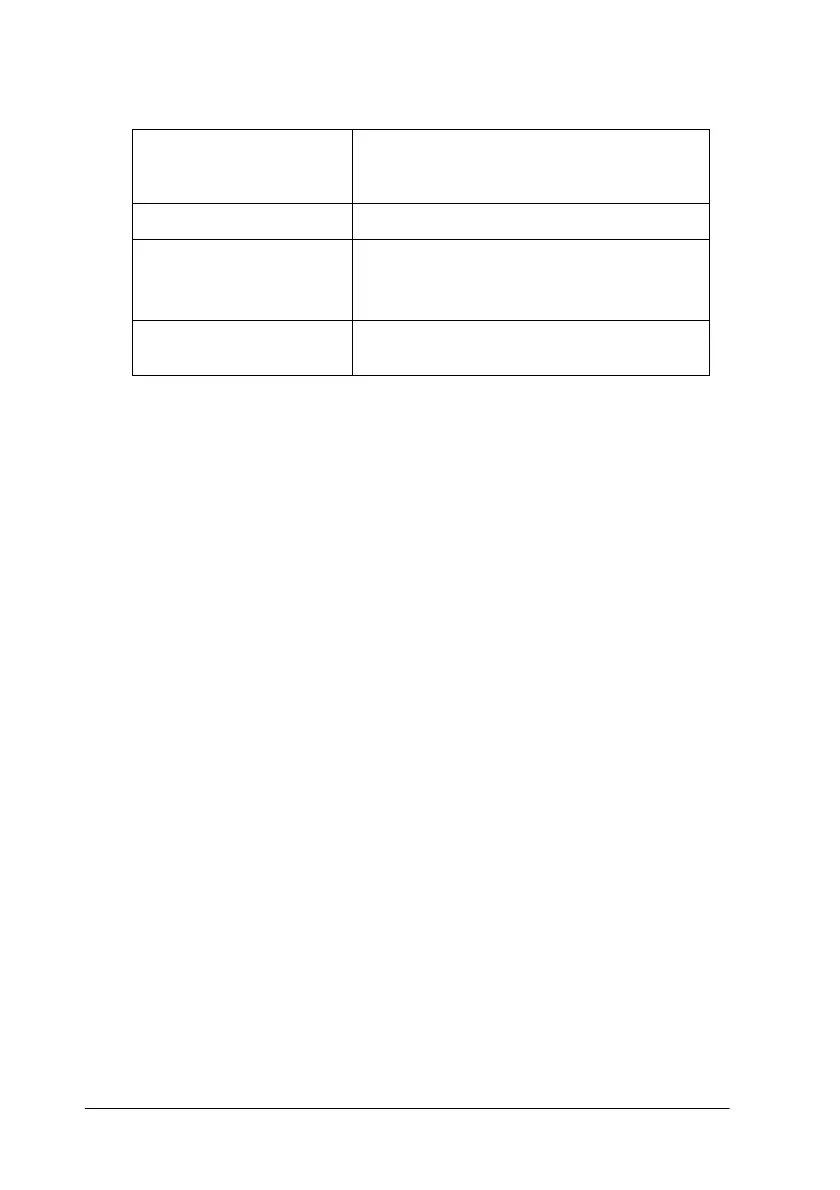
You can select from the following ready-made settings.
When you select a Custom setting, other settings such as Print
Quality, Halftoning, and Color Adjustment are made
automatically. Changes to these settings are reflected in the
display on the left side of the Main menu.
Follow the steps below to select a Custom setting.
1. Select
Custom
as the Mode setting on the Main menu.
Note:
For Windows 3.1 users, the
Custom
radio button referred to above
appears as the
Advanced
radio button in the printer driver.
2. Click anywhere in the list box to open it, then select the most
appropriate setting for the type of document or image that
you will print.
3. Verify the Media Type and Ink settings before printing, as
these settings may be affected by the Custom setting that you
select. See “Making the Media Type setting” on page 3-5 for
details.
Text/Graph This setting is good for printing
presentation documents such as graphs
and charts.
Economy This setting is best for printing drafts of text.
ICM
(For Windows 98, 95,
and 2000)
This setting automatically adjusts printout
colors to match the colors on your screen.
ICM stands for Image Color Matching.
sRGB This setting is best for color matching with
other sRGB devices.
 Loading...


