3.1 Unit Level Troubleshooting
When a problem occurs, you can identify the defective unit according to the symptoms
exhibits. The table below lists the symptoms of certain problems. Once the problem is
identified, refer to the flowchart that corresponds to the problem.
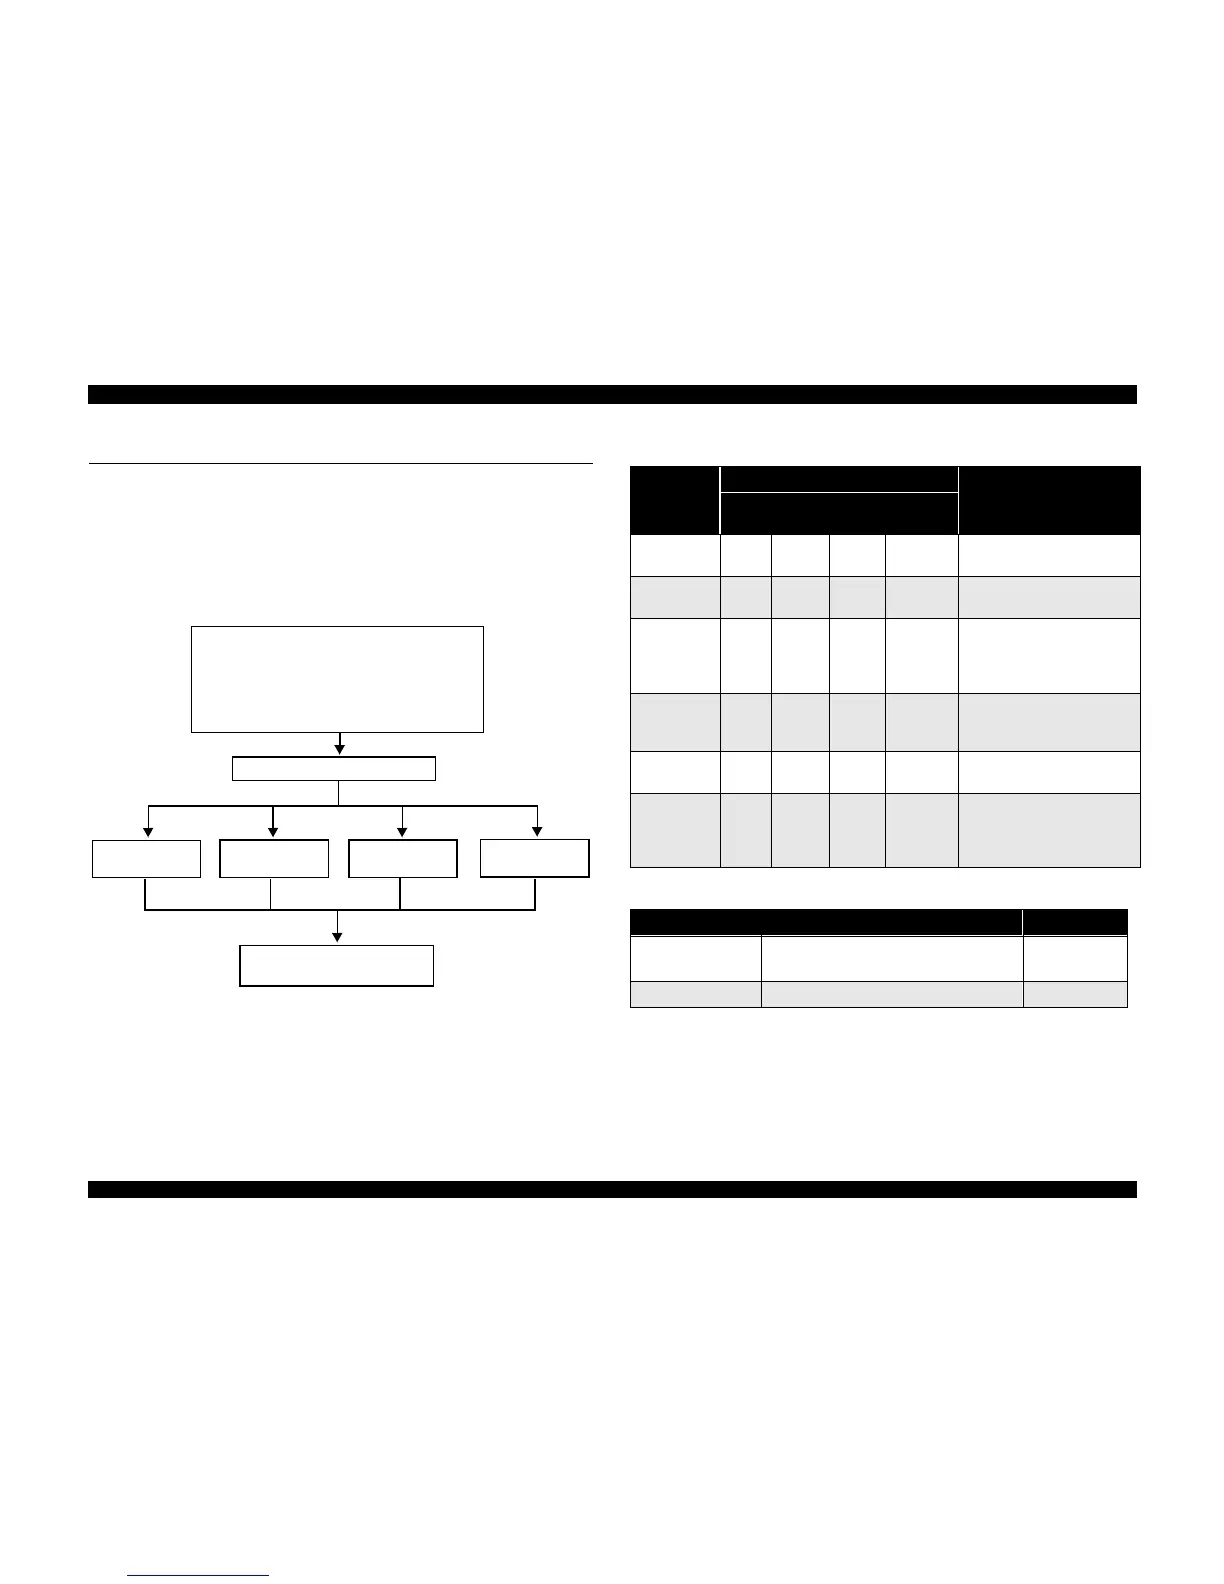
The following flowchart illustrates the main steps of the troubleshooting process.
NOTE: There is a special section for motors and sensors that starts on page82.
Figure 3-1. Troubleshooting Process Flowchart
Diagnose problem
o Table 3-1, “Printer Condition and Panel
Status”
o Table 3-2, “Symptoms and Problems”
Power Supply
Board, page79
MAIN Board,
page75
Printer Mechanism,
page66
Scanner
Mechanism,
page70
Reassembly = Chapter 4
Adjustment = Chapter 5
Service/replace the:
Table 3-1. Printer Condition and Panel Status
Error Status
Indicators
Recovery
Power
Ink out
(Black)
Ink Out
(Color)
Paper Out
Paper Out --- --- --- On
Load paper by pressing the load/
eject button.
Paper jam
condition
--- Off Off Blink
Eliminate a paper then press the
load/eject button.
No Ink
cartridge or
Ink end
(black)
--- On --- ---
Install a new black ink cartridge
by pressing the load/eject button
for 3 seconds.
No Ink
cartridge or
Ink end (color)
--- --- On ---
Install a new color ink cartridge
by pressing the load/eject button
for 3 seconds.
Maintenance
request
Blink Blink Blink Blink
Change the waste ink drain tank
and reset the EEPROM.
Fatal error Blink On On Blink
Turn the printer off and on
again. If the printer does not
recover, repair the appropriate
part.
Table 3-2. Symptoms and Problems
Symptom Problem Flowchart No.
Printer does not
operate at power on.
LEDs do not light.
Printer mechanism does not operate.
Flowchart 3-1
Error is detected Error is indicated by LED indication. Flowchart 3-2

 Loading...


