4.2.1 Removing the Housing
4.2.1.1 Front cover assembly
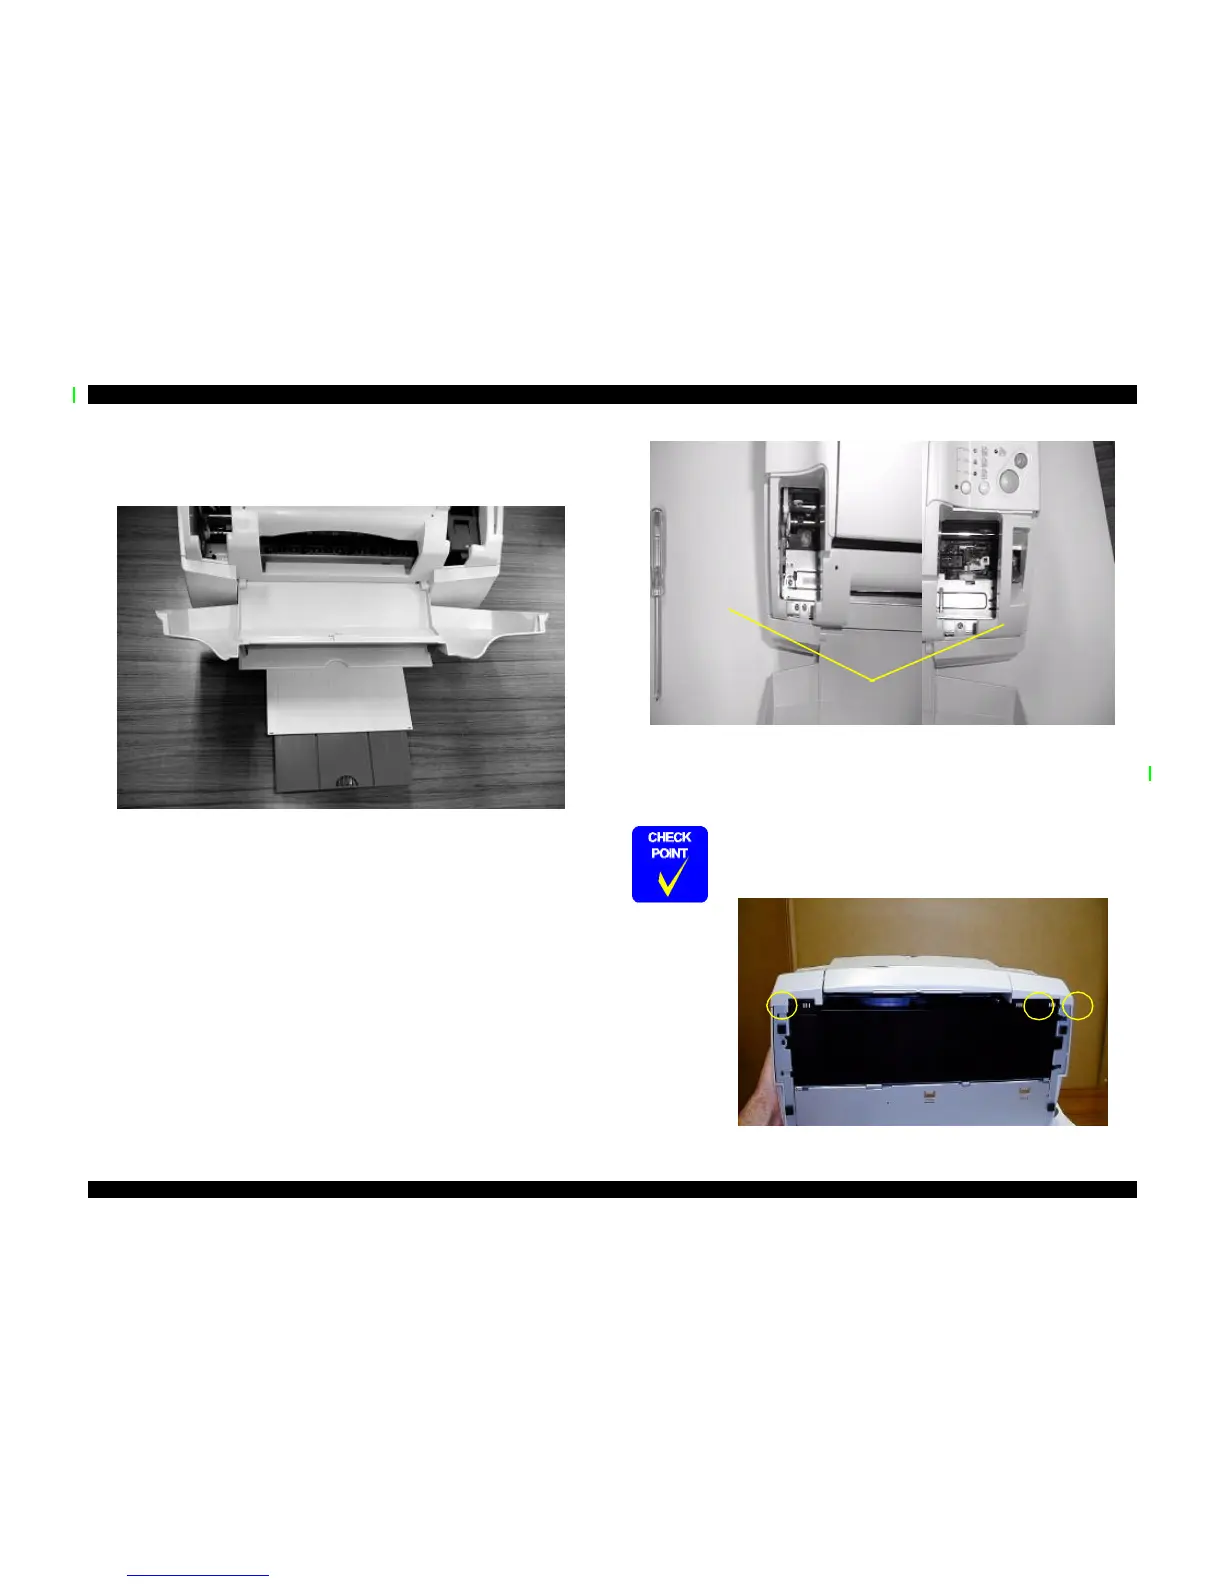
1. Open the paper eject tray and the front cover. These two pieces are held in place by the
left and right lower covers, so removing the right or left lower cover may cause the
eject tray and front cover to drop.
2. Remove one screw (CBS 3x6) securing the left lower cover and one screw (CBS 3x6)
securing the right lower cover.
3. While supporting the paper eject tray and the front cover with your free hand, pull
either of the lower covers out and down from the top (if necessary, lift the front of the
Stylus Scan). This will free the paper eject tray and front cover so you can place them
aside.
When reinstalling the front cover assembly, make sure the pegs at the
bottom of the lower covers are visible through the holes in the waste
ink tank. If some pegs are not visible, the pegs are bent and a lower
cover has not been installed correctly.
Two Screws (CBS 3x6)
Three sets of three pegs each.

 Loading...


