EasyManuals Logo

Epson Stylus Scan 2000 Service Manual

Epson Stylus Scan 2000
264 pages
To Next Page IconTo Next Page
To Previous Page IconTo Previous Page
Page #92 background imageLoading...
Page #92 background image
EPSON Stylus Scan 2000
Revision A
Disassembly & Assembly
Disassembly Procedures
91
4.2.1.2 Rear cover
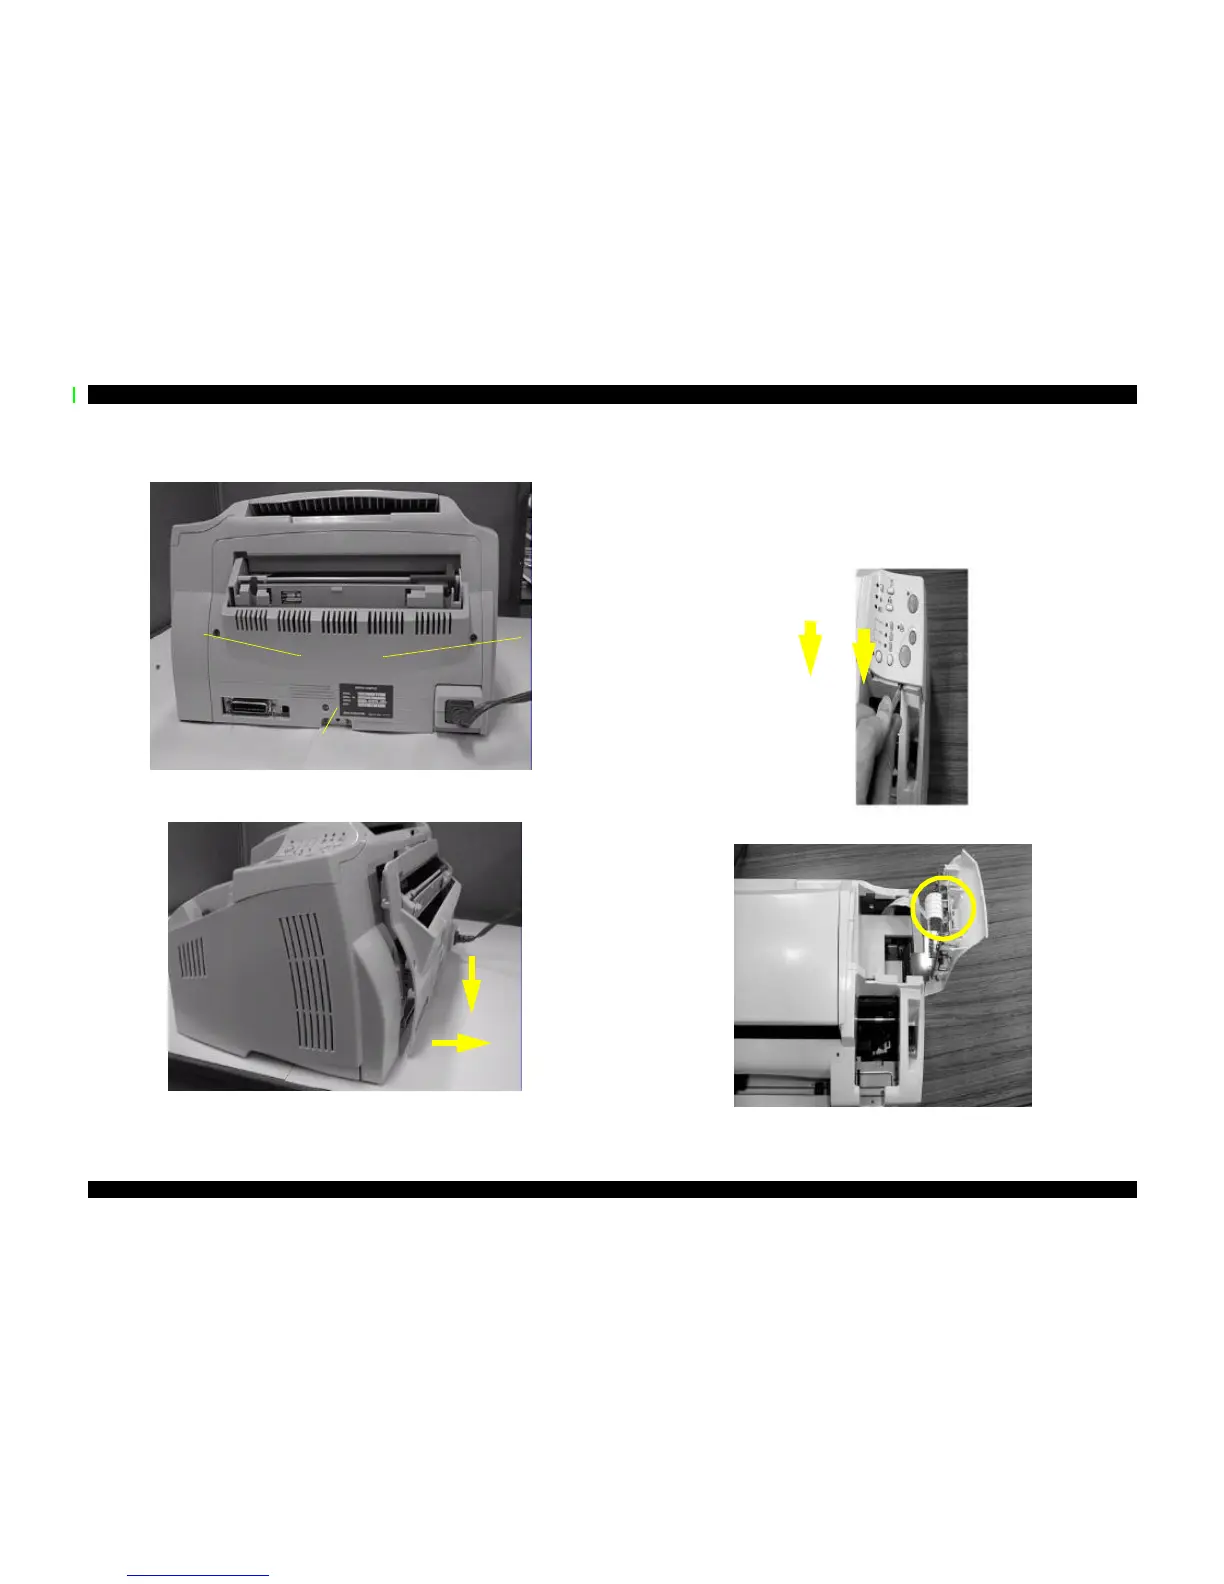
1. Remove three screws (two x CBP 3x8 and one x CBS 3x6).
2. As shown below, pull the rear cover down (#1) and out (#2) to remove it. (Try this over
the edge of your desk if you have difficulty.)
4.2.1.3 Control panel
1. Using a flat tip screwdriver or similar tool, push in the two hooks of the control panel
while lifting up the control panel.
NOTE: You may find that you can remove the control panel by pushing in the hook on the
right only, as shown below.
2. Remove the FFC from the control panel.
Two Screws
(CBP 3x8)
One screw (CBS
3x6)
1
2
FFC

Table of Contents

Other manuals for Epson Stylus Scan 2000

Questions and Answers:

Question and Answer IconNeed help?

Do you have a question about the Epson Stylus Scan 2000 and is the answer not in the manual?

Epson Stylus Scan 2000 Specifications

General IconGeneral
BrandEpson
ModelStylus Scan 2000
CategoryAll in One Printer
LanguageEnglish

Related product manuals