EasyManuals Logo

Epson Stylus Scan 2000 Service Manual

Epson Stylus Scan 2000
264 pages
To Next Page IconTo Next Page
To Previous Page IconTo Previous Page
Page #93 background imageLoading...
Page #93 background image
EPSON Stylus Scan 2000
Revision A
Disassembly & Assembly
Disassembly Procedures
92
4.2.1.4 Upper cover
NOTE: Before removing the upper cover, you may wish to remove the control panel as
described in the previous section. If you do not remove it first, keep in mind that
you need to remove the control panel FFC during step 4 below.
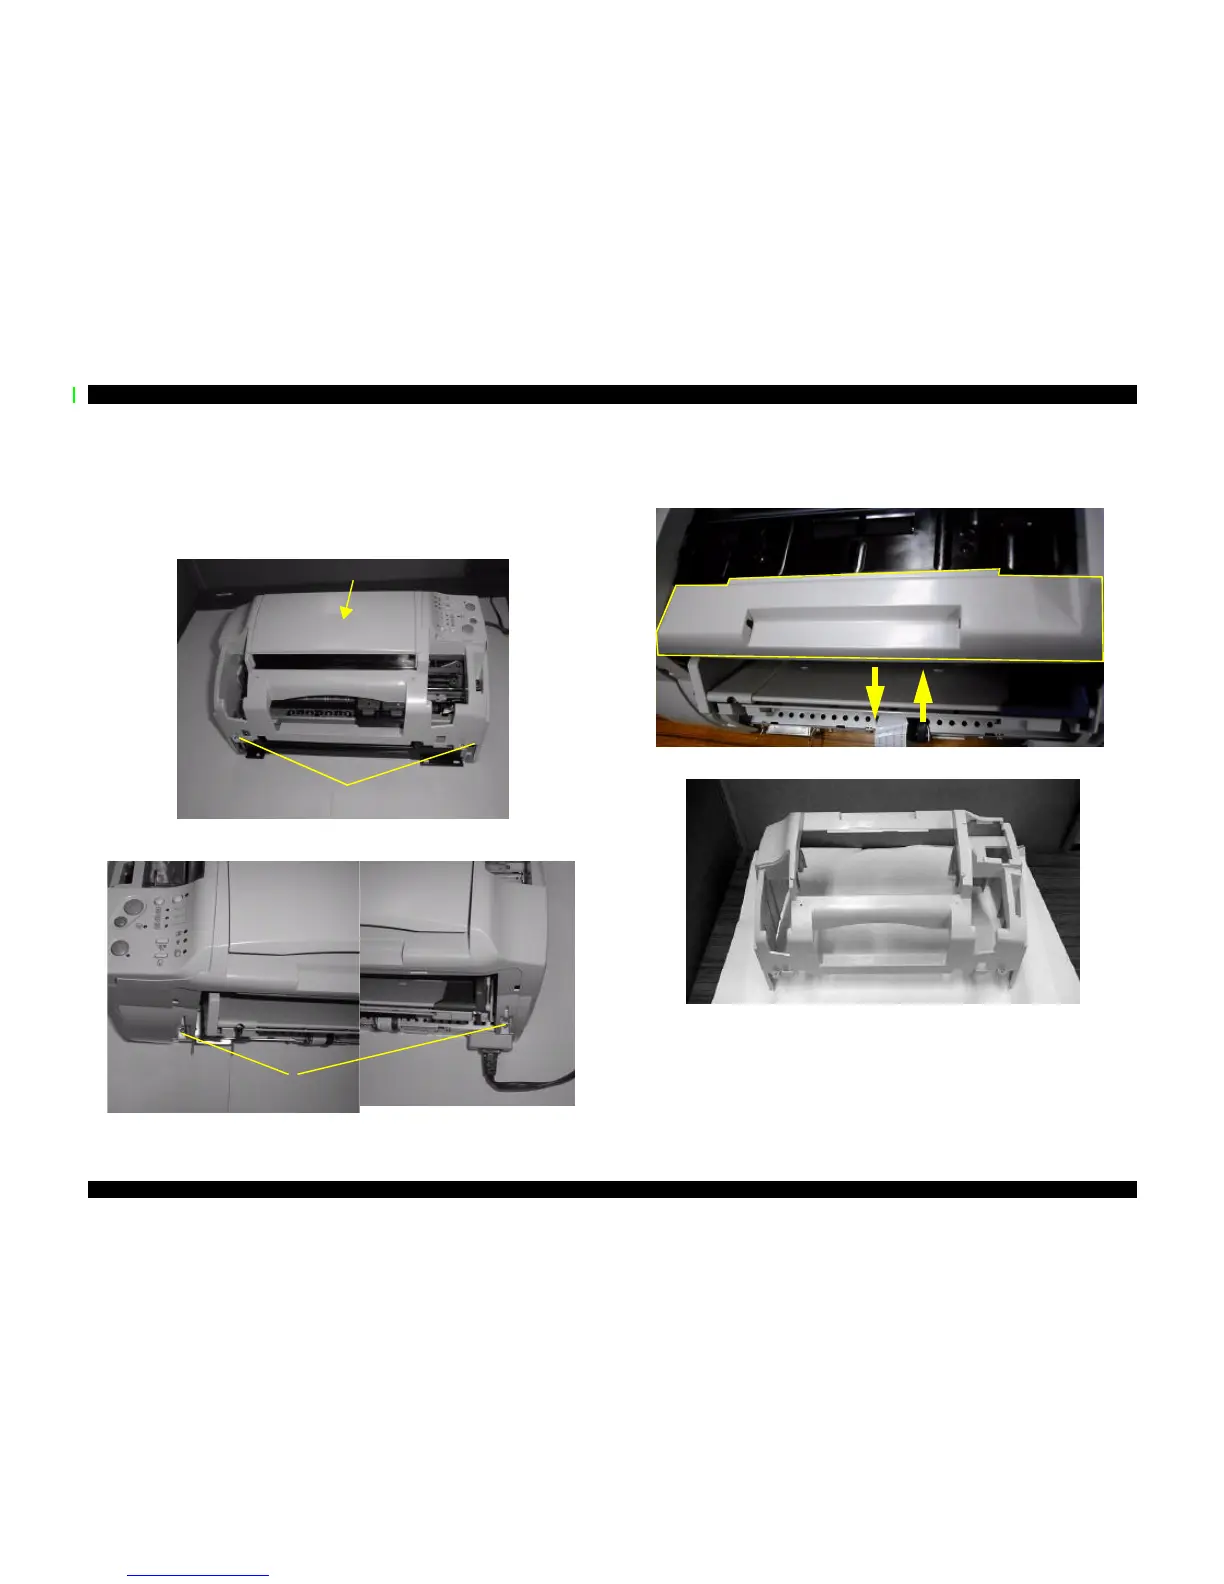
1. Remove two screws from the front (CBS 3x6).
2. Remove two screws from the back (CBS 3x6).
3. Open the scanner cover, and pull the upper cover to the rear to remove its projection
from under the scanner’s edge (black); then release so the upper cover is above the
scanner’s edge.
4. Lift up the upper cover and remove it.
Figure 4-1. Upper cover (from front)
Screws (CBS 3x6)
Scanner cover
Screws (CBS
3x6)
1
2

Table of Contents

Other manuals for Epson Stylus Scan 2000

Questions and Answers:

Question and Answer IconNeed help?

Do you have a question about the Epson Stylus Scan 2000 and is the answer not in the manual?

Epson Stylus Scan 2000 Specifications

General IconGeneral
BrandEpson
ModelStylus Scan 2000
CategoryAll in One Printer
LanguageEnglish

Related product manuals