FaroArm
®
Manual
January 2009
23
Chapter 1: Introduction to the FaroArm
®
• Renishaw (CK200) cleaning kit
• A magnetized TP-20 probe body
• Three separate magnetized TP-20 probe modules, which connect to
the TP-20 probe body.
N
OTE: The product numbers in the parentheses are Renishaw part
numbers. See the Renishaw User’s Manual for more details.
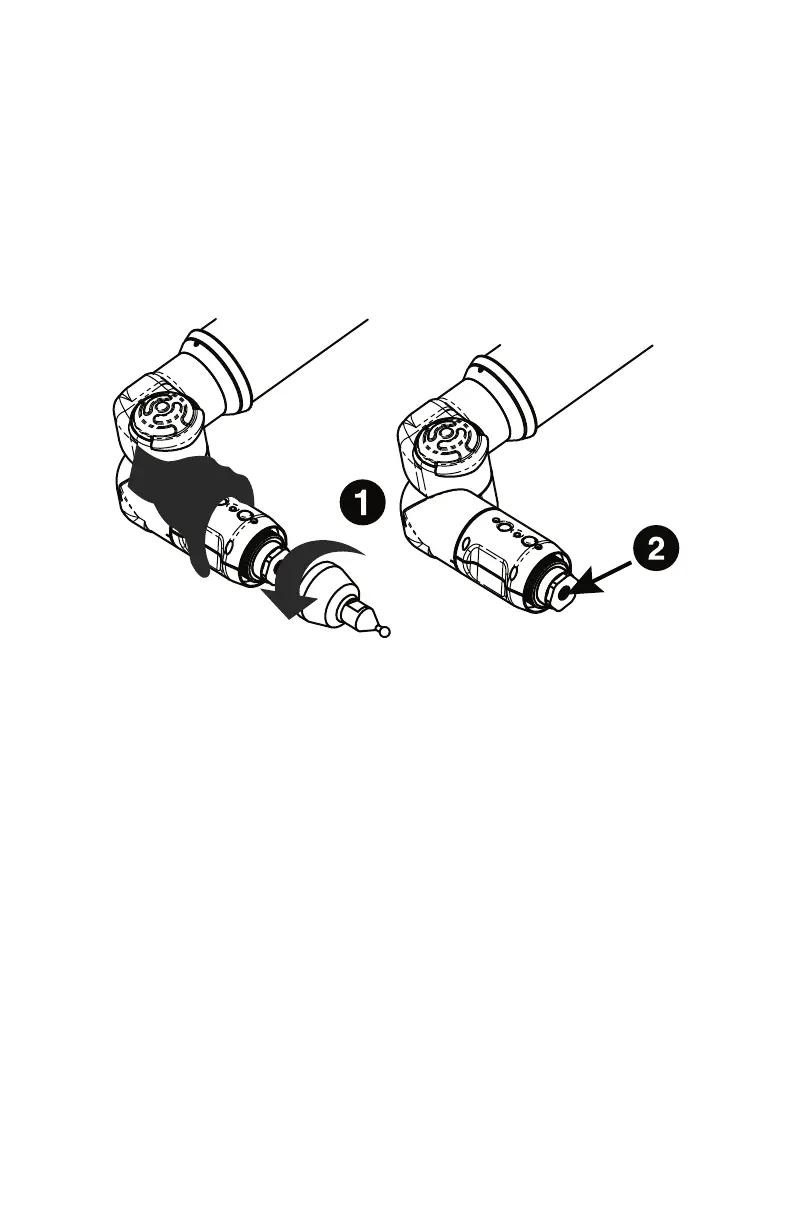
To install the TP-20 Probe:
1 Remove the current probe.
2 Remove the set screw using the supplied hex wrench.
3 Screw the TP-20 probe body into the FaroArm and hand-tighten
with the C Spanner (S9) wrench.
4 Attach a probe module to the TP-20 probe body. On the probe body
and probe module are triangle, half-moon, and square markers that
must be aligned for the probe to work properly.
5 Screw the Renishaw Probe tip into the probe module with the stylus
tool (S7). Do not under- or over-tighten any of the components.
I
MPORTANT: Replace the set screw after removing the Renishaw
Probe. Failure to replace the screw may result in the FaroArm taking
points without a button press.
Probe Modules for the TP-20 Probe
Probe modules are available from Renishaw in three trigger force
ratings:
Figure 1-22 Installing a Renishaw Probe
08M46E00_FaroArmUSB.book Page 23 Tuesday, February 17, 2009 1:42 PM