INSTALLATION 30
TO CONNECT TO THE NETWORK
1. Make sure that the E-41 is powered off.
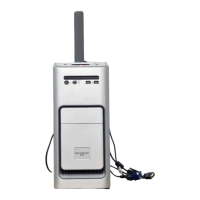
2. Connect the straight-through network cable to the upper RJ-45 port on the E-41 back panel
(see Figure 6 on page 28).
Make sure that you connect the cable to the correct RJ-45 port (see Figure 6 on page 28). The
network and copier/printer interface cables look similar but are not interchangeable. The
network cable at the customer site is a straight-through Ethernet cable that connects to the
upper RJ-45 port on the E-41 back panel. The copier/printer interface cable included with
the E-41 is a 39.3 ft. Ethernet crossover cable that connects to the lower RJ-45 port on the
E-41 back panel.
The E-41 provides twisted pair connectivity to an Ethernet network. When the network cable
is connected, the Ethernet interface automatically detects the speed of the network
environment. Depending on your network speed, the following unshielded twisted pair
(UTP) network cables are supported:
•For 10BaseT, Category 3 or higher
• For 100BaseTX, Category 5 or higher (4-pair/8-wire, short-length)
• For 1000BaseT, Category 5e or higher (4-pair/8-wire, short-length)
NOTE: After power on, the network administrator should perform Network Setup, verify the
network connection, verify that the E-41 appears in the list of printers, and print a few test
documents from a networked computer that will use the E-41. For more information, see
Configuration and Setup on the User Documentation CD.