INSTALLATION 23
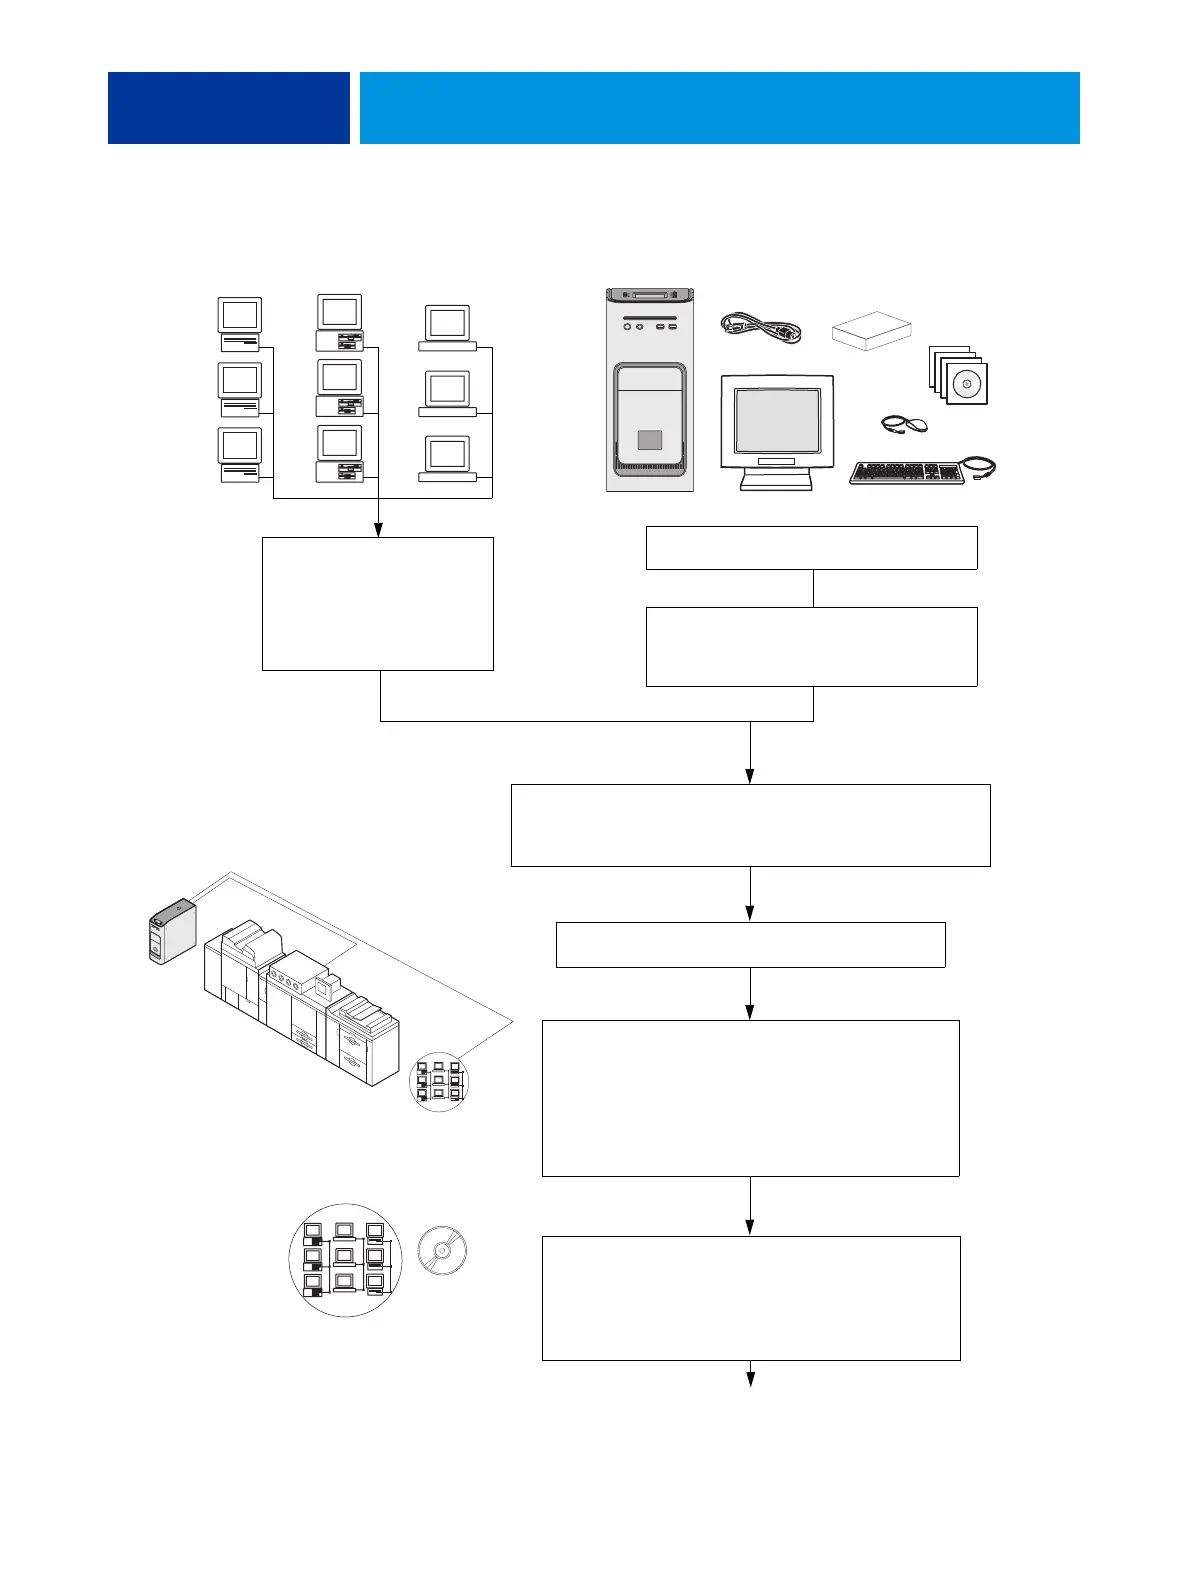
FIGURE 3: Summary of installation steps and references
Copier/printer
ac
computers
computers
workstations
Full E-41 functionality
Check installation requirements
and verify site conditions.
If possible, obtain verification
that the network is operational
(see page 24).
Complete installation (see page 31).
Remind the site administrator to install the current
user software on networked computers that print to the
E-41 (see Printing and Utilities on the User Documentation
CD).
Networked computers
Unpack the E-41 (see page 26).
Power cable(s), customer kit, media pack,
optional monitor, keyboard, and mouse
If present, connect the optional monitor,
keyboard, and mouse to the E-41
(see page 28).
Affix the Fiery decal to the copier/printer front cover.
E-41
If you must change the E-41 language, in Command WorkStation or
WebTools, launch Configure and then navigate to Server > General >
Choose Server Language, and then click Apply.
Connect interface cables (see page 29):
• Network straight-through cable to the upper RJ-45 port
on the E-41 back panel and customer network.
• Ethernet crossover cable to the lower RJ-45 port on the
E-41 back panel and the Gigabit Ethernet connector on
the copier/printer.