INSTALLATION 28
Connecting the E-41
You are now ready to make the following connections:
• Optional monitor, keyboard, and mouse (if present)
• Optional dongle (if present)
• Power cable connection
• Copier/printer interface cable connection
• Network cable connection
For detailed information about the monitor, keyboard, and mouse, see the documentation
that accompanies the optional kit.
Follow standard ESD precautions when handling components.
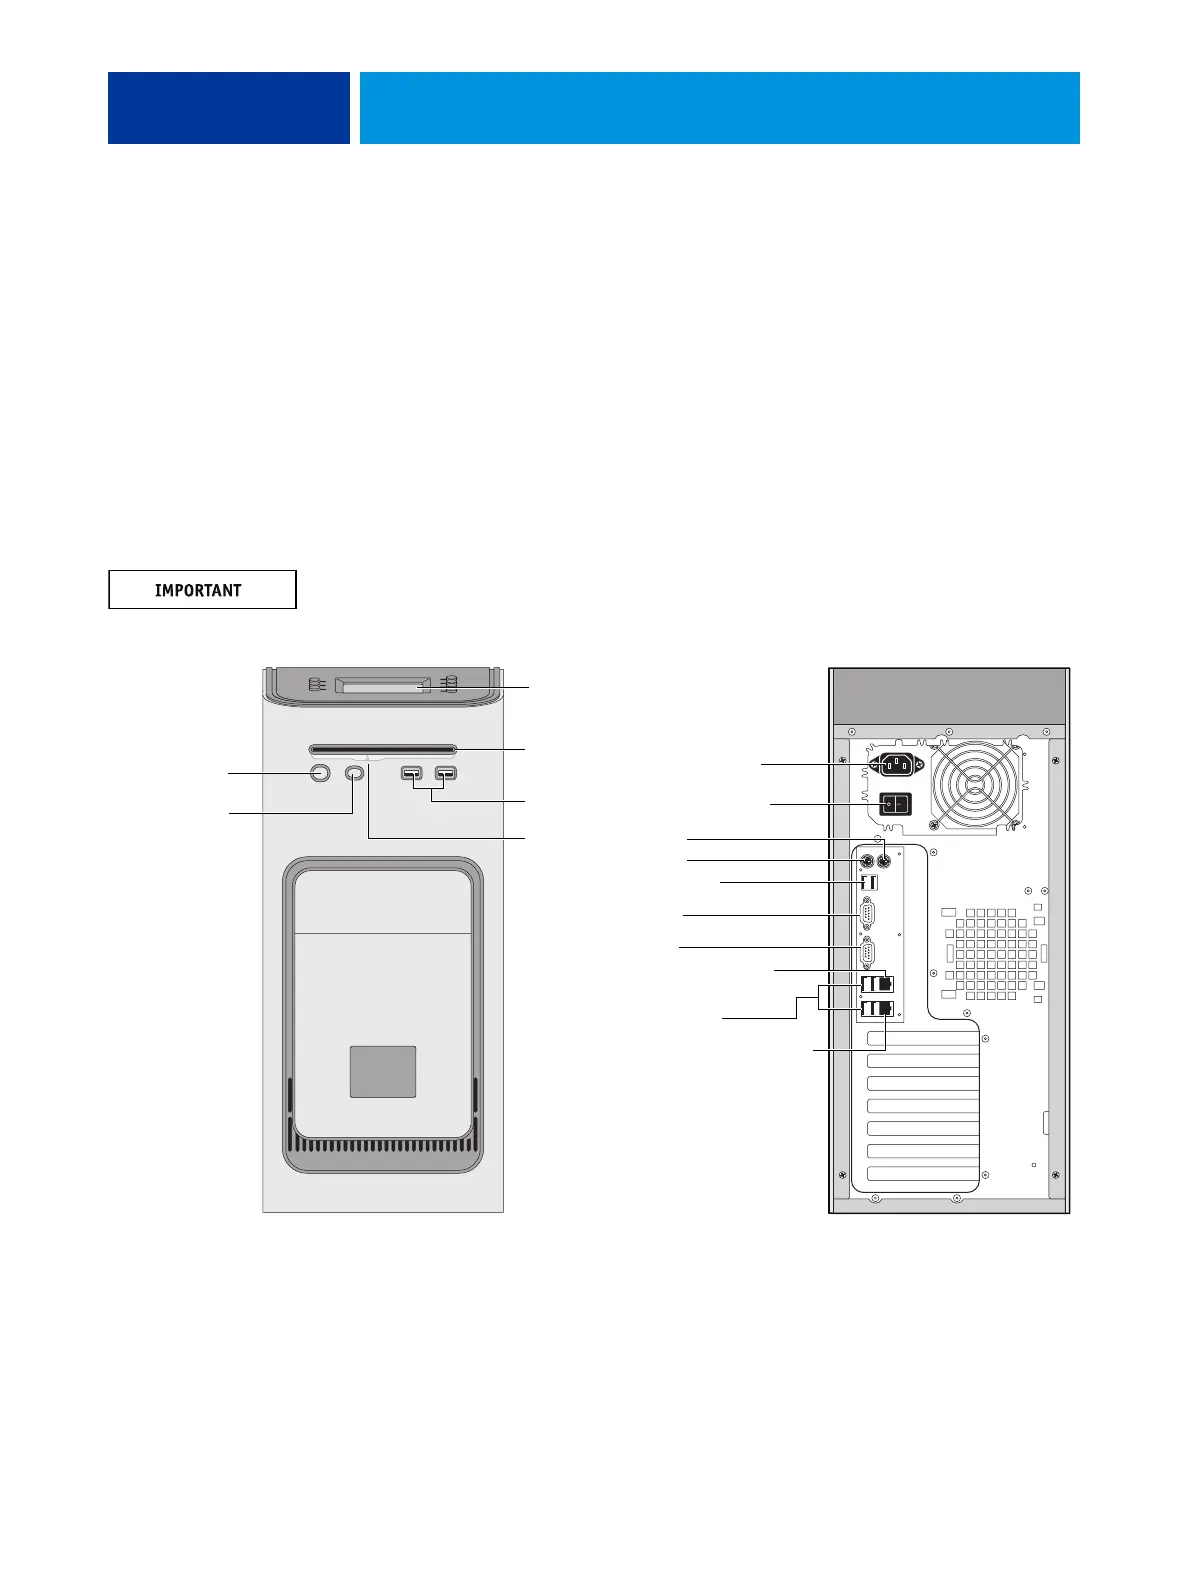
FIGURE 6: E-41 connections
Front panel Back panel
USB ports
Power button
Control panel
DVD drive
Not used
Power cable
Monitor
Not used
Not used
Network port (RJ-45):
Straight-through cable
USB ports (x2)
USB ports (x4)
Copier/printer interface (RJ-45):
Ethernet crossover cable
Reset button
NOTE: Use the
reset button only
if the system is
unresponsive to
keyboard or
mouse actions.
Eject button
Power switch