1 5 0 7 1 8 P LY F LY r e v A _ S e a t | August 7, 2015 5:06 PM
Note If you received a 1/4” plywood sheet that is nished on one side and
you intend to paint the Plyy go-kart seat; reverse the wooden parts 28-33
(so the unnished side is outward facing and
ready to receive paint).
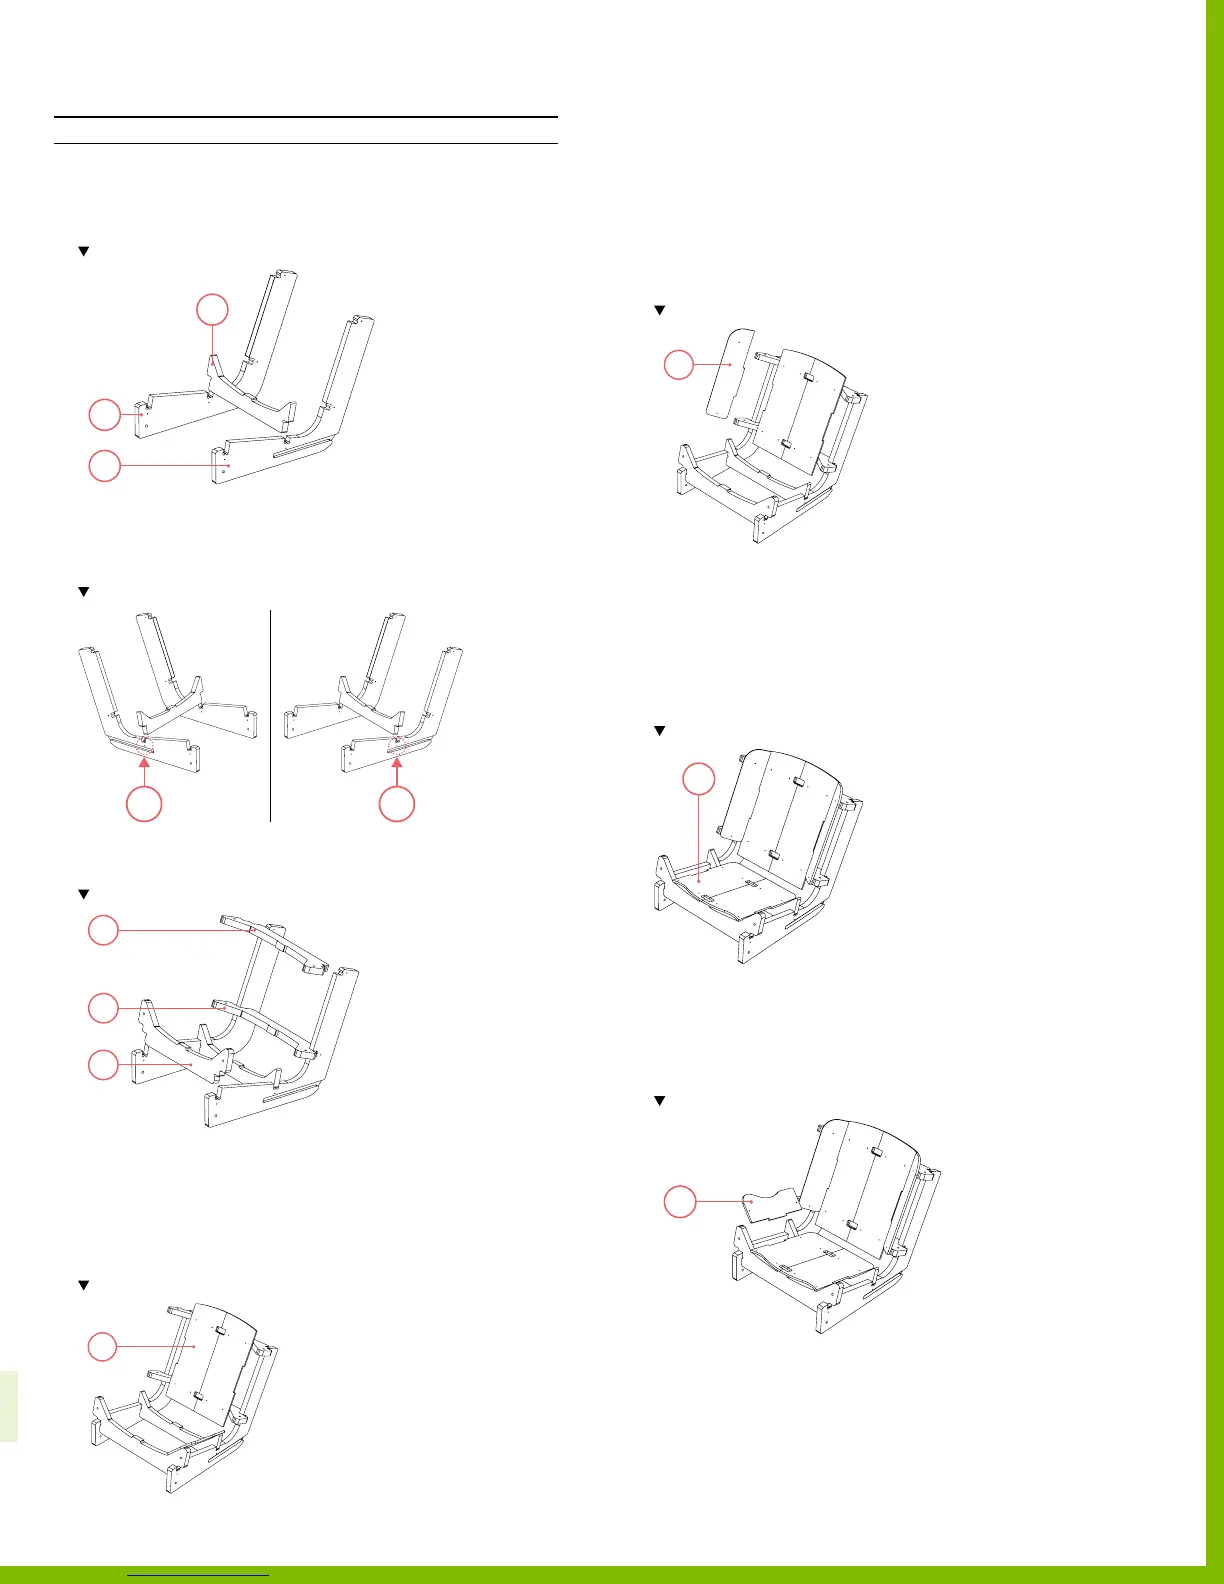
Assembling the seat
INSTRUCTIONS
1. Align parts 22 & 23 with the slots facing outwards.
2. Using a mallet, tap part 27 into the slots on parts 22 &23.
Note the part orientation and location.
3. Secure part 27 using 2 screws.
‒ Use 1 screw per side.
‒ Total of 2 locations, 2 screws.
Note secure part 27, by screwing the part in from the outside of part 22 & 23.
4. Using a mallet, tap parts 24, 25, & 26 into the
remaining slots.
Note the location and orientation of the parts 24-26.
5. Secure parts 24, 25, & 26 by using screws.
‒ Use 2 screws per part, 1 screw per side.
‒ Total of 6 locations, 6 screws.
6. Using a mallet, tap part 32 into the tab connections of
parts 24 & 25.
Note the location and orientation of the part 32.
7. Secure part 32 to the seat frame using screws.
‒ Use 8 screws.
‒ Total of 8 locations.
8. Using a mallet, tap part 29 into seat frame.
Note location and orientation of part 29.
9. Repeat step 8 with part 28 on the opposite side.
10. Secure parts 28 & 29 to seat frame using screws.
‒ Use 4 screws.
‒ Total of 4 locations.
11. Using a mallet, tap part 33 into the tab connections of
parts 26 &27.
Note location and orientation of part 33.
12. Secure part 33 using screws.
‒ Use 8 screws.
‒ Total of 8 locations.
13. Using a mallet, tap part 31 into place using a mallet.
Note location and orientation of part 31.
14. Repeat step 13 with part 30 on the opposite side.
15. Secure parts 30‑31 to seat frame using screws.
‒ Use 4 screws.
‒ Total of 4 locations.
22
23
27
21
26
24
25
32
29
33
31
11
PlyFly Go‑Kart Instruction Guide • 2015 Release