150718 PLYFLY rev A_GoKart | Aug ust 7, 2 015 5 :08 PM
Chapter 10
2
PART
Recommended tools
DESCRIPTION REFERENCE
Dead blow Hammer
or mallet
Allen Wrench
Socket Wrench
Required hardware
№ DESCRIPTION REFERENCE
1 Brake Caliper
P N 125 31
1 Short Aluminum Spacer
1/2” OD, 1/4” ID, 7/8” L
P N 125 47
1 Long Aluminum Spacer
1/2” OD, 1/4” ID, 1‑1/16” L
P N 125 48
2 Oversized Flat Washer
Zinc, M6
P N 125 49
2 Socket Head Cap Screw
Black oxide, M6, 55mm L
P N 125 50
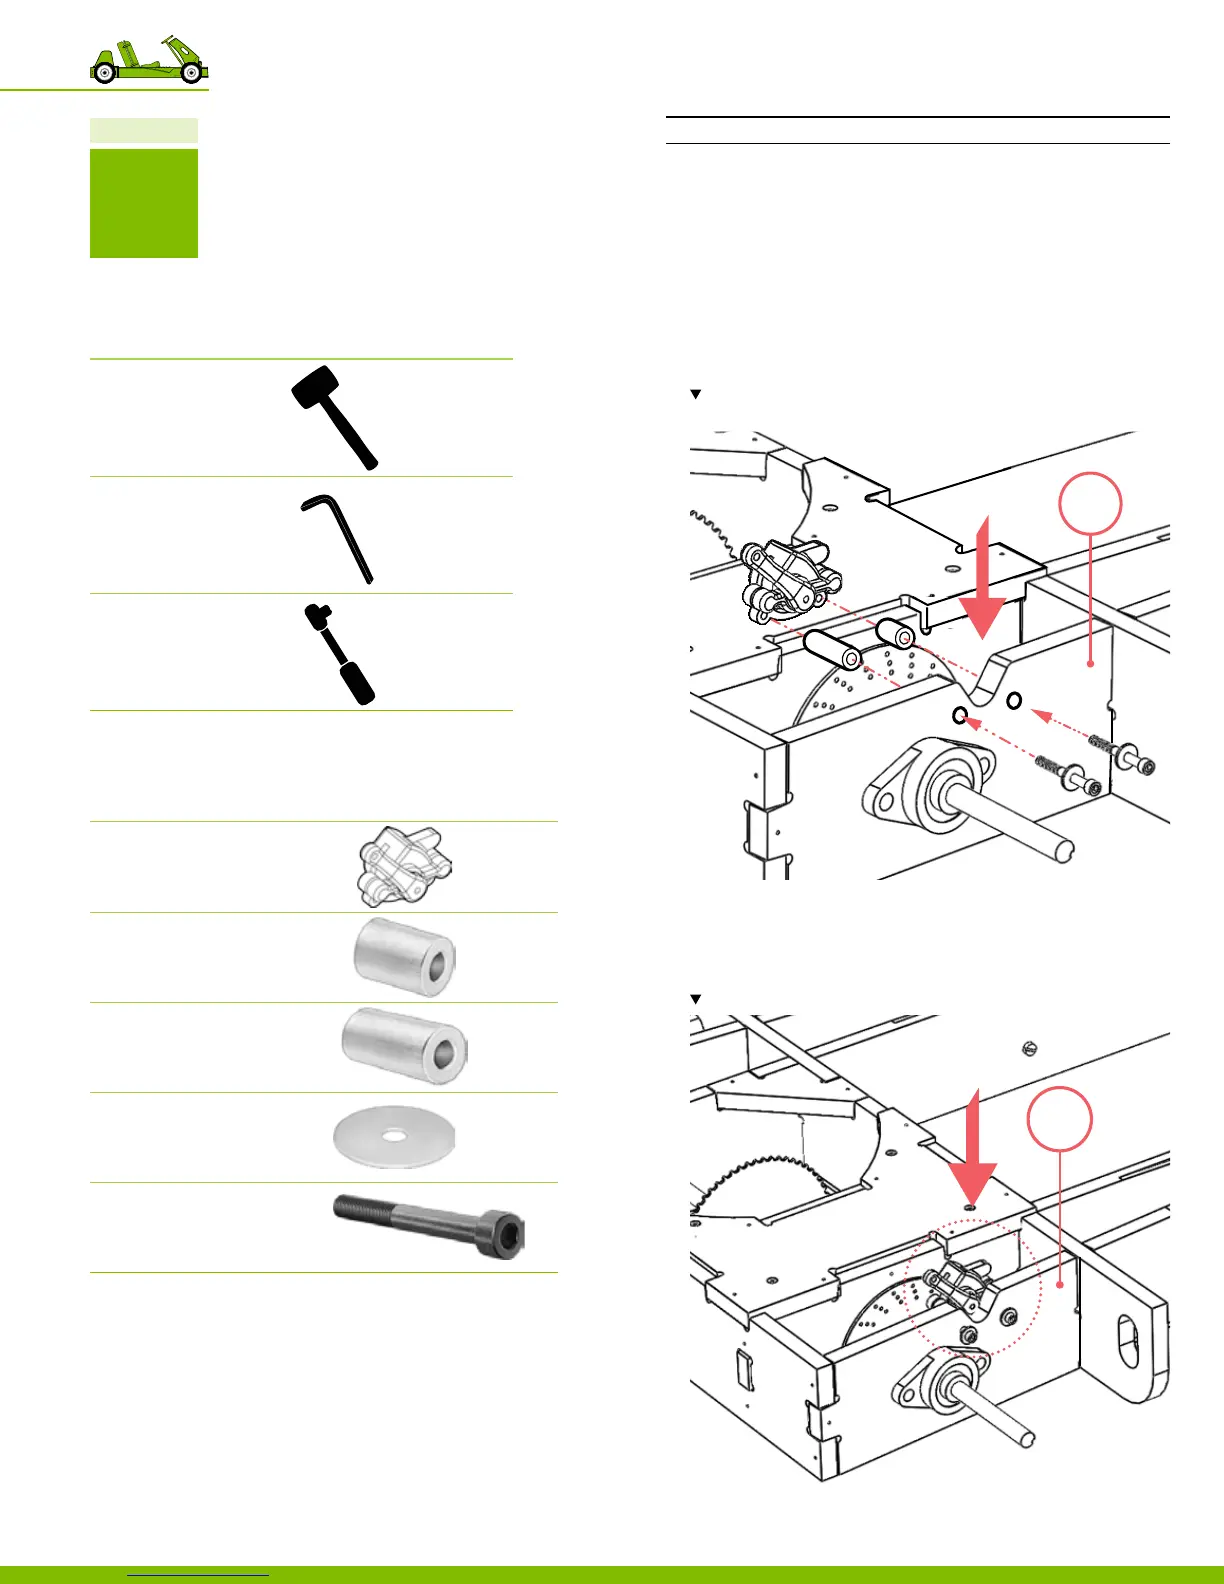
Part 2 Install the brake caliper
The brakes will initially be installed and then adjusted.
INSTRUCTIONS
1. Insert the socket head cap screws with an oversized at
washer through the holes located on part 43,
‒ Use 1 socket head cap screw with
1 oversized at washers per location.
‒ Total 2 locations
2. Insert into the aluminum spacers on the opposite side of
part 43.
Note the location and orientation of the brake caliper. As well as the locations of
the short spacer and the long spacer.
3. Place brake caliper into the cutout located at the rear of
part 43 and insert the hardware.
4. Secure the brake caliper in place, using
the metric Allen wrench provided.
Note the location and orientation of the brake caliper.
43
43
44
10 Putting the go‑kart together