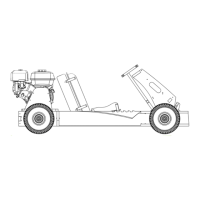
150718 PLYFLY rev A_GoKart | Aug ust 7, 2 015 5 :08 PM
Chapter 10
8
PART
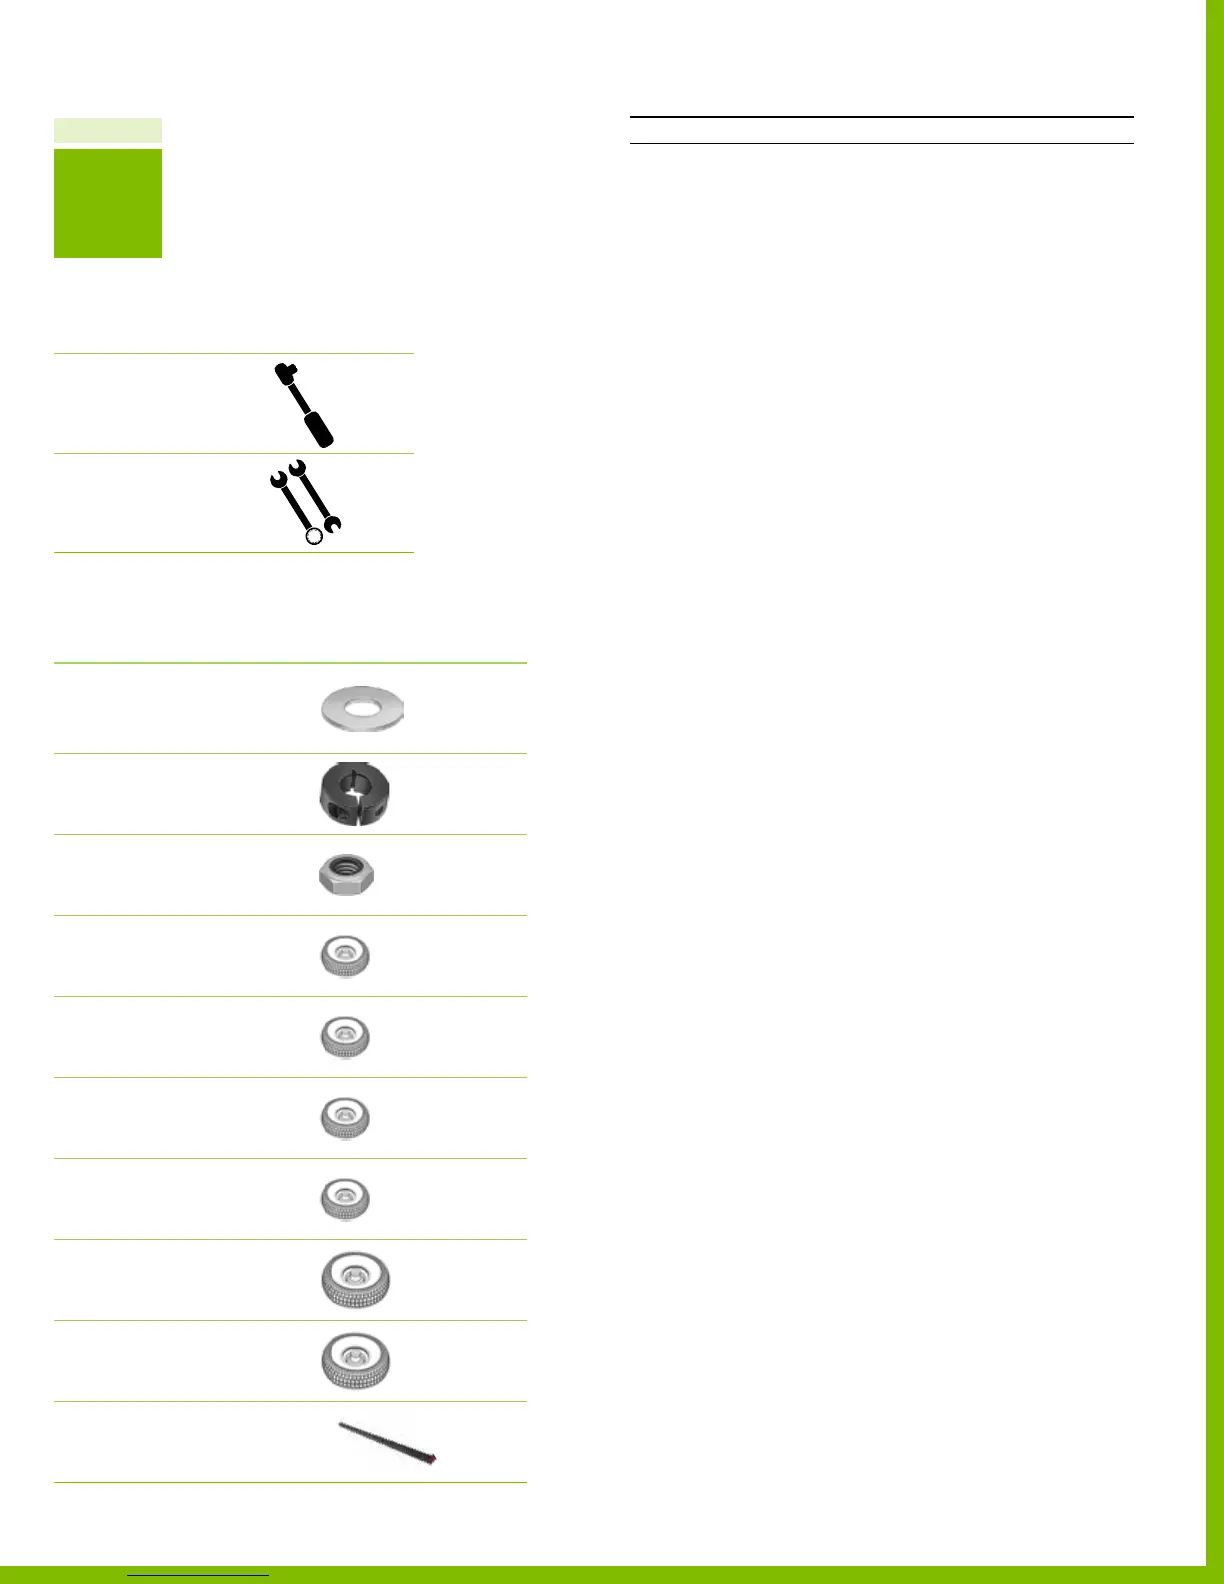
Recommended tools
DESCRIPTION REFERENCE
Socket Wrench
Wrench
Required hardware
№ DESCRIPTION REFERENCE
Flat Washer
5/16” ID, 7/8” OD
3 SINGLE WHEEL KIT P N 12516
2 LIVE AXLE KIT PN 12516
2 Shaft Collar
5/8” ID
PN 12540
2 Lock Nut
5/8"‑11
P N 125 0 6
1 Rear driven wheel
10”D
SINGLE WHEEL KIT P N 125 90
3 Undriven wheel
10” D
SINGLE WHEEL KIT P N 125 91
2 Rear driven wheel
10”D
LIVE AXLE KIT PN 125 9 0
2 Undriven wheel
10” D
LIVE AXLE KIT PN 125 91
1 Rear driven wheel
12” D
SINGLE WHEEL KIT P N 125 92
3 Undriven wheel
12” D
SINGLE WHEEL KIT PN 125 93
1 Key
3/16” square, 1”L
P N 125 39
Part 8 Install the wheel assemblies
INSTRUCTIONS
1. Mount the undriven wheels (the wheels with bearings)
by sliding them over the axles.
‒
SINGLE WHEEL KIT continue to step 2.
‒
LIVE AXLE KIT continue to step 4.
2. Mount 3 undriven wheels.
‒ 2 located on the front axles.
‒ 1 located on the back, left axle.
‒ Total of 3 locations.
3.
SINGLE WHEEL KIT continue to step 5.
4. Mount 2 undriven wheels.
‒ 2 located on the front axles.
‒ Total of 2 locations.
5. Secure the undriven wheels using lock nuts.
Hint To keep the wheels from rotating, place a
large slotted screwdriver into the heads of the front axle bolts.
6. Slide the shaft collar over drive shaft.
‒
SINGLE WHEEL KIT continue to step 7.
‒
LIVE AXLE KIT continue to step 9.
7. Install 1 shaft collar.
‒ 1 on the back, right drive shaft.
8.
SINGLE WHEEL KIT continue to step 10.
9. Install 2 shaft collars.
‒ 2 located on the rear drive shaft.
‒ Total of 2 locations.
10. Secure the shaft collar using an Allen wrench.
11. Mount the driven wheel (the wheels with the xed hub)
by sliding them over the drive shaft.
‒ Use the key to lock the driven wheel to the drive shaft.
‒
SINGLE WHEEL KIT continue to step 12.
‒
LIVE AXLE KIT continue to step 14.
12. Mount 1 driven wheel.
‒ 1 located on the back, right drive shaft.
‒ Total of 1 location.
13.
SINGLE WHEEL KIT continue to step 15.
14. Mount 2 driven wheels.
‒ Use the key to lock the driven wheel to the drive shaft.
‒ 2 located on the rear drive shaft.
‒ Total of 2 locations.
15. Secure the driven wheel to the drive shaft using
the set screws.
‒ Be sure the set screw aligns with the keyway.
16. Secure the axle to the driven wheel using the shaft collar.
‒ Use a socket wrench to tighten the locknut; while
holding the locknut on alternate side with wrench.
57
PlyFly Go‑Kart Instruction Guide • 2015 Release