Victor Xu Page 50 12 Jan. 2011
Copyright 2011 © Shenzhen Runtianzhi Image Technology, Co., Ltd.
http://www.floradigital.com
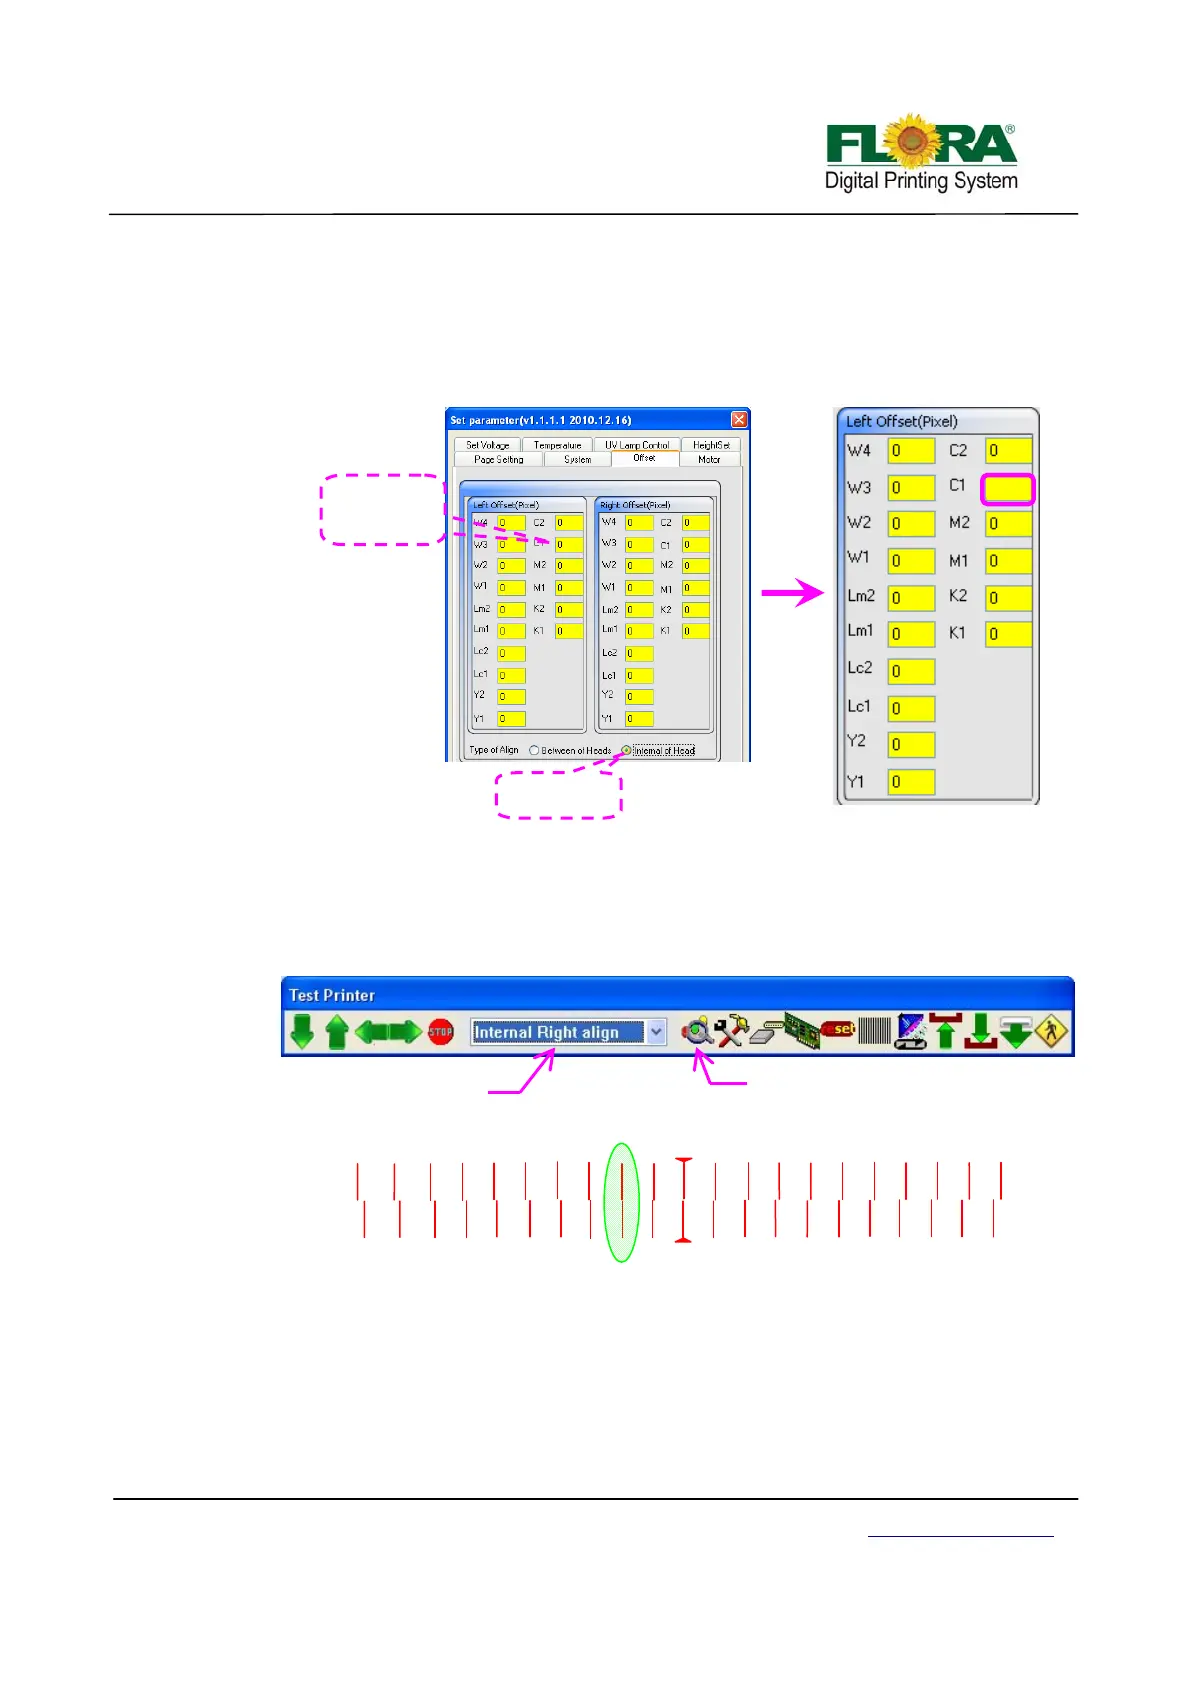
¾ On the Photoprint Job Properties click Driver Option >click advance button>
offset button > tick the Internal of head and add the -1 mathematically on the
Left table for C1 box as shown below.
¾ You can also navigate thru Test Printer Tab by clicking the settings icon as
shown in the lower left of Illustration.
Internal Right Align
¾ On the printer tab select Internal Right Align option then click send print as
shown below. Further below shows how the print out should look like, the
Illustration shows the M1 alignment happen at 2 (in-circled).
¾ On the Photoprint Job Properties click Driver Option >click Advance button>
Offset button > tick the Internal of Head and add the 2 mathematically on the
Right table for M1 box as shown below.
¾ You can also navigate thru Test Printer Tab by clicking the settings icon as
shown in the lower left in Illustration below.
Tick Internal o
Head
De
ault value
for C1 is 0
0-1=-1
-1
Internal Right Align
-1
-10
10
-9
9
-8
8
-7
7
-4
4
-2
2
1
-5
5
-3
3
-6
6
M1
R I G H T
-10
10
-9
9
-8
8
-7
7
-6
6
-5
5
-4
4
-3
3
-2
2
-1
1
M1
Click to send print
ali
n
Select Internal Right align