Victor Xu Page 45 12 Jan. 2011
Copyright 2011 © Shenzhen Runtianzhi Image Technology, Co., Ltd.
http://www.floradigital.com
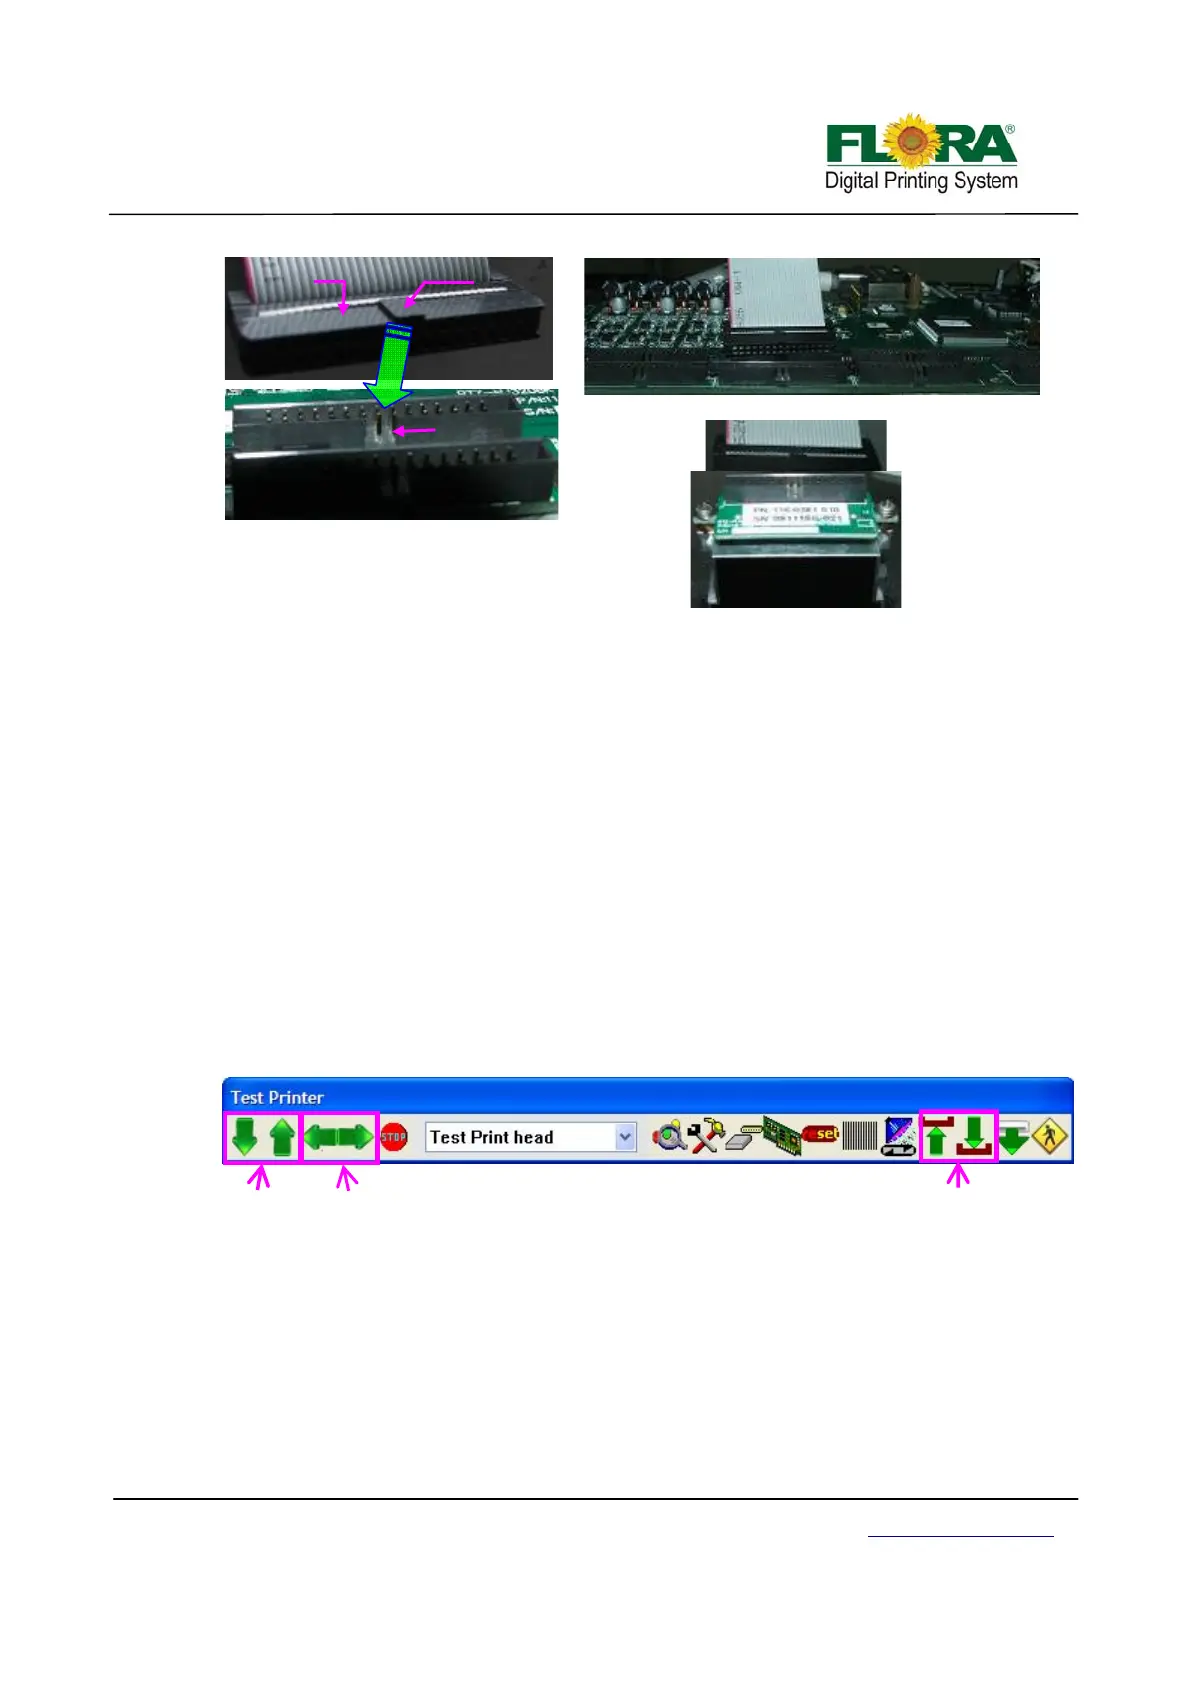
Check all the connection again to ensure there are no misconnections and loose connections
on the data cables. Power on the machine and check any functional abnormalities on the carriage.
5.5 Ink and Solvent Preparation
¾ Pour the ink and solvent in their corresponding ink/solvent barrels. Be sure to observe proper
procedure in handling the ink. See Chemical Safety Information
¾ Flush the print head with solvent
¾ Switch on the printer power
¾ Connect the ink pumps one at a time and check for any leakage along the solvent and ink
line system.
5.6 Test print
This is to check the mechanical functionality of the Printer through PC.
5.5.1 Test print tool bar
Using the RTZ Driver software, move the Print head Carriage from left to right, then to home
position. Check if the Y-axis and Z-axis Servo Motor are also working by clicking the appropriate
arrow head below. Please refer to 6.4.5 for more details.
5.5.2 Set parameter
This section will describe the necessity to calibrate the Voltage and Temperature settings for
each print head.
¾ By looking on the Right or X Align printed samples in section 4.9.2.3 or section 4.9.2.4
respectively you can determine what need to be done to get a better print quality.
¾ First you need to see the magnified printed sample for each print head. Let’s take the
illustration sample below.
Male connector
Pro
er Connection of Flat Data Cable
Connector
Slot
Female
Connector
Guide
Print
head Control Board
Flat Data
Cable
Print head
Flat Data Cable
Y-axis Icon
X-axis Icon Z-axis Icon