Victor Xu Page 47 12 Jan. 2011
Copyright 2011 © Shenzhen Runtianzhi Image Technology, Co., Ltd.
http://www.floradigital.com
Note: The actual reading for both Voltage and Temperature will appear only when the
Read Button is click.
¾ To change the temperature setting simply over write the existing value with your
desired value then click Write button. While for Voltage you need to click the Set
button to update the Voltage setting to your desired value.
¾ Other factors than can influence print quality are:
Room Temperature
Humidity
Ink Viscosity
Negative Pressure Settings
Carriage Printing Speed
Note:
In most difficult cases playing with Uni-direction and at slower speed can help improve
the print quality significantly.
5.5.3 Print head alignment
This is to describe the proper procedure in aligning the Print heads. Before alignment ensure
the nozzle test is perfect!
¾ Perform Ink Prime by activating the toggle switch. Do ink bleeding one print head at
time to remove air bubbles trapped inside the print head.
¾ Perform auto clean for print heads thru maintenance switch on the control panel or
from the Flora driver GUI.
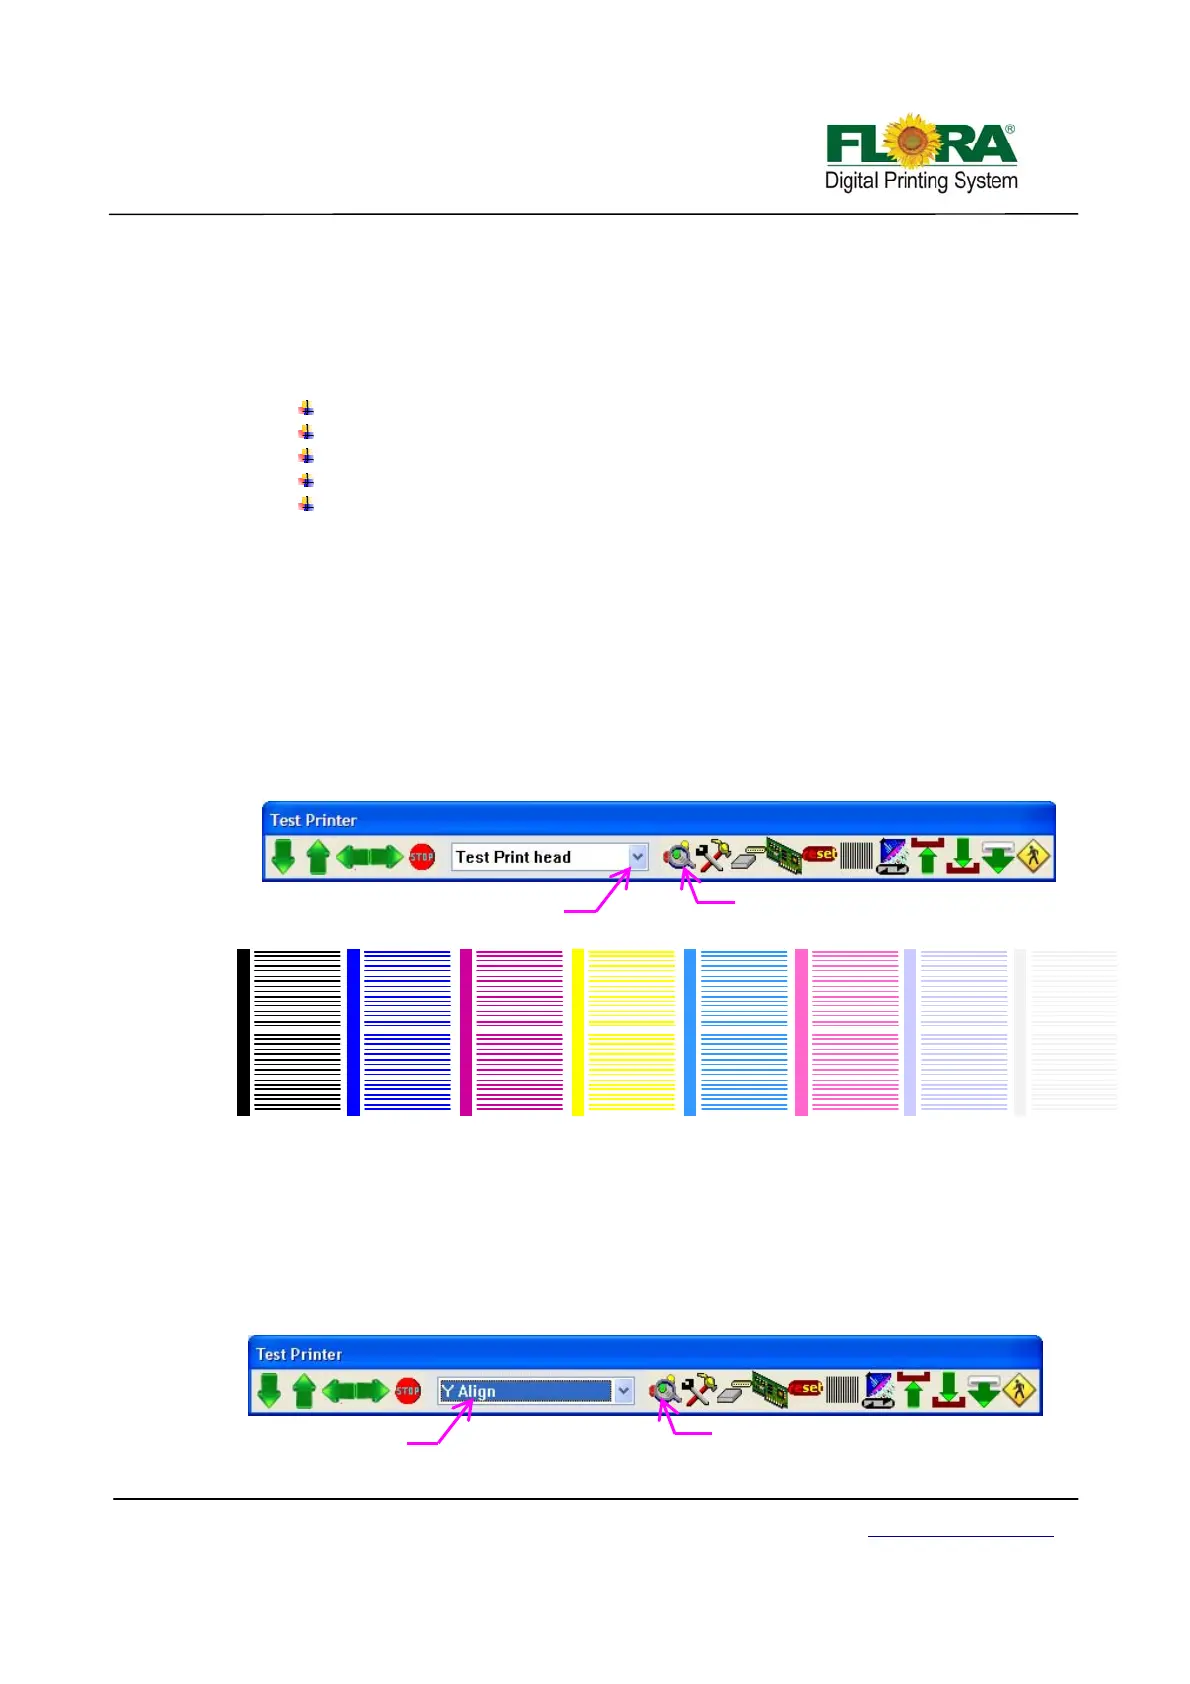
¾ Send Test Print head to see if all print heads prints a shown below;
Note: Above is an Illustration of Nozzle Test Print, only three colors are shown due to
space constraint, Yellow, White and Varnish print heads must print the same result.
5.5.3.1 Mechanical Alignment (Y-Align)
¾ On Flora driver GUI, click Test Print button and on the Test Printer tab select Y-
align then click “Test print” button. The result should look as shown below.
K1 M1 W1 C1 Y1 V1LC1 LM1
K2 M2 W2 C2 Y2 V2LC2 LM2
Click this to send
test
rint head
Select Test Print Head
Click this to send
test
rint head
Select
-
lign