Victor Xu Page 51 12 Jan. 2011
Copyright 2011 © Shenzhen Runtianzhi Image Technology, Co., Ltd.
http://www.floradigital.com
¾ Follow the same steps when doing Internal of head alignment for other print
heads not shown in the Illustration above.
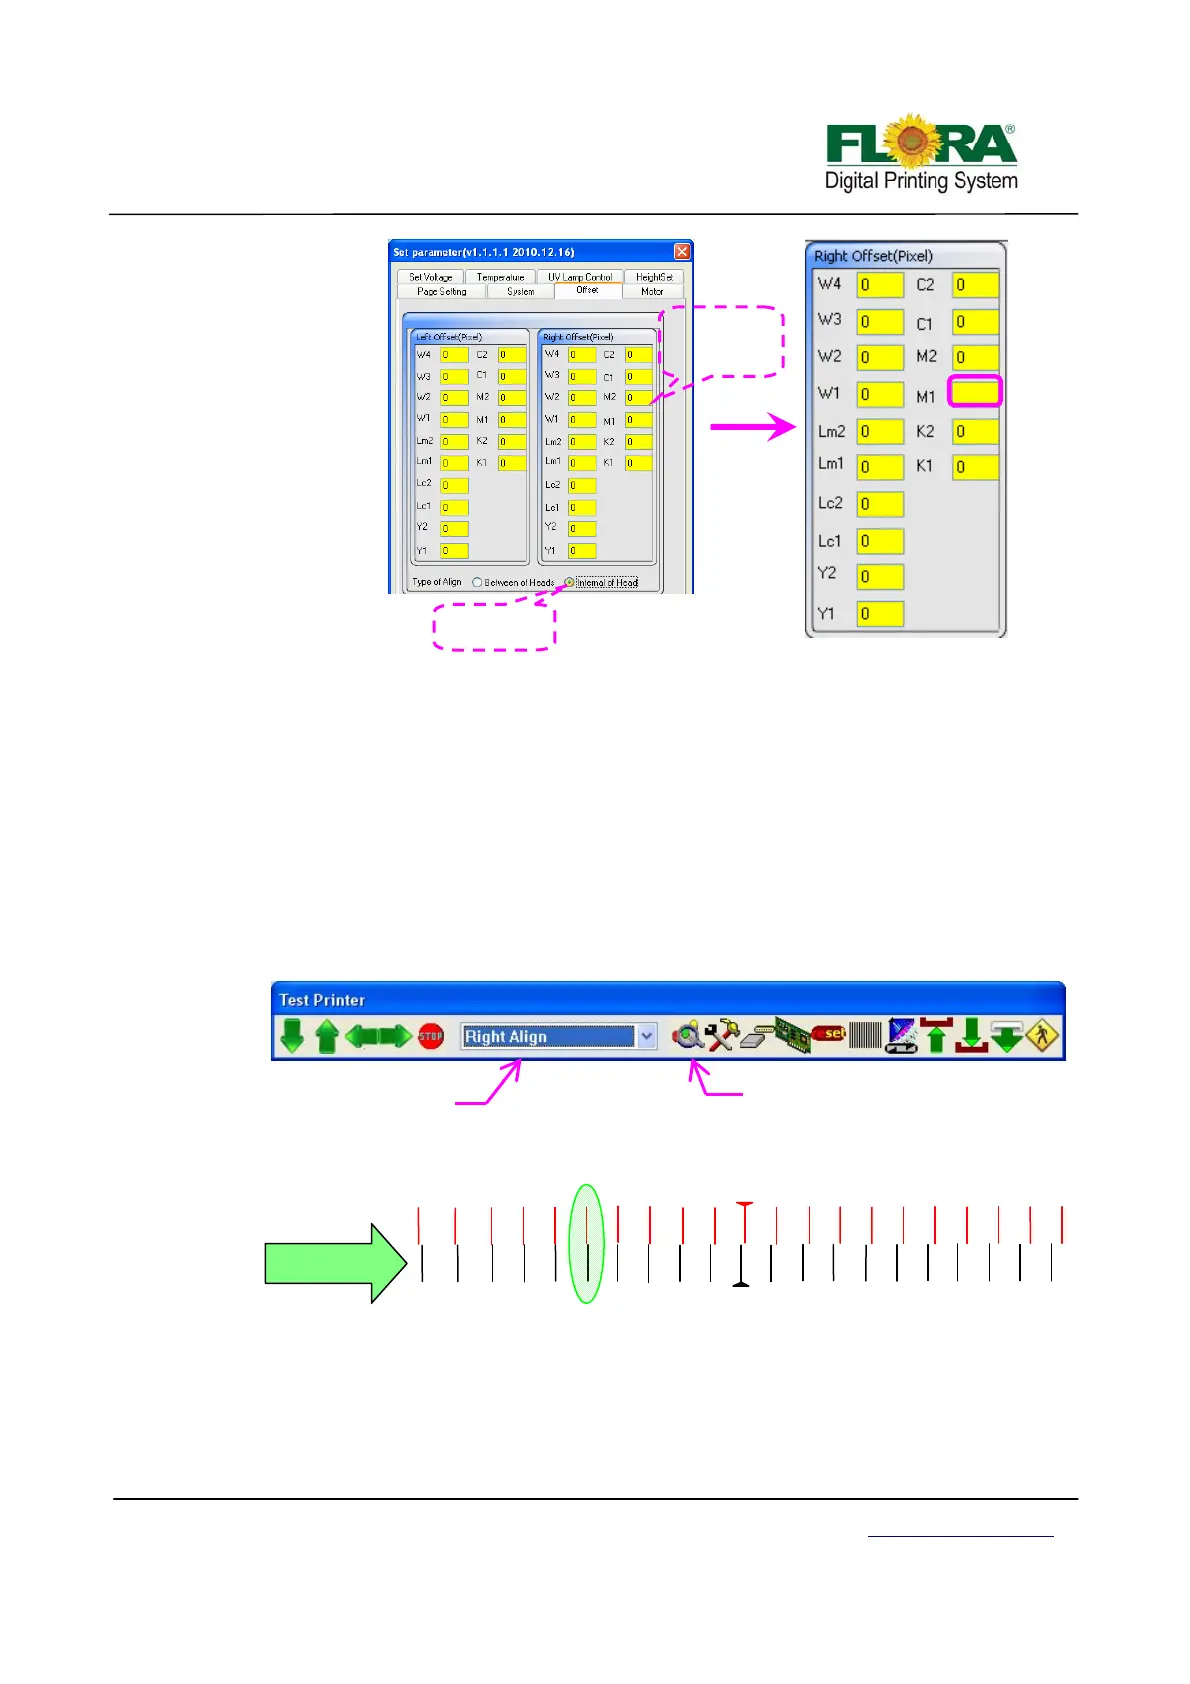
5.5.3.3 Right Align
There are 16 print heads in 8 colors in total. As they are fixed in different physical
position, it is necessary to do Right Alignment for secondary colors, or the secondary color will
be fuzzy and the output picture will be rough. Here this machine takes K1 as the base to align
the other print heads.
¾ On the printer tab select Right align option then click send print as shown below.
Further below shows how the print out should look like, the Illustration shows the
M2 alignment happen at 5 (in-circled). Please note that this time K1 is the
reference print head in aligning all other print heads.
¾ On the Photoprint Job Properties click Driver Option >click Advance button>
Offset button > tick the Between of Heads and add the 5 mathematically on the
Right table for M2 box as shown below.
¾ All the other colors are will be aligned in the same way.
2
Tick Internal o
head
De
ault value
for M1 is 0
0+2=2
K1 is Reference
Head
Right Align
-1
-10
10
-9
9
-8
8
-7
7
-4
4
-2
2
1 -5 5
-3
3
-6
6
M2
R I G H T
-10
10
-9
9
-8
8
-7
7
-6
6
-5
5
-4
4
-3
3
-2
2
-1
1
K1
Click to send print
ali
n
Select
Right align