Juno System: User Guide
Chapter 2: Getting Started with Juno
View System Information
32
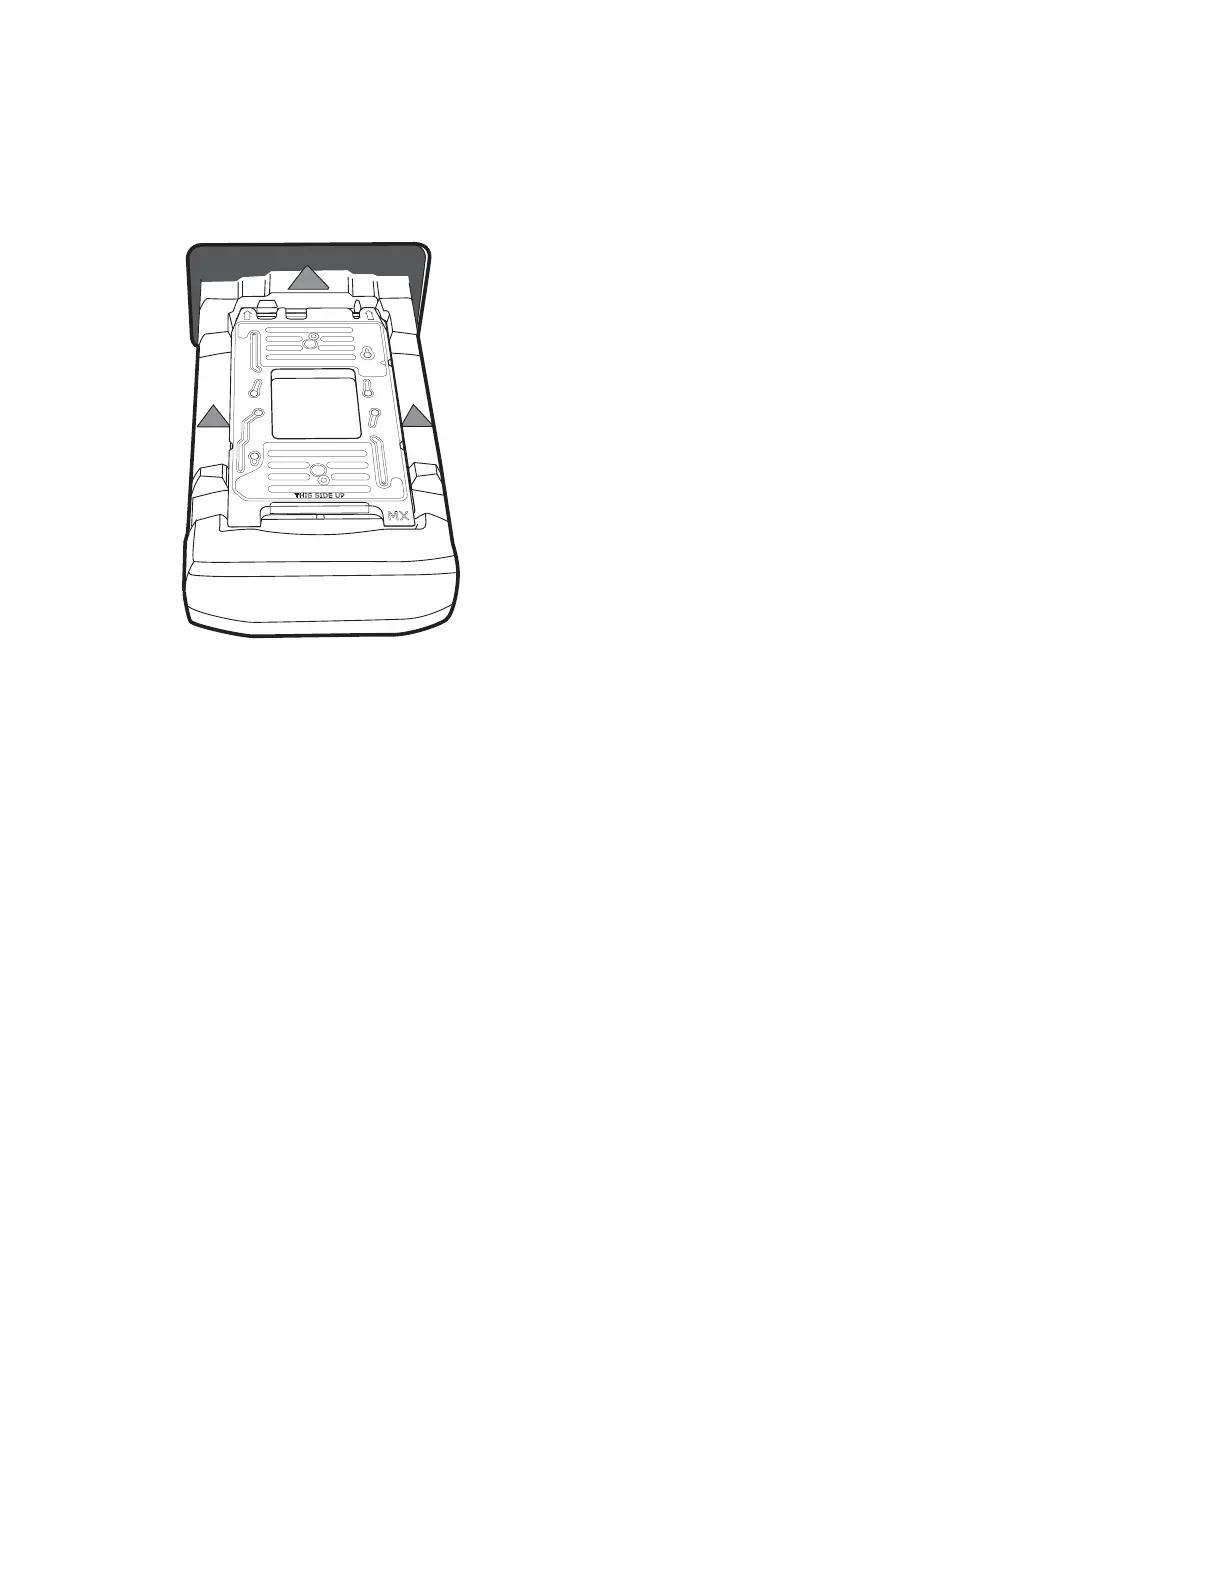
8 Seat the interface plate securely on top of the loading fixture (the MX Interface Plate is an
example). Insert the interface plate in the direction of the arrows with THIS SIDE UP
facing up:
9 On the Interface Plate screen, tap INSTALL. The instrument installs the interface plate
and ejects the Interface Plate Loading Fixture.
IMPORTANT If the instrument does not detect the Interface Plate Loading Fixture
barcode, enter the barcode on the Enter Loading Fixture Barcode screen, then click
LOAD. If the instrument does not detect the Interface Plate Loading Fixture, remove the
interface plate and re-install the fixture (repeat steps 4–9).
10 Remove the fixture, and store it in its storage container.
11 Tap CLOSE.
View System Information
1 On the Start screen, tap TOOLS.
2 On the Tools screen, tap About This System. On the Diagnostics screen, you can view
the system ID, supported IFCs, and firmware and software versions.