Basic Operation 27
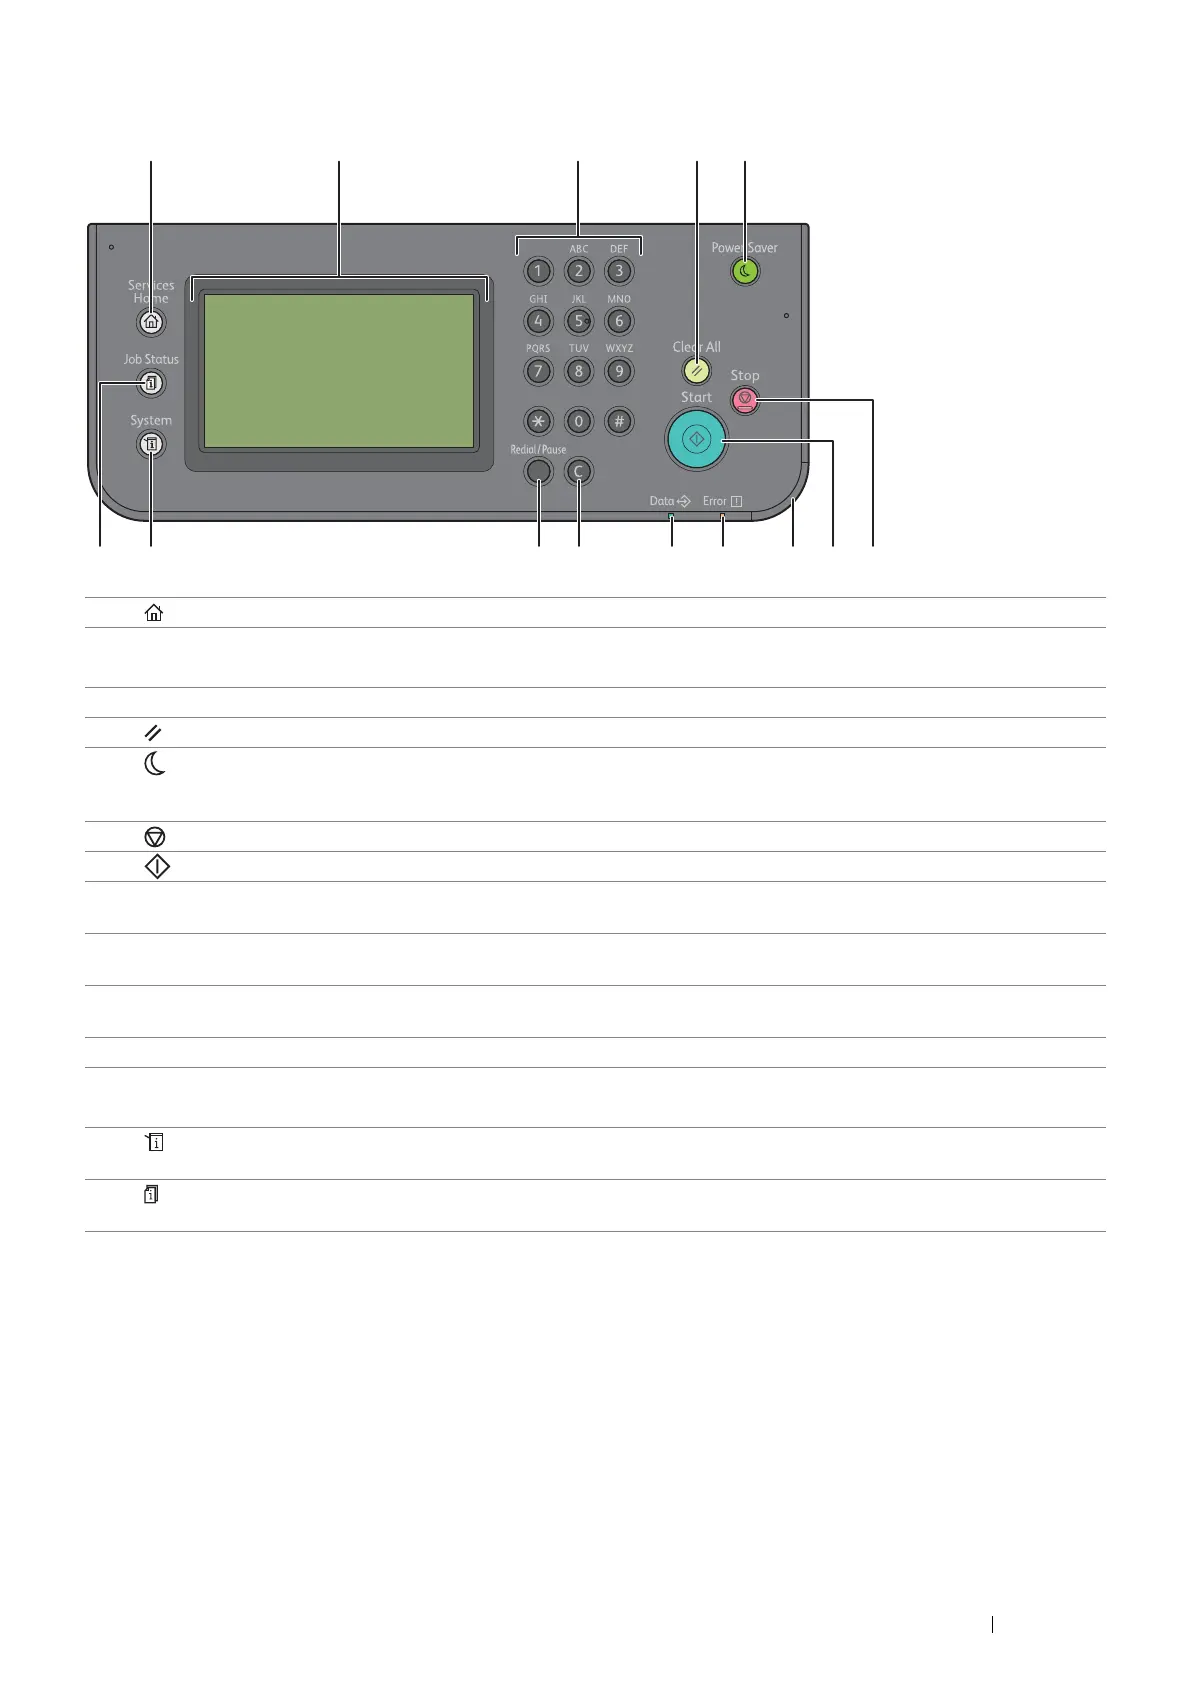
Operator Panel
NOTE:
• Moving to a different menu or returning to a previous screen cancels the current entry or setting. Make sure to save the
current entry or setting.
• For details on how to use the number pad to enter numbers, see "Using the Number Pad" on page 257.
1(Services Home) button Moves to the top service menu screen.
2 Touch panel Specifies the settings by directly touching the screen.
Displays various settings, instructions, and error messages.
3 Number Pad Enters numbers and characters.
4(Clear All) button Resets the current setting, and returns to the top menu.
5(Power Saver) button Exits the power saver mode. When the machine is not used for a while, it
enters the power saver mode to reduce power consumption. When the power
saver mode is active, the button blinks.
6(Stop) button Cancels active or pending jobs.
7(Start) button Starts a job.
8Status LED (Mobile) Shows a blue light when the Wi-Fi Direct
®
, AirPrint, and Google Cloud Print
™
connections are established, and blinks in certain conditions.
9Status LED (Error) Shows an amber light when an error occurs and a blinking amber light when
an unrecoverable print error occurs.
10 Status LED (Data) Shows a green light when the printer is ready and a blinking green light when
data is being received.
11 C (Clear) button Deletes numbers and characters.
12 Redial / Pause button Re-dials a telephone number.
Inserts a pause into a telephone number.
13 (System) button Moves to the System screen. You can access various information and menus,
check consumable levels, and print various types of reports and lists.
14 (Job Status) button Moves to the Job Status screen. You can check or cancel active jobs and also
access Secure Print and Secure Fax Receive.

 Loading...


