Using ScanSnap with the Quick Menu (for Windows Users)
155
Procedures
1. Load a document in the ScanSnap.
For details, refer to "How to Load Documents" (page 63).
2. Press the [Scan] button on the ScanSnap to start a scan.
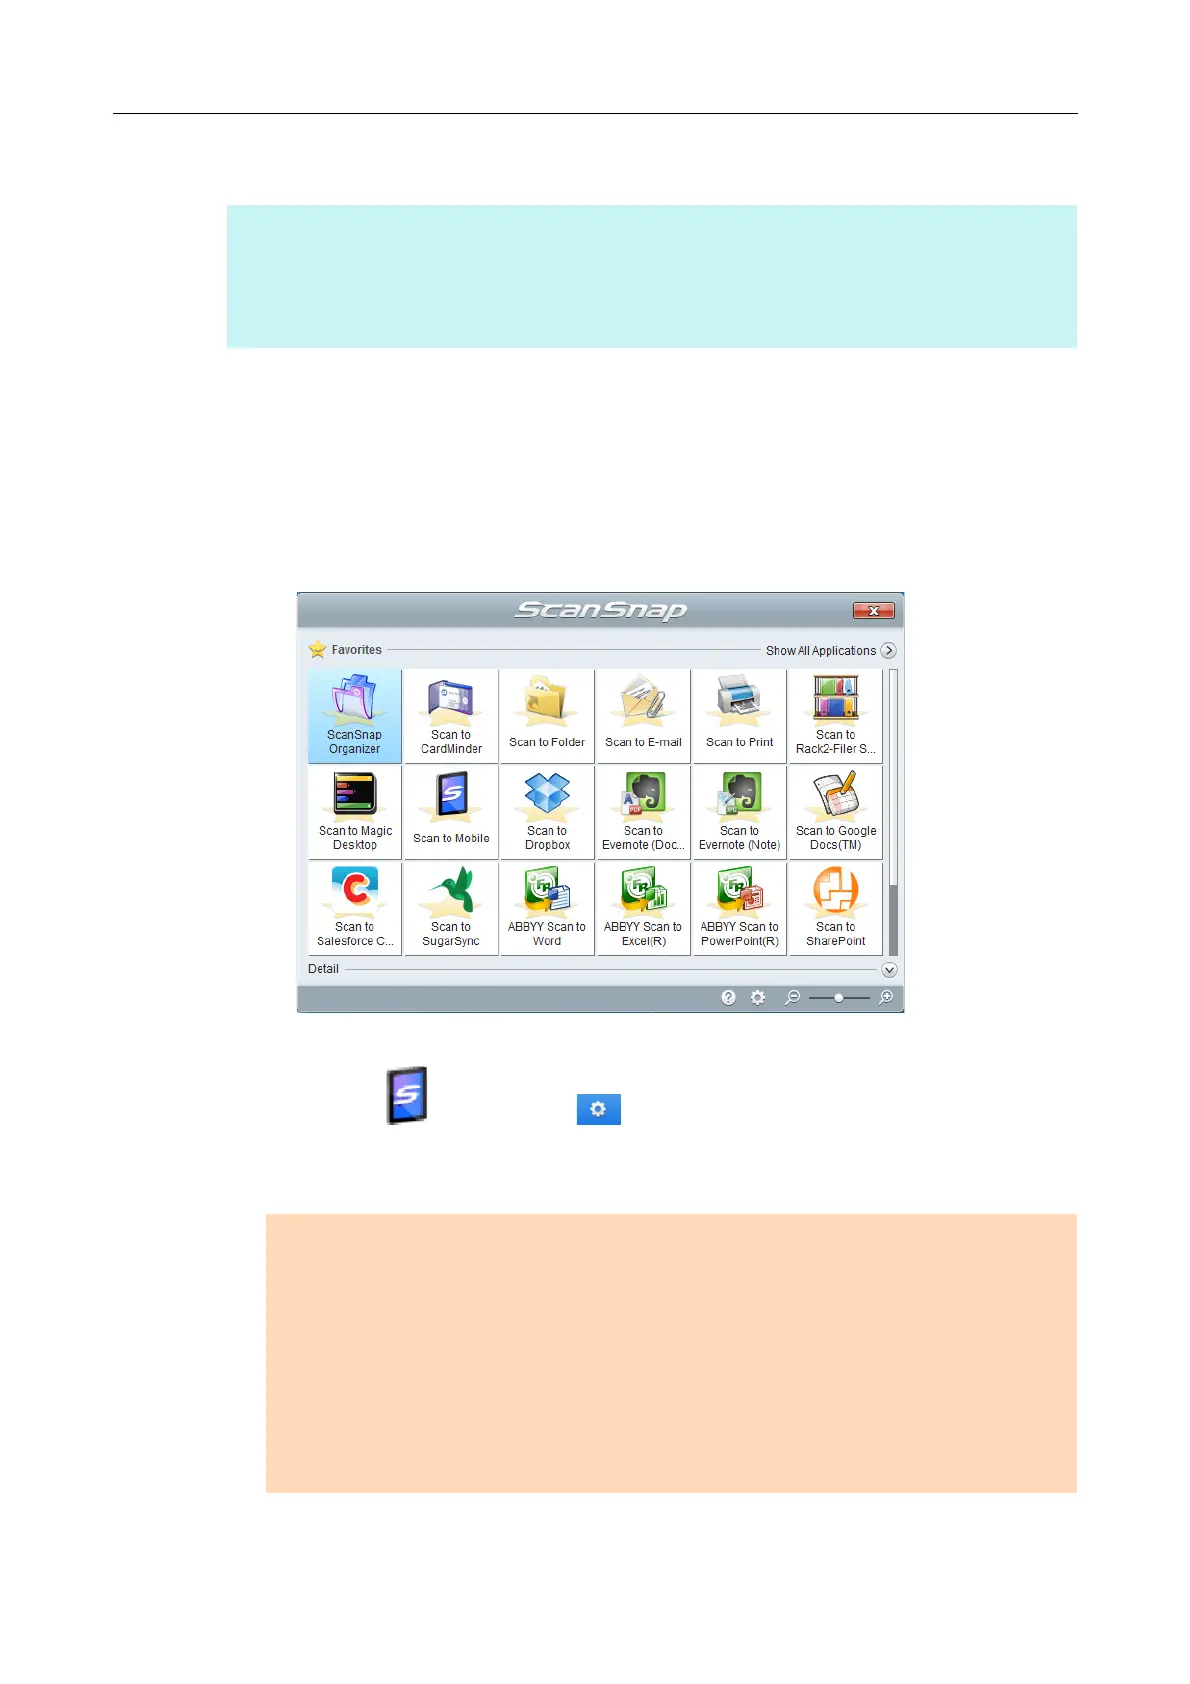
D The Quick Menu appears when the scanning is completed.
To change the settings for [Scan to Mobile], move the mouse cursor to the [Scan to
Mobile] icon , and then click . For details about how to change the settings,
"Preferences" (page 160).
HINT
To use the Quick Menu, you need to select the [Use Quick Menu] check box in the ScanSnap setup
dialog box.
For details about how to perform scanning by using the Quick Menu, refer to "Basic Scanning Operation
Flow" (page 114).
ATTENTION
z When [Scan to Mobile] has already started and is active (with the application selected on the
taskbar and the [Scan to Mobile] dialog box brought to front), ScanSnap Manager links with
[Scan to Mobile] automatically and the Quick Menu does not appear.
To show the Quick Menu, minimize the [Scan to Mobile] dialog box first, and then try scanning
again.
z You cannot start scanning when the Quick Menu is displayed. Wait until ScanSnap Manager links
with [Scan to Mobile] before scanning another document.
z Do not move, delete or rename the scanned image in other applications when the Quick Menu is
displayed.

 Loading...