Technical Support is available from 8am to 5pm (PST) M - F at support@fslaser.com.
14
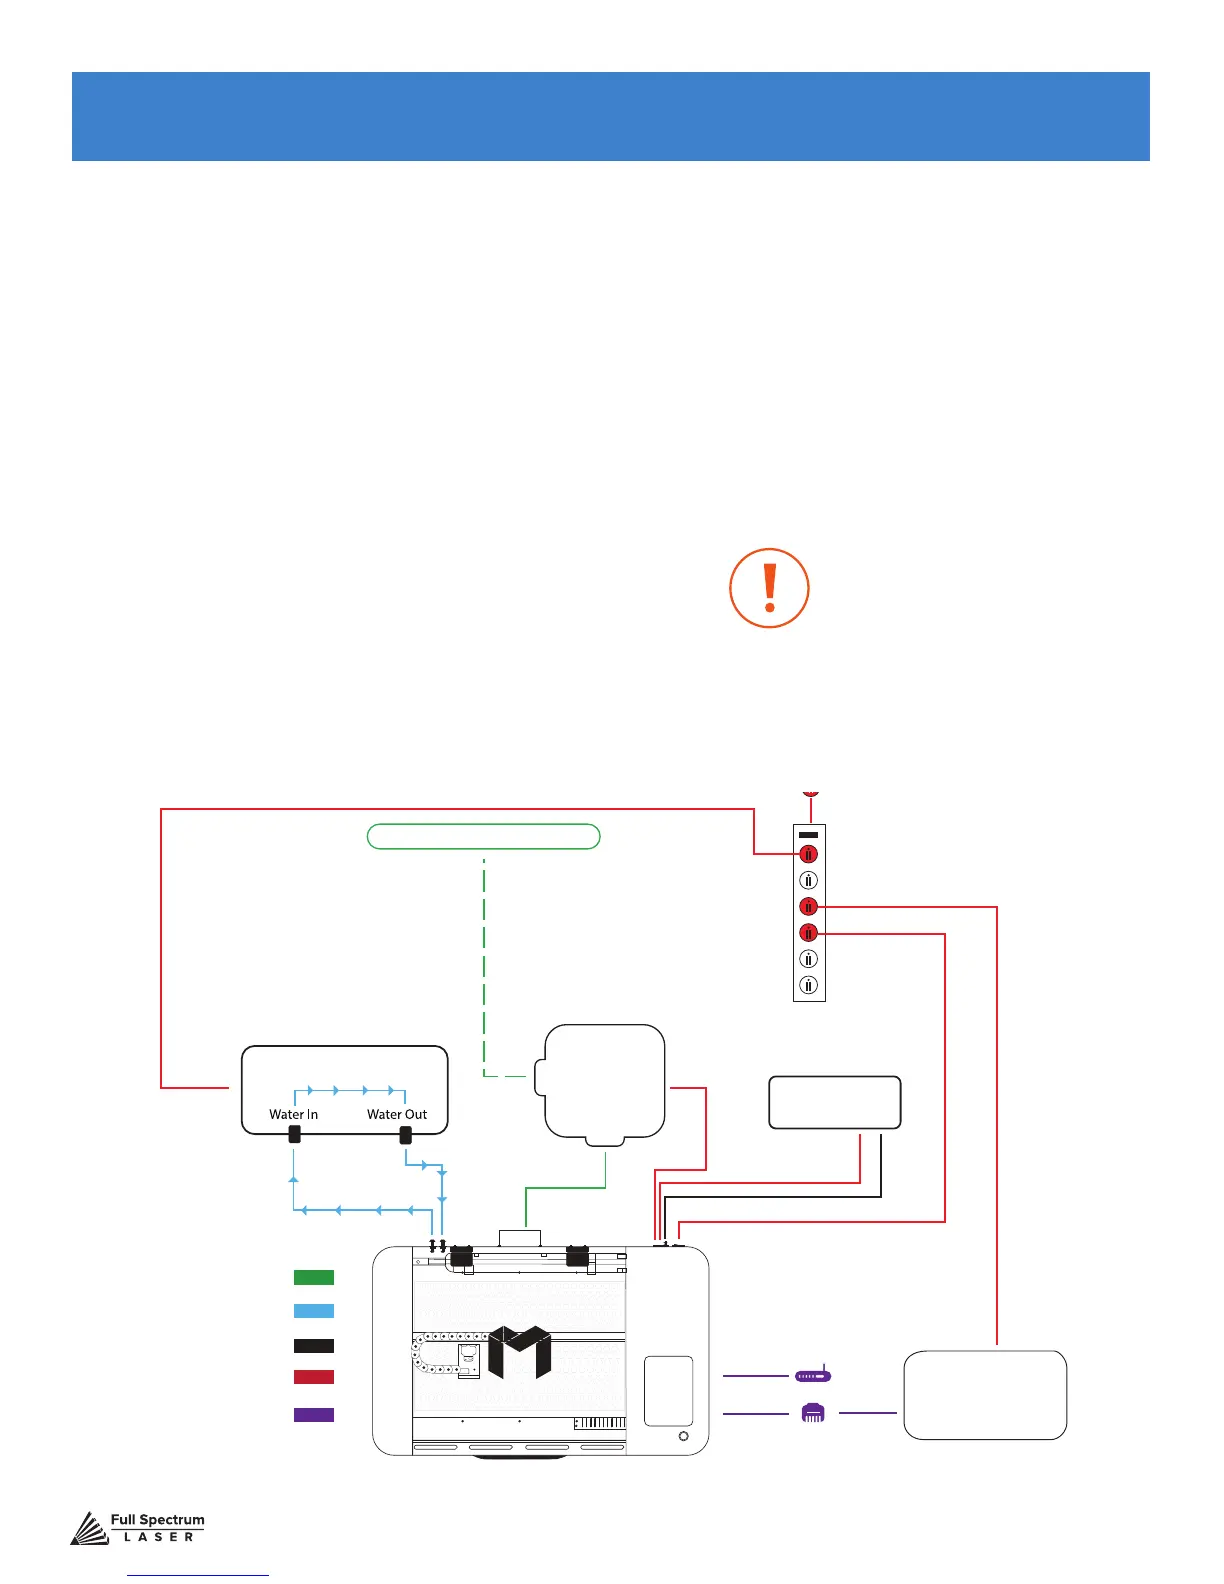
With your laser cutter unboxed and placed in its permanent work space we can now prepare it for
use. This is a simple process that should take less than half an hour to complete. Note that if you
purchased a Coolbox with your Muse, Step 2: Connect the Exhaust System; Step 3: Assemble the
Water System; and Step 3: Assemble the Air Compressor will be replaced with the instructions in
Appendix A: Coolbox Assembly.
Assembly Stages:
1. Locate & Remove Zip Ties
2. Connect the Exhaust System
3. Assemble the Water System
4. Assemble the Air Compressor
5. Connect Electrical Power
6. Connect the Ethernet Cable
7. Connect to RetinaEngrave 3.0 Software
SECTION III. INSTALLATION & ASSEMBLY
Water In
Water Out
Air Tubing
Power Cords
Water Tubing
Ducting
Software Connection
Window/ Exhaust Port
Cooling System
Computer
Options
Power Strip
Wall Outlet 110 V
Air
Compressor
Exhaust
System
Figure 3.1
This conguration does not in-
clude Coolbox. If you are using
a Coolbox system with your
Muse, refer to Appendix A:
Coolbox Assembly.